Sunday, January 3, 2021

New Year, New Plans

Don't be surprised if you see an abundance of house themed projects in my pattern shop and on my Facebook page this year. There will be houses on quilts, houses on mug rugs, and projects for things to use inside our new house.

I definitely have houses on my mind. There's a reason for that. My daughter is building a new house for the two of us this year. We are so excited! For well over a year, we've been working together to come up with a plan that suits us both, and now it will all come together.  We'll have shared spaces and private spaces, and I'll have a lovely sewing area.


The photo shows our little bit of Nebraska prairie. It's in a newer development on the edge of town. The trees are on a farm that lies across the street from us. We're hoping to see deer, rabbits, and goodness knows what other wildlife.

Culling the excess in my house is underway. We knew this was coming, so we had two garage sales this summer, and I took several car loads to City Mission. I worked in my sewing room this past week after Christmas. Downsizing is hard. I've lived here for 30 years, and it will take me many months to go through everything in this house and decide what to keep, what to let go, and what to replace with new.

For now, we are staying home and playing it safe as we wait for the vaccine that should help make 2021 a better year than last.  

Fingers crossed!


Monday, March 4, 2019

The Empty Chair, Part 5: The Accident


Last Friday after work, my daughter left Lincoln with her two little dogs and headed back to Plattsmouth for the weekend. The last meeting of her day had run late, so the sky was darkening by the time she  got on the road. The evening was cold and windy with more snow predicted during the night and into Saturday. It only made sense to go right away and beat the storm.

I sat down to finish writing the pattern for my newest mug rug, a sweet mother giraffe with her new calf. I designed it for Mother's Day and for giraffe lovers like my daughter. I looked up from my typing to check the clock several times. I expected my daughter to call when she arrived home.

Mandy's call came at 7:15. When I saw her name on my phone, I thought she'd made good time, but the instant I heard her voice, I knew something was terribly wrong. 

"Mom, I'm okay, but..." My heart lurched, and I tried to catch my breath. "..but, I've been in an accident." The police arrived just then, so I had to wait for her to call back and tell me more.

I tried to focus on "I'm okay", until she called a few minutes later. A friend and her husband had driven out right away, and the pups were in the truck with them. She said she was truly fine, and the tow truck and ambulance had also arrived. I didn't learn all the details until she got home an hour later.

She had been only a few miles from town, when she came over a hill and into a swirling wall of white snow. Although no new snow was falling, gusty winds were carrying Thursday's snow from the hilltop across the highway. Heavily packed snow and ice covered that stretch of road, and the visibility was zero. She was going slowly, but the snow blinded her, and the car skidded into a spin. She had almost gained control, and was trying to get her bearings, when she was hit by another car coming behind her over the same rise. Her car slid off the road, and down the embankment. If it hadn't landed in a snowdrift, the car and everyone in it would have tumbled into the ravine below.

Miraculously, aside form some bruising from the seat belt and the airbag, she was uninjured and the buckled-in pups hadn't been hurt at all.

On Saturday, a friend took Mandy to the lot where her car had been towed. She knew the car had been totaled, but she was surprised to see that both the front and the back were badly damaged. She only recalled one impact. The had evidently been hit from the front, sending it back into a spin, and then the back of it collided again with the other vehicle.  

Mandy bagged up the items that had been left behind, and put everything into her friend's car. Before leaving, she decided to take one more look. Just to make sure nothing was forgotten.

And that's when she found it. Tucked in a corner of the pocket in the door on the driver's side was a small medallion in its plastic sleeve. Her father had given it to her the spring before he passed away. He had told her to keep it in her wallet for good fortune. 

So she did. She placed it safely in her wallet. But when she got home that night, her wallet was still inside her purse.

I don't think I believe in guardian angels, but the events of the past year have sometimes made me wonder.  Someone or something seems to be looking out for us. Each event has seemed to connect back to my husband in some way. Her father hated that car, and he scolded her for buying it. He told her the car was unsafe. It was too lightweight, had too many miles on it, and it didn't have the four-wheel drive essential for winter driving in Nebraska.

Mandy and pups got a ride back to Lincoln yesterday, and I was able to see for myself that she really is okay. She's off right now, buying a car. This time she's taking her father's advice. This one will newer and heavier, and it will come with four wheel drive and a backup camera.

The two pups are tucked in next to me on the couch at the moment. I'm looking at my mug rug picturing the mother and baby giraffe, and, once again, I'm counting my blessings. Mother's Day came early this year.


"Newborn" Click here:


Tuesday, February 26, 2019

Blotting Out Winter With Rainbows

 
Click here for pattern:  Rainbow Bows

It all started with a sale on fabrics. Right after Christmas, I happened upon a package of sixteen fat eights in bright, rainbow colored, polka dots at half price. How could I pass that up? The baby box containing items I'm making for future great-grands is far from overflowing.

While cold winter took hold and the snow fell constantly, I played with warm, summer colors. I dreamed of warm days, soft rain, and lovely rainbows. The rainbow colored fabrics turned into a quick and easy rainbow quilt made with large and small bow tie blocks. I kept the theme going in the border of alternating colored and white squares - rainbows everywhere to contrast with the gray skies and white snow outside my window.

Too much snow!

I almost never use polyester batting in my quilts. It's too lightweight to drape nicely or to hold it's shape as a table runner or a wall hanging, but when it comes to quilts for babies, polyester is my first choice. It's warm, it's soft, and it is lightweight. A baby quilt like this is light enough for a toddler to drag everywhere. It can be tossed into the washer and dryer with other laundry, too.  This isn't the kind of quilt  you might display on a wall. it's meant to be used and loved.


Minimal stitch-in-ditch quilting was perfect this time.  Simple, straight lines with a walking foot are fast, well suited to the batting, and the quilt remained soft and fluffy.

Quite a bit of fabric was leftover, so I improvised the back of the quilt to use up the extra.


I also made a coordinated slip on pillow cover There is no zipper this time, so the entire project was both fun and easy.


Dreaming of spring.


Wishing you a lovely end to winter. 


Monday, January 14, 2019

The Empty Chair, Part 4: A Year Gone By


This week marks a full year since my dear man has been gone. So many things have changed. I still miss him every day, but I'm gradually adjusting. I think the hardest part has been the silence. I've been running the television or playing the radio all day long, just for background noise.

Life has changed in so many ways, but this next year will be one of happier adjustments. Something is in the works.  I always knew I'd married a stubborn man, and there are moments that leave me wondering. 

I mentioned in an earlier blog that Fred was adamant that I not live alone. My grandchildren moved next door in March. Everything fell together so suddenly after his passing, that I questioned if Fred had a hand in it all. I've so enjoyed having those sweet, young people so close by. It's been wonderful, but not exactly what Fred wanted. In those last weeks, he insisted that I should live in the same house with one of our children.  He worried that I'd fall, or get sick, and no one would be here to help me. He had the same concerns for our daughter, who has been living on her own for several years. Fred thought we should be together under one roof. There was just one problem. Mandy has been living over an hour's drive from me and working in Omaha.

Then, just before Christmas, a position in Lincoln suddenly opened up. Mandy applied, and job was hers. Her transfer took effect last week, and she'll be moving back to Lincoln as soon as her house sells. It will go on the market in March when winter begins to bow out. In the meanwhile, Mandy is staying with me during the week, and going home on weekends. While she's working, I have the company of her two little dogs, Watson and Willow. They are delightful, and my house isn't quiet unless they're sleeping. Puppies during the day, a daughter in the evenings. What could be better?

After the sale of her house, Mandy will find a house in Lincoln. She says that her dad won't let her rest until she finds something with enough space for both of us and the pups. She also won't settle for anything that doesn't have well lighted studio space where she can paint and I can sew.

This is all quite exciting. I'm truly looking forward to the coming year.

Nap time for Watson and Willow
Change is inevitable, so I wish all of us a year filled with love, happiness, and only those changes that bring joy.


Monday, January 7, 2019

Changes in the Crafty Pattern Marketplace


Craftsy is in the process of merging with Blueprint, the sister company that has been affiliated with Craftsy for the last couple of years. While this is occurring, there has been more than a bit of turmoil in the pattern marketplace.

I don't really know many details, but I'll share what I do know.

How Designers Are Affected:

The marketplace really did need changes. It had grown way too large, and Craftsy had no control over the quality or originality of the patterns that were sold. The company has started out with a mass culling of both patterns and designers. I was one of the fortunate designers to remain on the website, although my patterns have been trimmed from 132 to 31. I'm not sure what criteria were used in making these choices.

Designers have been told that Blueprint will allow new patterns to be published later this year. At some point, they will also be open to new designers and some of those who were not retained. When the website is ready to welcome designers back, they will have more control over which patterns will be published. Whenever that happens, I will let everyone know.

How Craftsy Pattern Customers Are Affected:

Any pattern you have purchased should still be available in your pattern library, so nothing purchased should be lost. You may need to be patient about downloading for awhile as this part of the website is still incomplete. All of the patterns that have been kept on the website are available for purchase and download, too.

Any patterns left in your cart or your wish list from those that have been removed will not be available for purchase.

Locate Patterns on Etsy

Last summer I opened an Etsy shop for my patterns. I didn't know what Craftsy was up to, but previous changes at Craftsy had affected my sales, and I needed a second venue for my designs. You may love many of Craftsy's other independent designers. Many of them also have Etsy shops and Facebook pages.

Etsy functions in ways both similar to and different from Craftsy. My patterns are available as PDFs and can be downloaded instantly much like on Craftsy. Visitors can make my shop one of their favorites, favorite individual patterns or add patterns to their carts.  If you favorite the shop, you can more easily follow the addition of new patterns as they are published.

Not all of my patterns are on Etsy right now. I've been uploading one or a few at a time, but I will gradually add more. If you can't find a pattern you want from my Craftsy store, please contact me. I'll add the requests to my Etsy shop as quickly as I can.

You can contact me at these locations:
Etsy
Facebook
Email: klee2strings@gmail.com


Friday, November 16, 2018

German-Russian Kuchen: Grandma's Recipe


Kuchen, fresh from the oven. Yum!
Once a year or so, when the air is cold and the snow is blowing, I bake a batch of  my German Russian grandmother's kuchen. Kuchen, pronounced "kooga", is the food from Grandma's kitchen that I remember best.

There was always kuchen at Grandma's house. She baked it at least once a week, and she made eight or ten at a time. Kuchen was usually dessert, but it could also be breakfast or an anytime snack with coffee or milk fresh from the cows.
My grandparents. Circa 1946
Each time I bake kuchen, I am swept back in time and find myself with my grandmother in her fragrant, farmhouse kitchen. It's 1947, and I'm five years old. There's is a big, black, wood burning stove, polished to a shine, and  mismatched wooden chairs gathered around a long table covered with an oilcloth tablecloth. A hand pump sits over the kitchen sink, and pink depression glass cups and saucers are neatly stacked in the cupboard. Grandma bustles around humming softly, as she churns up wonderful fragrances that make my mouth water. Her hands and apron are covered in flour, but she stops to give me a kiss on my forehead. Sometimes she gives me a bit of pie dough and helps me turn it into sugar and cinnamon roll-ups. If she's baking bread or kuchen, I get to help with the kneading. I may be a child, but I'm already learning about cooking and baking.

My mother didn't enjoy cooking or baking, and kuchen is time consuming.  After my grandmother passed away, I only got to taste this special pastry when we visited my aunts in North Dakota. All six of my red-headed aunties were cooks who followed the old traditions. If they didn't have freshly baked kuchen, they could more than likely find one in the freezer.

When I was married and settled in my own kitchen, I asked my aunties for the recipe. It's easy, they said. You just make a sweet dough, layer fruit on top, and pour egg custard over it all. Not one of them could give me measurements. Making kuchen was so instinctual, that they never thought about how much flour or how many eggs. They just put it all together.  Years later, when three of them were visiting in Lincoln, my daughter gathered them in her kitchen. They baked the kuchen with my daughter while I wrote down the steps and the measurements along the way.

I've modified the recipe a bit since that day, but it still makes five or six kuchen. Fortunately it freezes very well, so we can make it last for a couple of months.

German-Russian Kuchen
Makes five 9" kuchen or six 8" kuchen

Lightly grease five 9" pie pans or six 8" pie pans.

In addition to dough and custard, you will need about five 15 oz cans of canned fruit. 
Traditional fruits include sliced peaches, apricots halves, sliced pears, or seedless plums. Dried prunes are often used, too.

Drain the fruit, and pat it dry with a paper towel. Soak prunes for fifteen minutes or more in warm water to soften them. Cut the prunes in half. 

Sweet Dough

  • 4 c flour
  • 1 tsp salt  
  • 1/2 c sugar
  • 1/2 c butter, room temperature
  • 1 c warm milk, divided
  • 1 pkg yeast
  • 3 eggs, room temperature, 

  1. Place flour, salt, sugar, and butter in a large bowl. Mix to a fine crumb as you would a pie crust.
  2. In a small bowl, dissolve the yeast in 1/2 cup of warm milk. Beat the eggs with a fork. Add the eggs, a pinch of sugar, and the remaining half cup of warm milk to the yeast mixture. Let it rest for a few minutes until it develops a thick foam on top.
  3. Make a well in the flour mixture. Pour the yeast liquid into the well.
  4. Mix the dough with a spoon or your hands. Place it on a lightly floured board.
  5. Knead briefly, just enough so it forms a shiny ball. Do not overwork the dough. If the dough is too dry, you can add a little milk or water.
  6. Put the dough into a lightly greased bowl. Turn to cover with a thin film of oil and cover with plastic wrap. Place it in a warm place.
  7. Let it rise until double in bulk, 1 - 1 /2 hours.  
If the kitchen is cool, I heat the oven very little, to about 150 degrees, then I turn it off and place the bowl of dough inside. If the oven is too warm, the yeast can be killed or the dough can rise too fast and be ruined.

Dough rising in the oven, custard cooking in the double boiler.
 While the dough is rising, make the custard.

Custard
  • 6 eggs
  • 1 1/2 tbsp flour
  • 1 1/2 c sugar 
  • 3 c cream or half and half
  • 1 1/2 tsp vanilla
  • cinnamon

Mix all of the ingredients with a wire whisk or hand mixer. Cook the in a double boiler, stirring constantly until the custard begins to thicken.

If you don't have a double boiler, cook it in a heavy pot over low heat stirring constantly. Make sure to scrape the bottom of the pot as you stir to prevent scorching.

Assemble the Kuchen

Kuchen dough with fruit layered on top. I made peach and apricot kuchen.
  1. When the dough is ready, punch it down. Divide it into either five or six equal pieces. Cover it with a towel and allow it to rest for ten minutes. 
  2. Shape each piece of dough into a flat pancake. 
  3. Place the dough into a pie tin, and use your fingers to spread it evenly over the bottom and 1/2" to 1" up the sides. 
  4. Top with a layer of prepared fruit. 
  5. Carefully pour equal amounts of custard over the fruit layer. Sprinkle lightly with cinnamon. 
  6. Bake at 350 degrees for 20 to 25 minutes or until the dough is  golden brown. 
  7. Cool on a wire rack

Kuchen in the oven. Smells good already.

 Slice each kuchen into six or eight wedges. It can be eaten either warm or cold. It's delicious either way. Wrap tightly and keep in the refrigerator for no more than one or two days. Any excess kuchen can be stored in the freezer for up to a six weeks.

Yum!! So good.

Wishing you a fantastic Thaknsgiving!


Wednesday, September 19, 2018

Three Quarters of a Century Plus One

I had a birthday earlier this month. I've become old enough that I turned my age into a math problem. I'm a retired teacher, so everything becomes a lesson. It's automatic. Maybe I'll even remember my own age this way. All that counting backwards to 1942 gets harder every year.

I volunteer at school every working with and for my former fifth grade teammates. One of the teachers told the students that I'd just had a birthday, and, of course, the kiddos wanted to know my age. They had no trouble with the math, but there were some very large eyes. A few of them have never actually known anyone so ancient.

Working with my former team is one of the highlights of my week. I give book talks, help students with reading issues, shelve books in the library, and then enjoy lunch with my friends.

That brings me to this newest mug rug pattern. I'm trying to design a mug rug for each of the teachers for Christmas. I want to create designs that fit their own unique interests, and I don't want to use anything that I've already made.

The newest addition to the teaching team is a young man who is an actor in his spare time. I haven't seen him perform, but those who have, say that he's fabulous. I started there.

The Greek muses of comedy and tragedy seemed fitting for his mug rug. I'm sure that there are thespians in almost every family, so some of you may be looking for a gift just like this.

Muses, Masks of Comedy and Tragedy: Etsy Listing, Craftsy 


Summer officially exits the stage this week, and colorful, cool autumn will make a dramatic appearance.

Wishing you a fabulous season. 


Friday, August 24, 2018

Inspired by Puppies

My daughter has two adorable little dogs named Watson and Willow. They are inseparable buddies, snuggle pups, forever together.


These puppies are so much fun, and I don't see them very often, so, of course, they found their way into a pattern. I didn't expect three variations of a pattern, but that's the way it worked out. Goodness knows, I'm not in control of any of it. Inspiration takes over, and I can only go with the flow.

Buddies Trio Pattern Click for Etsy Click for Craftsy


Although the pups are in all of them, each of the projects is very different from each of the others. A person can add as much embroidery or thread work as liked. Nothing more than mouths and eyebrows works well, too

The 9" x 9" quilt block can be used as part of a quilt, a small wall hanging, a hot pad, or a large mug rug. It could even be left unquilted and placed in a picture frame.


The pups have eyebrows, mouths and a few little bits of stitching to add dimension to Watson's hair and Willow's ears. The quilting on this one was fun. I just followed the leaves so it required no thinking about the design. This was the first of the three projects that I finished. It's cute as can be, but I changed Willow's mouth on the other two.

These little guys lent themselves beautifully to pillows. The background on the !2" s 16" unquilted pillow was chosen by vote on my Facebook page. I wasn't sure about using the black, but I really like it. The contrast in colors really makes the pups pop. This time I accidentally left out the stitching on Willow's ears, but it doesn't detract from her at all.


The 16" x 16" pillow was the most fun to make because it had the most detail. This one was pure play.

I quilted the front of the pillow cover and I added rickrack so it wouldn't look so plain. The gray background and rickrack were special choices to go with my daughter's decor. You can see her colors in the puppy photo at the top of the page. Yes, she gets this project, too, poor thing.

The real fun, though, came when I added extra thread play to the puppies. Something was needed to make them stand out better against the fabric background.


Now, I'm thinking ahead to the next project. I'm not sure what it will be for sure, but it will likely have a Halloween theme.

Wishing you a lovely last week of August.

Thursday, August 9, 2018

Summer Progress

It doesn't feel like it's been a full two months since I posted here, but it has. I'm just beginning to find my footing in this new reality of life without the support and comfort of my sweet hubby. Summer sunshine, working in my garden, evening walks, visiting with neighbors, and spending time with my friends have been the best therapy possible. 

Etsy Listing,
Craftsy Listing
After I returned from a trip to visit my sister in June, I spent most of the summer setting up my new Etsy shop and writing a pattern for my tote design. I was still unable to come up with new design ideas, so writing the pattern was a welcome challenge.

I would never have gotten through writing the tote pattern without the help of four amazing and very patient ladies who volunteered to test the pattern. I"m afraid that none of us knew what we were getting into when this journey began.

Patterns for bags and totes are not at all like patterns for quilts and mug rugs. In all honesty, I stumbled and bumbled my way through the entire process. My testers were terribly patient with me, and found every one of dozens of mistakes. Every time I fixed one area, I seemed to screw up another. When it finally seemed like the pattern was finished, I got in a hurry and published it too soon. Then, I had to make corrections to the pattern that had already been published - not once, but three times!


These are two of the darling totes my helpers stitched. I'll post more photos when they come in. 

I love sewing bags and designing bags, but it will be awhile before I even consider writing another purse or tote pattern.

With the completion of that pattern, my mental dam cracked, and new ideas have begun trickling through..  The first to reach completion is this pair of rainy day mug rugs. I'm publishing on both Craftsy and Etsy now, so buyers have choices.

  Etsy Listing,  Craftsy Listing


Wishing you a wonderful August!


Wednesday, June 13, 2018

Let's Talk Piping


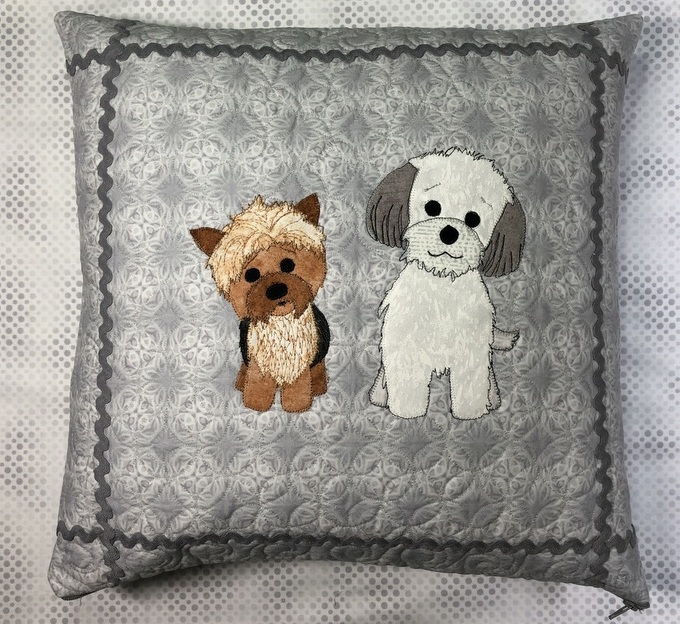
Whether brightly contrasting or sublimely subtle, piping can be that little extra element that takes a simple dress, pillow, or bag from "nice" to "wow". It adds a finished, tailored element to the simplest designs. Adding a bit of piping isn't complicated, but it can appear intimidating for inexperienced makers. Once you've gone through the process, you'll be surprised at how truly easy it can be.

I'm going to talk a bit about piping in general, explain how to make your own, and then show how to place any piping into the seams of your project.

You can to buy ready made piping by the yard in most fabric stores. It's often seen in huge displays right next to zippers and bias tape.  More specialized styles and sizes are availabel in some craft stores and online.

The packaged tape on the above left, is the right weight for shirts and lightweight dresses. Although it's inexpensive and comes in multiple colors, this product is not the best choice for most bags and pillows. The poly-cotton broadcloth fabric used in the piping doesn't hold up well to the wear that bags and pillows often receive, and the cord is too narrow to stand out on quilted or stuffed projects.

Spooled tape sold by the yard may be made with sturdier materials, but it can get pricey. Choices of color and fabric are limited, as well.

If you're going to put the effort into adding piping to a bag or decorative pillow, it usually makes more sense to make your own piping. You can choose a fabric of the same weight and in the perfect color to make your project stand out as special. The process is uncomplicated, no magic involved. You only need basic sewing tools: a quilter's ruler, a cutting mat, a rotary cutter, and a zipper foot.

How to make your own piping:

1. Gather necessary materials
  • piping cord at least 1" longer than the seam it will be inserted into
  • fabric strip  to encase the piping at least 1" longer than the seam (Width will depend on the thickness of the cord. See #3 below.)
  • thread to match the fabric of the piping
  • A zipper foot
Notes:
  • Strips cut on the straight grade work fine for straight seams, bias strips are necessary for curved seams. (Commercial piping is cut on the bias.)
  • To sew strips together for long or multiple sections, cut the ends of the strips at a 45 º angle. Sew together as you would strips for binding. 

2. Choose the cording that is the best size for your project. You can buy cording in weights from barely there, to heavy duty.

For totes and pillows,  I almost always use polyester cord with a diameter of 5/32". If you only need a small amount, it may pay to purchase it by the yard. I use a lot, so I buy packages of 10 yards each.

3. Cut the fabric for the cord casing.

A rule of thumb to determine the width of the fabric strip is to double the diameter of the cord and add 1 1/4".  Cut the fabric strip and the cord about 1" longer than the seam the piping will be sewn into.

If the piping will be in a straight seam, the fabric strips can be cut on either the straight grain or on the bias. If seams are curved, the fabric strips should definitely be cut on the bias. 

4. Encase the cord inside the fabric strip.

Attach the zipper foot to your sewing machine. If using 5/32" cord, cut the fabric 2" wide.


Center the cord on the prepared strip of fabric.
Fold the fabric over the cord and match the edges.
Sew along the cord, getting as close as possible to the cord.

Use the fingers of your left hand to push the cord up snuggly against the zipper foot. When stitched, the fabric should fit tightly around the cord.

5. Trim the prepared piping.

For regular seams, trim the fabric 1/2" beyond the edge of the piping. This is the same width that most ready made piping has been cut.

This job will be much easier if you have a 1/2" quilter's ruler. If you are using a wider ruler, align the 1/2" mark on the seam next to the cord.

Watch your fingers! Rotary cutters are sharp!

For quarter inch seams, trim the fabric at 1/4" from the edge of the piping.


The piping is ready. Next comes stitching it into the seam of your project.

How to sew piping into straight seams 

1. Cut the fabrics being used with the piping.


2. Lay the piping along the edge of the right side of one of these fabrics. Align the edges. Position the zipper foot against the cording inside the piping. When stitching, try to sew directly on the row of stitching that encases the cording.


3. Place the two fabric sections right sides together.  The section with the piping should be on top.  Sew directly on the line of stitching that holds the piping in place.


4. Fold the fabrics open and press the seam open.


6. When the piping will lay on the outside edge of the seam, fold the fabrics back from the piping and press.

How to sew piping around a curve
The process for sewing piping into curved seams is basically the same as for sewing it into straight seams. 

1. Align the piping on the edge of the right side of one of the fabrics being used. Sew directly on the stitching on the piping. You will need to manipulate the piping around the curve as you stitch.


2. Pin the second piece of fabric right sides together with the piece to which piping is attached. Make sure the edges of the two fabrics are exactly together and stretched over the thickness of the piping between the fabrics.

3. Flip over so the stitching from step 1 is on top. Once again stitch directly on the previous line of stitching.

4. Clip the seam with little "v" shaped cuts to reduce bulk.

5. Open the seam and press. (In this case, you would turn the band right side out.)

That's it! Easy as pie.

Monday, May 28, 2018

The Empty Chair, Part 3, Falling in Love


I've worn myself out this weekend, and it will be an early night.

It's been five months since my hubby passed away. It seems like forever and it seems like yesterday. I needed time, but I was finally ready to clean out his office this weekend. Our former guest room is now my sewing room, so I'm going to turn the office into a guest room. It will be nice to have a place where visitors can stay.

It took all weekend, but the desk, the bookcase and all the drawers of files have been sorted through and emptied. I moved important things to empty drawers in the bedroom, and listed the office furniture for sale on Craigslist.

Moving furniture around, emptying and filling drawers, and carrying boxes up and down the stairs, was tiring enough, but sorting through his things was the hardest part of it all.  Fred had tucked away little things that meant something to him, and I found several boxes of small treasures. This mug rug was in one of them.

So many of my designs stem from something in my own life experiences. I named this mug rug "Winter Romance", and  I gave it to Fred for Christmas shortly after I made it. The design was all about the winter we met.

It was in January of my junior year University of Colorado in Boulder. On the first day back from Christmas vacation, I was sitting in the student union with a friend after our last classes for the day. The room was filled with people escaping the cold and snow outside. Marty and I found it almost impossible to carry on a conversation with all the shouting and laughing from students just back from a two week break. The fragrances of wet wool and hot coffee permeated the air.

A couple of tables away from us a group of several boys was crowded around a very small table. They were all talking at the same time and laughing over something. I may not have noticed them were it not for my friend, Marty. "Don't look like your looking, but look at those boys," she said, nodding at their table. "One of them keeps looking at  you."  I glanced that direction, and I'm sure I blushed. She was right. "He can't take his eyes off you," she said. "He's really, really cute! I'm so jealous!"

"He's okay," I said nonchalantly. "Nothing special." I tugged my skirt down to in an effort to hide my legs better. Skirts were short in 1963. I had lied when I said he was "okay".  He had curly black hair, twinkling brown eyes, and a beautiful smile. He was wearing a hand knit, golden yellow wool sweater over a black turtleneck. Yes, I noticed what he was wearing, and I can still picture it as if it were yesterday. I was dressed in blue, in case you were wondering. Some things stick. But, back to Fred. He was so much more than just okay. He was the most gorgeous young man I'd ever seen! I proceeded to pointedly ignore him, but I couldn't get him out of my head for the rest of the evening.

The next day I went back to the student union during a mid-morning break between classes. The union was almost empty, so I sat at a table for eight by the window where I could watch the snow coming down and people rushing by.

"Excuse me," a voice interrupted. I looked up to see the same beautiful boy from yesterday. He looked around the almost empty room as if searching for a place to sit. "Is this seat taken?" He pointed to a chair directly across from me. His eyes sparkled with humor. I laughed out loud.

We talked with the ease of people who had known each other forever. There was so much to discuss, but we both needed to get back to class. We made a date to meet at the union for lunch the next day.

I was several minutes late arriving at the union for our lunch date on Wednesday. It was bitterly cold, and the wind was blowing fiercely. I couldn't believe that Fred was waiting outside in the cold for me. The first thing I noticed were his ears. He wasn't wearing a hat, and his ears were bright red. His hands were stuffed deep in his pockets, and he looked half frozen. You may have noticed that the snowman in the mug rug wears no hat. Now you know why.

We were inseparable from the on. The rest of the winter was magical. The Boulder campus was even more beautiful than usual. Some of the wonder was from the deep white snow that we trudged through and turned into snowballs, but most of the beauty came from the two of us. Was it love at first sight? Fred always said he was in love from that first glimpse of me across the crowded room, but it took longer for me to know that he was the one - at least until the end of the first week.

I'm putting the mug rug  carefully away as a reminder of the winter we fell in love.