 |
| Which bag are you making? |
Note: All seam allowances are 1/2" unless otherwise instructed.
There are two more pieces of lining to cut.
1. Cut two strips of lining, 3" x 16' each.
2 Locate the center of the 16" sides and mark with a pin or a notch. Also mark the centers of the encased zipper units.
3. Sew the 3" x 16" strips to the encased zipper. Make sure the right sides of the strips are facing the right side of the zipper (the side with the zipper pull on top).
4. Cut a 1 1/2" square from each bottom corner of the pocket sections of lining. These cuts will be used to make the boxed corners on the bottom sides of the bag.
 |
 | |
| The zipper is sandwiched between a narrow strip of lining and a pocket section on both sides. |
Note: Place the zipper pocket on whichever side will allow it and the encased zipper to open in the same direction. My zippers open from left to right.
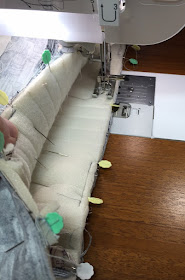
6. Tuck the zipper ends out of the way and sew the two side seams of the linings right sides together.
 | ||||
| View from the top of the bag. |
Note: Open the zipper to finish sewing the bag.
7. Tuck the body of the purse and the handles inside the lining. Right sides should be together.
8. Place the side seams of the lining in the exact center of the 3" wide
sides on the outside of the bag. Pin the lining to the bag all the way
around.
9. Sew the bag and the lining together at the top.
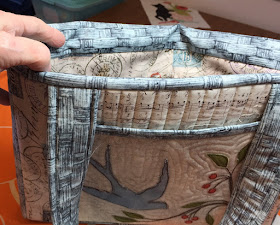
10. Turn the lining to the inside of the bag. Do not fold the batting down. Fold the lining over the batting and to the inside of the bag. The 1/2" strip of lining that remains on the top looks like binding and matches the trim on the main front pocket.
11. Pin the lining in place. Stitch in the ditch right along the seam. Press.
Note: Double check to make sure the bag zipper is open.
12. Turn the bag inside out. Pull the lining away from inside the bag to finish sewing the bottom.
13. Stitch either side of the bottom edges of the lining together for 1
1/2" - 2" from the side edge inward. This will leave an 8" or 9" opening
at the bottom of the lining. Backstitch so the the short seams don't
rip out when you pull the bag through the opening later.
14. Pinch the square opening at the corners together. Align the side seam with the bottom seam. Pin together.
15. Stitch across. This will create the box corner at the bottom of the lining.
16. Remember that 11" x 2 1/2" piece of plastic canvas you cut and put away back in Part 2 of this tutorial? You need it now. Slide the plastic canvas under the insert at the bottom of the bag and center it. I hope you don't have to cut another piece like I did. I put the one I made earlier away in a place that was evidently too safe.
17. Pull the bag through the opening you left in the lining. Stitch the opening closed, and push the lining to the inside.
18. Give the whole bag a good pressing and it is done!!
If you want your bag to remain clean over time and with lots of use, I recommend taking it outside and spraying it with Scotch Guard. Spray it lightly, allow to dry, and spray one more time.
One final note.
I would truly appreciate hearing from you about the usefulness and quality of this tutorial. As I said in the beginning, I've made many bags, but this is my first attempt at writing a pattern for one. I welcome any suggestions you might have. If I ever get it figured out, I may design more bag patterns.


What beautiful handbags you have constructed. I can't wait to try them for myself. I'll let you know how it goes :) Thank you.
ReplyDeleteI hope it goes beautifully for you, Edith. I'm so glad you like these bags. Be sure to send photos to me! My email: klee2strings@gmail.com
DeleteHi. I just read this post and LOVE how you designed what I have read! How do I find the rest of the pattern/instructions? I think this is a purse I would love to make and wear. I always feel you can't have too many pockets and the outside is beautiful!
ReplyDeleteLila
The entire pattern is found in six different posts. This was the last of the six. Scroll down to "Labels" on the left side of my page. In that column you will find Summer Purse listed. You should be able to navigate to the earlier posts containing directions from there.
Delete