Saturday, December 27, 2014

Gathering Ideas for 2015 and Glancing Back at 2014

I've begun a to do list for 2015's patterns, and your ideas could really help me choose the best projects to focus on. What types of projects do you want to sew during the coming year. Mug rugs? Wall hangings? Table toppers? Quilts to snuggle in? Something altogether different? What themes appeal to you? Cats have already been suggested, but some others of you may also want something specific.

Do you have a preference for applique, paper foundation piecing, or traditional piecing? Is there a new technique you'd like to learn?

The more you tell me, the more I can streamline my work and create designs that you want to see.

I've put together a quick review of the patterns that were published during this past year. I make so many that it's sometimes hard to remember exactly what has and has not been done in the past. I find that reviewing helps me to see the gaps in what could or should be.

It truly has been a very productive year. I was surprised that I've made 35 patterns! Some go much more quickly than others, but it averages out to one new design completed every ten days. That's a lot of sewing, but I have loved every minute of it!

I organized the patterns in several categories.

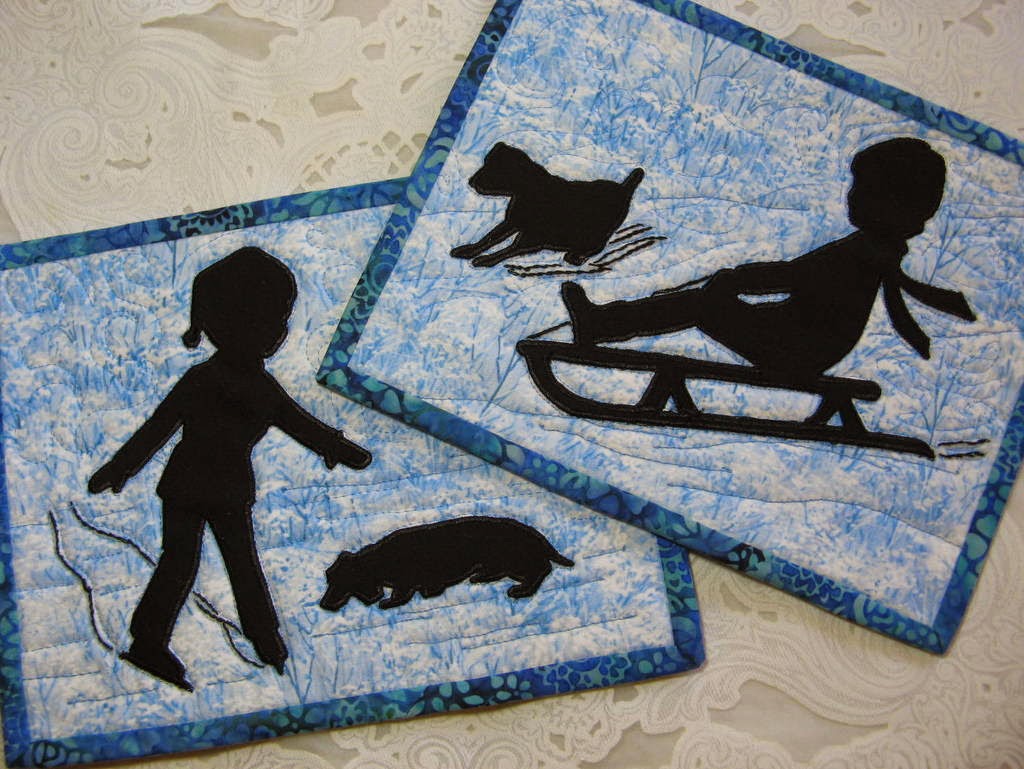
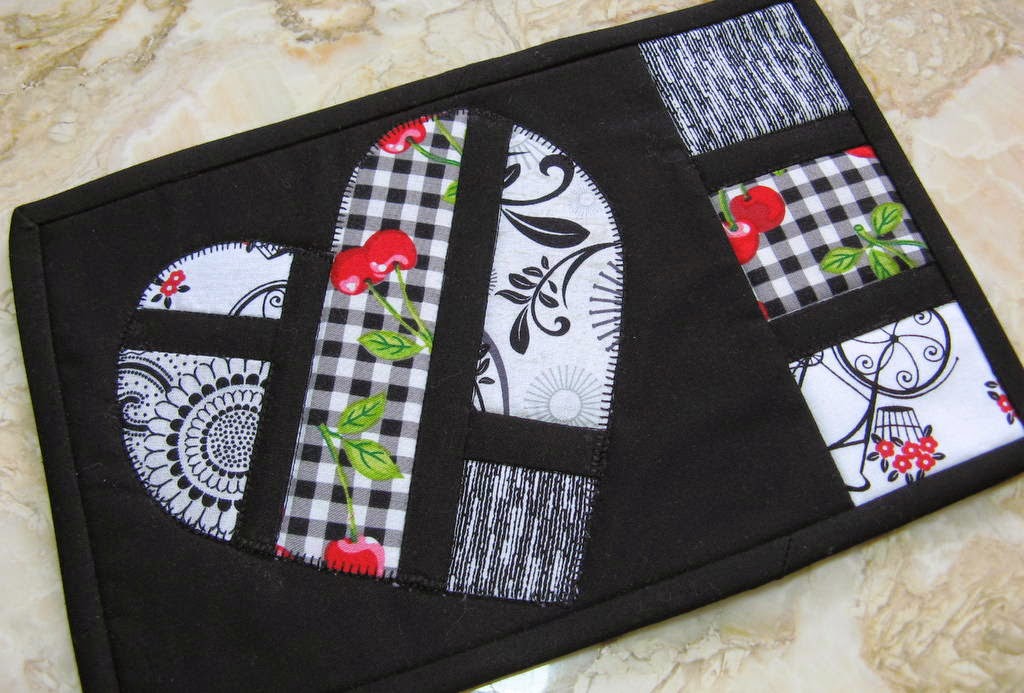
 Fifteen Mug Rugs:
Somehow I managed to miss a couple of them in the photo collage below. I will make more mug rugs next year, but I doubt that there will be as many as there were this year. Is there anything special you'd like to see in these quick, but practical, mini quilts?


 Two Lap Quilts:
I made only two of these this year. I'd like to remake the Snowball Fight quilt in quilting fabrics if I have time, but I'm not sure about whether or not I'll make others. What do you think? Is there a special lap quilt, baby quilt, or other small quilt that you'd really like to make?

Add caption
Twelve Quilt Along Blocks:
My goodness, but "Home" was a delight! So much fun, but very labor intensive, too. I am considering another quilt along or maybe even two, but whatever I create next year will be on a much smaller scale. What are your thoughts about quilt alongs?


Five Table Toppers and Runners:
I love making these because I use them so much in my own home. I do plan more for the next year. Shall I limit myself to seasonal or holiday themes or shall I try for more general designs. I don't know. You'll have to help me out on this.


One Tooth Fairy Pillow:


 Or was it a mug rug?


This was probably the most fun of my projects this year. I love sewing for children, but it's hard to come up with unique ideas. Can you suggest something else?

Free Patterns:
In addition to the new patterns, I added three of the older ones to my group of free patterns. I do intend to add more this coming year.


Thank you for being part of this wonderful year of stitching!

I'm making my list and checking it twice!
With your help next year will be even more exciting and fun.


Saturday, December 20, 2014

Teacher Gifts and a Recipe

Phew! I can breathe more easily today.

Christmas cards are in the mail, the tree is up, gifts are ready to go, and I can put away the cookie sheets and frosting bags for now because the baking is finally finished.

One other wonderful pre-holiday task has also been completed.

I spent Thursday at the elementary school where I used to teach. I love the opportunity to meet over lunch with my old teammates, and I love being with the children. Several times a year I round up a stack of really great books from the media center at school and give book talks to the fifth grade classes. My December book talks were timed to coincide with the student wiggles and excitement that appear at this time of year and make actual teaching all but impossible. A guest speaker is always a break from routine classwork, and students were excited to have some new ideas for holiday reading.

The teachers were dressed to compete in a holiday "ugly sweater" contest, and with only two days till winter break,  gifts for teachers had begun to appear on their desks.  Seeing the gift bags and the plates containing homemade goodies reminded me some of my very favorite gifts from those many years that I was teaching.

If you've ever wondered what to give a teacher for Christmas you should know about the gifts we cherish. These are a few from the collection of items I've kept. It's been seven years since I retired, but I can't bring myself to let any of them go.


In the photo you can see a snowman doorstop made from a brick,  a tiny, little homemade tree ornament, a crocheted dishcloth made by a student's grandmother, and all of those handmade cards that I still keep in a box. The cup was a very special gift. It was delivered years after one of my students had grown up. It has a logo of the university where he was now teaching on the front. He wrote a lovely note in silver marker on the back and hand delivered the cup to me at school the day before our winter break.

There were stacks of other gifts that became precious to me. One was the apron that a student had made for me with help from her mom. She was dancing with excitement as she told me that she'd sewn one for herself that was exactly the same as the one she made for me. The apron was child-sized, but it went straight into my apron drawer. Over time it was worn so often by my grandchildren and other tiny kitchen helpers that it became quite bedraggled.

I still have a big fleece throw which I've used until it's much the worse for wear. The student tied all of the fringe knots by himself. His mother said he spent more than a week working on it after dinner every night.

There was another gift that I'll never forget. A sweet little girl handed me a paper plate containing half a dozen rather odd looking, grayish colored cookies. "I made them all by myself!" she grinned. I looked at her grubby little hands and knew I couldn't bring myself to taste those cookies. After lunch I told her that I loved her cookies and they were so amazing that I'd taken them to the teacher's lounge where they had disappeared as fast as could be. She gave me the hugest hug. I didn't know if I should feel guilty or not, but I had told her the absolute truth.

Simple gifts from the heart are those that are most meaningful. Teachers don't remember who gave them the fancy boxes of candy, the packages of gift soap, or the dozens of "#1 teacher" cups, but I definitely remember the tiny bell a little girl brought to me. She said she chose it so that I would think of her every time it tinkled on my tree. It does tinkle now and then, and I do remember that sweet little face.

A Recipe

I am totally "cookied" out. I don't think I can face another cookie, at least not until Christmas day.. I made plenty for the cookie exchange last week, we have more than enough for our own family, and I'll be able to put a few gift plates together, too.

In spite of the overabundance of cookies, my work in the kitchen is far from finished.  On Christmas morning I cook up a big brunch for the family, and  in the evening I serve spaghetti. The simple dinner helps us to avoid the heaviness that comes from eating a turkey dinner on top of the cookies and other munchies that we've nibbled on throughout the day. In spite of that,  I thought I might add a little something extra this year.

Goodness knows, we don't need any more sugar, but I had a recipe idea, and I just had to try it out. When inspiration strikes, I have no choice but to go along for the ride!  Not every experiment is a success, but this time I'm really glad I gave in to that creative urge. The recipe turned out to be pretty yummy. It's my own version of pumpkin bread, moist and sweet, and filled with good things.

I started with a basic pumpkin bread recipe, eliminated a bit of this and added several bits of that. I know I'll be baking this one all year round, not just for holidays. I made it as a bread, but I'm pretty sure that with a shorter baking time it would make great muffins, too.

Pumpkin Cranberry Nut Bread

Makes 2 standard loaves (9' x 5' x3") or 5 mini loaves (5 3/4" x 4" x 3")
Keeps very well frozen.


Ingredients

  • 3 cups flour
  • 1 1/2 teaspoon soda
  • 1/4 teaspoon  salt
  • 2 teaspoons cinnamon
  • 1/4 teaspoon  ginger
  • 1/4 teaspoon allspice
  • 3/4 cup softened butter
  • 2 14 cups sugar
  • 3 eggs
  • 2 teaspoons vanilla extract
  • 1 teaspoon grated orange rind 
  • 1 large can pumpkin puree (15 oz)
  • 1 cup buttermilk
  • 1 cup dried cranberries
  • 1 cup chopped walnuts
Instructions
  1. Preheat the oven to 350°
  2. In a medium size bowl, sift the first 6 dry ingredients together
  3. In a large bowl, cream the butter and sugar together until light and fluffy
  4. Mix in the eggs, vanilla, and grated orange rind
  5. Add the pumpkin puree and blend
  6. Stir in half of the dry ingredients.
  7. Stir in half of the buttermilk.
  8. Stir in the rest of the dry mixture.
  9. Add the rest of the buttermilk, the cranberries, and the walnuts. Stir in gently just until combined. Do not over mix.
  10. *Bake in two loaf pans for 1 hour to 1 hour and 20 minutes or until a toothpick inserted in the center comes out clean.
  11. Set on a wire rack and allow to cool for 20 to 30 minutes in pans.
  12. Remove from pans, pour and spread glaze evenly over the top. The bread should still be warm enough that the glaze will drip slowly down the sides of the loaf.
* If using mini-loaf pans, bake for 35 to 50 minutes or until a toothpick inserted in the center comes out clean.

 Glaze

  • 3 tablespoons softened butter
  • 2 cups confectioner's sugar
  • 1 teaspoon vanilla extract
  • 3 - 6 tablespoons milk


  1. In a small bowl, place butter, sugar, vanilla, and 3 tablespoons of milk. 
  2. Mix on low till combined, then mix on high till all lumps are gone. 
  3. Add milk as needed to make a glaze thin enough to pour slowly from a spoon. 
  4. Spoon glaze over the tops of the warm bread and let it run down the sides.
  5. You can slice and eat it when it's still warm, wrap tightly and keep it refrigerated for up to a week, or freeze for up to six weeks. 

Yum!
Wishing you a very Merry Christmas!


Thursday, December 18, 2014

An Old Year Ends and a New Year Begins

Christmas is only a week off and my time is so full that I won't be able to complete one more sewing project in time for the big day. I still have Christmas cards to get out, a tree to set up, a couple of dozen sugar cookies to frost, Christmas brunch and dinner to plan, an entire house in desperate need of cleaning, and last minute gifts to purchase and wrap! I'm definitely done sewing until at least December 26th.

I hope that you are farther along than I am, but it's time to move on and think about the new year. What can you sew for January?

You might just start with my colorful, new "Celebrate" mug rug pattern that is ready just in time for New Year's Eve.

An Unplanned Mug Rug 


I truly hadn't planned on making this until I was cleaning up my sewing room and sorting some stray fabrics a few days ago. I spotted this piece of batik with splotches of bright colors on a black background. It had been a fat quarter, but it was now missing a 10 inch square making it about three quarters of a fat quarter. Not enough for anything large.

The colors reminded me of fireworks, and fireworks reminded me of New Year's Eve, and the idea exploded as a perfectly finished mug rug in my head. There was just enough fabric for a paper foundation pieced background and I had plenty of brightly colored scraps to add even more brightness. 

Other Winter Projects

If you are ready to start sewing soon after the holidays, you might choose other patterns suitable for January and February. Winter won't be for over awhile. In Nebraska it will just be getting into full swing! 

Here are just a few winter quilting ideas from my patterns.

I'll start with January. 


"Cheers"
The upcoming year is filled with days worth celebrating. You don't have to stop with the New Year.


"Mitten Weather"
Heads and fingers can still get mighty cold.


"Winter Romance"
There's just something about snow that brings out romance, and around here the winter snow is only just beginning.


"January Chill"
Snow is also a invitation to play! 

"Snowball Fight"
After those hours spent in the cold, playing with snow or shoveling it from walks and drives, a cup of hot cocoa and a warm flannel quilt are just what a person needs. 


"Four Seasons"
And this little set of mug rugs fits every season, winter, spring, summer, and autumn.


And for February, the month of Valentine's Day and love -  

Here is an entire collection of hearts. 


"Hearts Afloat"

"Heartthrob"

"February Valentines"

"Quartet"

Wow! I didn't realize I had so many winter patterns!!

And, now I need to go to work. I just need to decide where to start!

Happy Holidays!!


Saturday, December 13, 2014

Taking Care of Essentials with French Braid Oven Mitts

I won't be posting tutorials and sewing hints every week, but during this time right before Christmas I needed to stop and take care of some personal sewing. First came the shortening of some new pants. That's what happens when a person's legs are too long for petites, but too short for regular length.

The second new project was born of desperation and has turned into the pattern in this post. Every single one of my old oven mitts is fit only for the trash, and I have no choice but to replace them.

I am not about to spend good money on oven mitts when I have several drawers filled with fabric scraps. Did you know that some of those mitts cost over $100 each? What on earth are they made of? Not for me. In fact, I won't spend any money at all this time because I'm making my own oven mitts from materials I already have on hand.

Handmade oven mitts are not only a thrifty way to use scraps, but they can be great Christmas stocking replacements and cute, practical gift bags. Fill the mitt with the makings of something yummy or with other little goodies, slap on a bow, and watch the smiles grow. For several years I held December cookie exchange parties for my sewing group friends. One year I made oven mitts from holiday fabrics for every one of those friends. Then I hung the mitts across the fireplace mantle like stockings. They looked so pretty hanging there all in a row. The best part was that they were truly appreciated.

The mug rugs for the cookie exchange party were made from solid pieces of a single fabric. If I were in a hurry this year, I'd make my new ones in the same way. This time, though I was playing with an idea for quilt-as-you-go mitts so I could use up a few of those narrower fabric scraps taking up drawer space. I settled on a French braid design. It's actually a variation of a log cabin pattern. I'm very pleased with it, and it's super easy. That's a must for something that will be used to death in a year.


The Cutting Template

First things first - the pattern for the mitt, itself. You could buy a pattern, or you could use the pattern that comes with each package of Insul-Brite. If you do use the Insul-Brite pattern, be sure to add at least at least 1/2" beyond the marked stitching line for seam allowance. That pattern has terribly narrow seams that simply won't work when you are sewing through so many layers.

I much prefer drawing my own pattern to using something else. For one thing, I have rather short fingers, so many of the oven mitts found in stores are too large for me. If you have an old oven mitt that's a good fit, your pattern practically makes itself.

This is how I drew the template this time.

I first taped two pieces of cardstock together to make a sheet large enough for the outline of the mitt. Plain paper would also work, but I wanted something I could cut out and draw around easily and something that I could keep in a file for a long time.

Then I traced around an old mitt that is a really good fit.  I added 1/2" around the tracing to make a seam allowance and I drew the cutting line. As I sketched, I smoothed out those funny edges that old mitts acquire.

I cut the pattern out and traced around it on tissue paper. The tissue paper is so much easier to pin onto my quilted layers than anything else. It also has the advantage of being transparent which is important for this pattern. I made sure to mark the innermost point of the "v" where the thumb of the pattern meets the fingers section. If it isn't marked it's hard to know exactly how deep the stitching of that "v" should be.


Now that the pattern was ready, I could focus on making the quilted pieces.

Materials and cutting

Materials for each oven mitt:
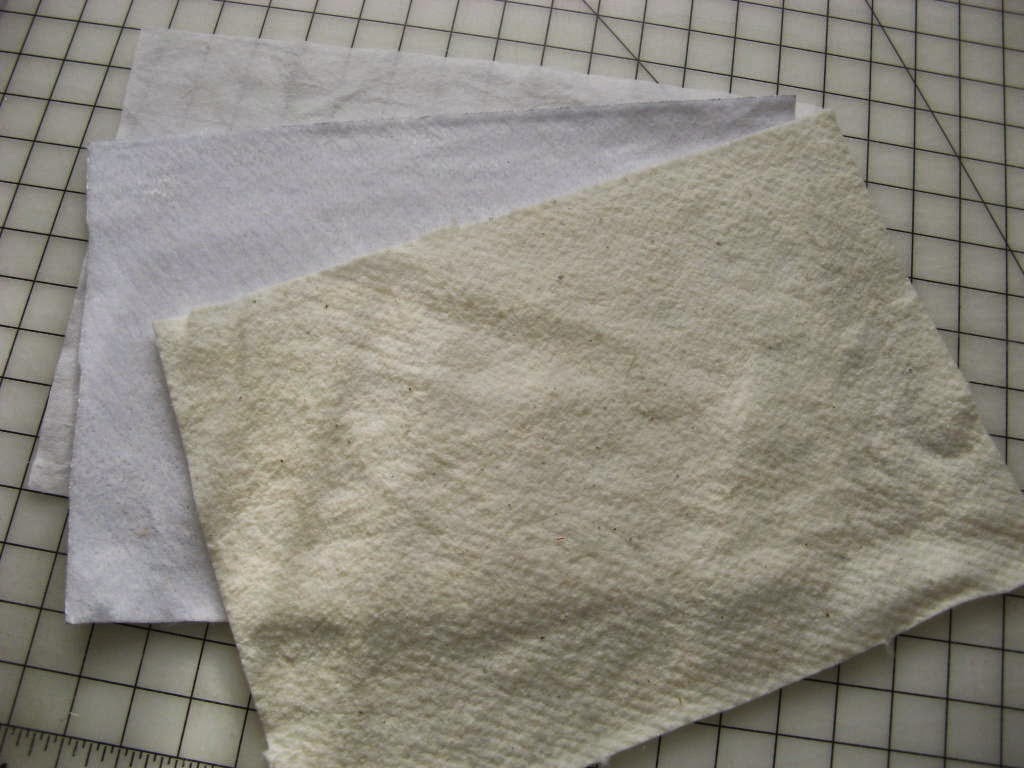
  * Insul-Bright - 2 pieces 9 1/2" x 14"
   Cotton batting such as Warm and Natural - 2 pieces 9 1/2" x 14"
   Backing fabric - 2 pieces 9 1/2" x 14" (I used thin muslin.)
   From mixed scraps
     - one 7 1/2" square
     - one 8" square
     - one 9"  square
     -  sixteen strips, 1 1/2" x 7 1/2"
     -  one strip, 1 1/2" x 6 1/2" for the loop
     -  one strip, 1 3/4" x 15" - 16" for the binding  (The length of this strip may vary depending on the measurement around the top of the oven mitt. If you prefer, you could use double fold bias tape to finish the top of the mitt.)

*Note: Two layers of cotton batting can be used instead of a single layer of batting and a layer of Insul-Bright. This is the way I used to make all of my oven mitts. They are fine for most purposes, but the Insul-Bright does add extra insulation from heat.  

Stack the backing, Insul-Bright, and batting in that order to make two quilt sandwiches, one for either side of the oven mitt.


 The Insul-Bright is slippery, so I used just a light spritz of quilt basting spray to help keep things in place while sewing.

Cut out the fabrics. Cut each of the three squares in half diagonally to make half square triangles. 


Make the quilt as you go quilt sandwich for the oven mitt.

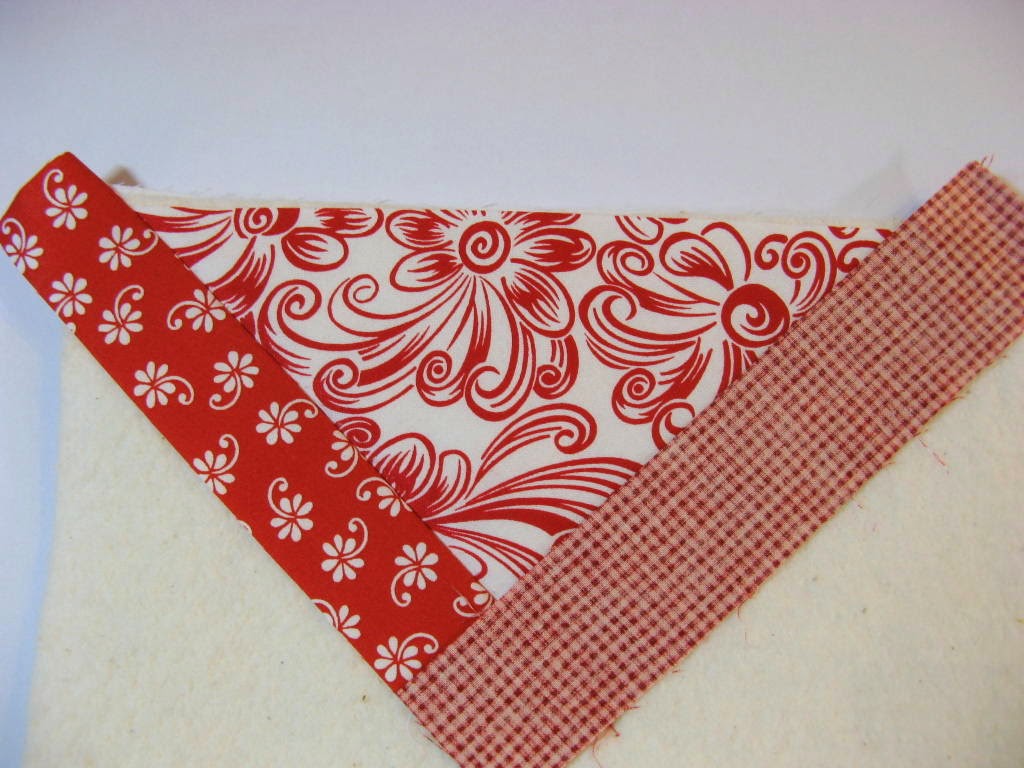
1. Lay the widest side of  a triangle cut from the 7 1/2" square right side up at the center top of the batting of the one of the two layered quilt sandwiches.  


2. Lay one of the 1 1/2" x 7 1/2" right sides together against either short side of the triangle. Line the edge of the strip up with the square angle of the triangle. Stitch along the length of the strip with a 1/4" seam


3. Fold the strip out and press. Lay another strip along the other side of the triangle right sides together. Again, line the end of the strip up with the corner of the triangle. Stitch, fold, and press as before.


4.


5. Continue in this manner, alternating sides and stitching strips until there are four strips on either side of the quilt sandwich to complete the French braid effect.


6. Lay a short leg of a triangle from the 8" square as if it were another strip. Align the right angle of the triangle with the right angles created by the alternating strips. Stitch along this edge with a 1/4" seam.

My seams must not all have been exactly 1/4" because the strips were getting a little out of alignment. I made a minor adjustment with the triangle to line everything up again.
 7. Press this triangle out.


8. A triangle from the 9" square is sewn on last. Lay the bias edge of the triangle over the last strip and sew with a 1/4"seam.


9. Press this triangle out.


10. The quilt sandwich for one side of the oven mitt is finished. Make the sandwich for the other side of the mitt in exactly the same way.

Construction of the mitts

1. Use your oven mitt pattern to cut one side of the mug rug from one of the quilt sandwiches.  Flip the pattern over and cut the other side of the oven mitt from the second quilt sandwich.


2. Mark the dot for the "v" on the lining of both pieces of the oven mitt.


3. Place the two sections right sides together and pin from the outer wrist to the center of the finger section. Stitch around this portion of the mitt only. Sew with a 3/8" seam allowance. 

Half an inch seam allowance was added to the pattern, but you should sew with a slightly smaller seam allowance. When turned right side out some of that 1/2" seam allowance you drew on your template will be taken up by the sheer thickness of the layers of fabric, batting, and insulation.

4. Trim close to the seam from the top of the wrist to about 1" down. Reinforce that seam with a machine zigzag stitch. Here I go using my good old blanket stitch again. I do like the clean edge created by this stitch. 


5. Make the binding for the the top of the oven mitt.  Fold the oven mitt open and measure the top. Measure the top of the wrist. Cut the 1 3/4" wide strip about 1/2" longer than that measurement.   

Note: If you are going to use ready made seam binding, cut it about 1/2" longer than the distance across the top of the wrist and sew it in place. 

6. Press one edge of the binding strip over 1/4". 


7. Pin the right side of the raw edge of this strip to the wrong side of top of the oven mitt. 

The right side of the binding is facing the wrong side of the oven mitt. 

8. Sew with a 1/4" seam. Fold the binding over the front of the oven mitt and attach it to the right side of the mitt with a top stitch close to the edge of the binding.


9. Make the loop for hanging the oven mitt from the 1 1/2" x 6 1/2" strip of fabric. 


Top stitch close to the edge of the fold.

9. Fold the loop in half. Place it about an inch down from the wrist opening on the right side of one section of the thumb side of the mitt. Make sure the loop points up at an angle. Pin it in place and stay stitch it very close to the side edge of the raw seam.


10. Pin the two halves of the oven mitt together, taking care that all edges are lined up. Sew the rest of the way around the mitt. Reinforce the "v" with one or two extra rows of stitching.


 11. Trim the entire seam close to the stitching. Machine zigzag stitch over the seam.


12. With a sharp scissors, snip almost to the point of the "v". You will be cutting through some of the zig zag stitches, but be careful not to cut through the straight reinforced stitching.

13. Turn the mitt right side out, press smooth, and you are finished!


Wishing you a super week!