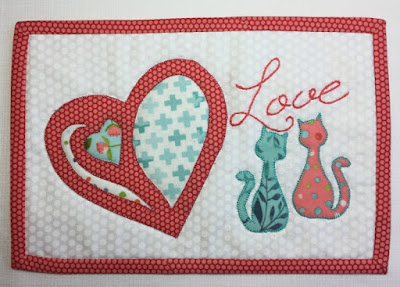
This blog post explains details about how I did the applique, but I can't make PDF downloads of the templates available on my blog. I can only give a link to another site, so I'm publishing the instructions for cutting and assembling the block in a free pattern on Craftsy.
The templates can be used with fusible web, and that's the method I almost always use. I want this quilt to be special, though, with turned under edges. I love the look of hand applique, and with turned under edges, I can avoid the stiffness that can come with fusible web.
I'm not an expert at all when it comes to hand applique. I've experimented with lots of techniques, from needle turn applique to ironing heavily starched edges around templates. I'm pretty hopeless at turning edges as I sew or with an iron, so I used freezer paper, basting, and starch. Yes, it's much more time consuming than fusing, but this is a once only, very special quilt.
1. I traced the templates onto the dull side of freezer paper and cut them out on the lines.
2. I put the freezer paper shape shiny side down on the wrong side of the fabric and ironed it so it would stick.
3. When I cut the fabric I cut it about a quarter of an inch larger than the freezer paper template all around.
4. Now came the not so fun part - basting. Hand sewing is not my thing, but my O.C.D. has kicked in and I'm being fussy. Hand work is something I can do to keep my hands busy in the evening, and basting doesn't require much finesse. I have to admit that the basting went very fast. I had all the pieces basted in less than an hour.
5. Normally a person would stitch this onto the quilt by hand and later snip the fabric behind the applique and pull out the freezer paper. This block was an experiment with trying to use machine stitching in such a way that it would imitate hand stitching, so stitching it down first wasn't going to work. I feared that some of the stitches would pierce the freezer paper and I'd have bits of paper stuck permanently in the quilt.
6. Starch next. I poured a little bit of liquid starch into a small plastic container. Then I used a small brush to saturate the turned edges of the fabric on the back of the freezer paper. I ironed it dry, and removed the basting stitches and the freezer paper. I was a little bit surprised that it held it's shape perfectly.
7. Next came glue. I put a few drop of quilt basting glue on the starched edges.
8. I placed the applique pieces onto the quilt block. Then I gave them time to dry.
 |
| I fussy cut the center part of the flower to get the large dot exactly in the middle. |
I think I'll go back to using the polyester microfiliment thread next time. It's practically invisible to start with. Then, again, I might just bite the bullet and applique my glued pieces down by hand.
I hope to make another pieced block this coming week. Fingers crossed!
We're experiencing a strange record breaking heatwave in Nebraska right now. I've never seen temperatures near 80 degrees in this part of the country in February! I may have to break down and do some yard cleanup.


