Thursday, December 5, 2013

Muffins!

What to do on a cold, cold day?
Bake muffins, of course!
At least that's what I did.

The wind was blowing and the temperature dropping as arctic cold pointed it's icy finger right at Lincoln, Nebraska! We didn't even get a blanket of beautiful, white snow to gentle the harsh view of barren trees and dying grass. Just wind. And cold.

Brrr....
I  looked out through my window and shivered.

Definitely a day for baking. I decided against buttery, sugary, calorie laden cookies and pulled up my favorite muffin recipe. The recipe calls for buttermilk and fresh fruit, so I figured I'd at least get some calcium and good vitamins with my calories.

I split the recipe in half and made two batches. The kitchen warmed up, the house smelled heavenly, and I made a lovely mess while listening to country music on the radio.

Here's my recipe. It starts with a basic recipe to which you add your own favorite fruit.


Fruit Muffins with Buttermilk
I get 2 dozen muffins, but my ancient cupcake pans are smaller than the new muffin pans. 

Start with this basic recipe. I've suggested some variations at the end.

INGREDIENTS:
  • 1/2 cup butter or margarine, room temperature
  • 1 1/2 cups granulated sugar
  • 4 large eggs
  • 1 teaspoon vanilla extract
  • 3 cups all-purpose flour
  • 1 teaspoon baking powder
  • 1/2 teaspoon baking soda
  • 1/2 teaspoon salt
  • 1 cup buttermilk 
  • 1 cup of *prepared fruit (see variations below)
PREPARATION:


Cream butter and sugar till light and fluffy. Add eggs, one at a time, beating after each addition. Blend in vanilla extract. 


In a separate bowl, stir together flour, baking powder, baking soda, and salt. 

Stir flour mixture into creamed mixture with a wooden spoon. Gradually add buttermilk stirring just enough to moisten the dry ingredients. *Stir in fruit. 

Spoon batter into prepared cupcake or muffin pans, filling each cup  2/3 full. Sprinkle the tops with coarse granulated sugar.

Bake at 350 degrees for 20 - 25 minutes, or until a wooden toothpick inserted in the center comes out clean. Cool in the pan for 5 minutes. Gently move muffins onto a wire rack to finish cooling. 

A FEW VARIATIONS: 

Blueberry Muffins: *Add 1 cup of fresh or frozen blueberries. A teaspoon of grated orange or lemon peel is also delicious with blueberries.

Strawberry Muffins: *Add 1 cup of chopped fresh or frozen strawberries.

Apple-cinnamon muffins: Add 1 teaspoon of cinnamon to the flour mix. *Add 1 cup of freshly grated apple, skin included.

Pear-walnut muffins: Add 1 teaspoon of cinnamon to the flour mix. *Add 1 cup of chopped fresh pears and 1/4 cup of chopped walnuts. 

Pineapple muffins: *Add 1 cup of drained, crushed pineapple.

Invent-your-own muffins: You get the idea, I'm sure. Toss in a cupful or your favorite fruit and add any flavorings you like. Be creative!

I think I'd like to try cinnamon-raisin with streusel topping. Maybe substitute brown sugar for half of the white sugar.

Oh, and zucchini! Wouldn't that be fun!

Dates? Might need to reduce the sugar a bit. Maybe with orange zest.

What else? Send your ideas to me here: klee2strings@gmail.com

Turn on some happy music and sing along as you fill your kitchen with warm, appetizing fragrances, and banish winter's chill from your home!


Happy Baking!!

I think I'll bake bread tomorrow. 


My Daughter Wanted Something, So ...

"I have so many crochet hooks," my daughter said. "I wish I could find a case that would hold them all in order! Everything is too small, and it's such a headache to dig through the whole pile every time I want one." Then she smiled and showed me some of the lovely and fun crochet projects she's been working on for Christmas gifts.

Those might not have been her exact words, but I knew what she was really saying with that pretty smile that I can never resist. "Mom, I'm not going to ask you outright, but I really want you to make a case for my crochet hooks. Please. With sugar and cream."

Melt. Of course. Anything for my sweet daughter.

The minute I got home I headed to my sewing room and got out paper, rulers, a pencil, and a calculator. Then I sorted through my stash of fabrics and "stuff" to find what I needed.

Yes! That last little bit of tape measure fabric will do. And, it goes perfectly with this yellow and black floral that I used to make that tote and iPad holder. (For my daughter, of course.)

Oh, and here's a black button, a great zipper, and magnetic snaps. Oh, look! Skinny elastic cord! Happy, happy!

Twenty four hours later ...


As for the crochet hooks ... 


But would she like it?

There was only one way to answer that. Forget waiting till Christmas morning. I was too anxious to have her to check it out. I could alway make another, better one for her if I needed to. 

"I have something for you to look at," I said. "It's just a prototype," I said.

"What is it?" she asked, grabbing it from my hands. (Maybe I handed it to her, but grabbing sounds more interesting.) 

She immediately pulled out her crochet hooks and slipped them in the pockets. Room to spare! Then she found the little pocket and squealed! (Or, perhaps she just said something about it being perfect, but I like the idea of squealing so much better.)

"It's a prototype," I said, pulling hooks out and taking it from her. "I need to improve it for a pattern." 

"But...." Oh, those puppy dog eyes! (She really hasn't made those eyes for years, but don't those words make for a great picture?)

So, in spite of her objections, I brought the case home so I could make a pattern. I hadn't been sure about the pattern idea until I saw her reaction. Perhaps other crocheters could use something like this, too.

I changed the pocket up a bit to make it more spacious and easier to attach. I used different fabric, too. The tape measure fabric is pretty much used up, now. 

Measure, cut, mark, stitch ...

and here it is!


I hope you will like what I've done. 

Happy Stitching!!


Tuesday, December 3, 2013

Mitered Binding - No Hand Stitching!


Use 1/4” seam allowance for all seams.

The photos in this tutorial come from my Craftsy sewing pattern, “Trifold Crochet Hook Case”.

Note: When binding smaller projects like mug rugs and this crochet case, I always starch the fabrics before cutting. Fabrics that are stiffly starched will press firmly in place. This will make a huge difference when the time comes to press the mitered corners of the binding into a perfect 45-degree angle. Corners will keep their shape beautifully with minimal pinning when you do the final stitching on the front of the quilt.
1. Measure the distance around the item you will be binding. Add 6 inches to this measurement to find the length of the piece of binding you will need. (It's always better to be generous in cutting rather than skimpy.)  

2. Cut strips of binding fabric 2 1/4” wide. If you need only a single strip, add 6 inches to the needed length. If you need more than one strip you will need to add the extra 6 inches when your strips are sewn together.

3. Cut the ends at a 45-degree angle.  There are several ways to do this, but I usually use a rotary cutting ruler with a 45-degree angle on one end.


4. Sew the strips right sides together as shown in the photo. Press open. Measure to make sure that you have the extra six inches in length.


5. Fold the length of binding in half and press. It will now measure 1 1/8 inches in width.


Note: you will be stitching the binding to the back of your quilt.

6. Place a pin to hold in the binding in place at the center of one side. Lay the binding along the back of your quilt. The raw edge of the binding should be against the raw edge of the quilt with the folded edge pointing inward.

7. Allow six inches of unattached binding before beginning to sew. Backstitch a few stitches, then stitch to within 1/4” of the corner.


9. Lift the presser foot and turn toward the corner. Stitch diagonally right through the edge of the corner. Remove the quilt and snip the threads.

 10. Turn the quilt. Fold the binding straight up. This will create a diagonal fold into the corner. Then fold the binding back down. Make sure the top of the fold is even with the edge you just stitched. The raw edge should line up evenly with the next side to be stitched.   


11. Stitch down the next side to within 1/4” of the corner and repeat steps 9 and 10.


12. Continue stitching the binding to the edges of the quilt and mitering the corner turns until you are within 6 inches of the pin holding the other end of the binding in place.   Backstitch, remove quilt from the machine and snip threads.

13. Place the two loose ends of the binding together.  Use a pin to mark exactly 1/4” back from the cut edge on the fold of the first section of the binding. Lay the end of the other section of binding right on top of, or tucked right under, the first piece. Make sure the binding lies smoothly along the edge of the quilt.


14. Put a pin through the fold of this end in exactly in the same place as the first pin. This pin will serve as a cutting guide.

15.  Open this end of the binding and lay it right side up on a cutting mat. Carefully measure 1/4” out from the pin toward the uncut end of the binding. You will be adding 1/4” to the binding before cutting it.


16. Cut at a 45-degree angle that matches the angle of the original cut.

17. Place the two ends of the binding right sides together and stitch 1/4 inch from the edge just as you did when attaching strips of binding to each other.


18. Press the seam open. Refold and press the binding. Lay it in place along the quilt edge and stitch in place. Snip threads.

19. Turn the quilt over to the back.  Press the straight seams flat. Don’t press the corners from this side.


20. Turn to the front. Fold the binding in and press all along the sides. At the corner, continue pressing along the same fold.


21. Turn the quilt a quarter turn. Beginning at the corner you just worked on, fold this side over and press. Continue until all sides are pressed in place. Pin.


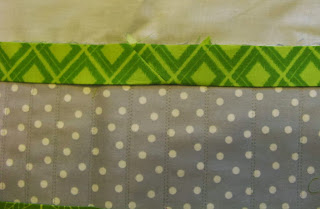
22. Stitch close to the edge of the binding all around the quilt.

Front and Back Views


That’s it!