Thursday, November 13, 2014

A Christmas Elf and a Trick or Two

I always have fun with my sewing, but this little guy was especially delightful to make. It was a special request, and I'm so glad Sue asked for an elf!

Thank you, thank you, Sue!

It started with a quick pencil sketch.


As always,  I took it to my husband for his opinion.  When his face broke into a smile I knew it was okay.

I made the templates in the morning and spent most of the afternoon choosing fabrics. Lots of Christmas prints and a small scrap of a "flesh" colored solid. That "flesh" color could be anything on the spectrum from pale cream to deep ebony, but I chose the color that matches my own family for this one.

Trick # 1

"Where did you find the flesh color fabric?" my friend Midge, asked. 

Quilting cotton in most flesh tones is pretty hard to come by, so I modified the color of my fabric with an easy trick. I started with Kona cotton in peach, then I used the old trick of altering the color of the fabric with tea. 

The original Kona cotton and four little sample sections for testing color.

Here are the instructions:

1. Get out bowl that is sufficiently large to hold your fabric with room to spare and place 2 teabags into the bowl for every cup of water that you will need to completely immerse your piece of fabric. 

2. Pour boiling water over the tea bags and let it steep for about 10 minutes. 


3. Drop the fabric into the tea. Swirl it a bit to ensure an even stain. If you need to leave the fabric unattended, make sure that no pockets or air are lifting sections of it to the surface. 


4. When you think the fabric might be about the right color, rinse it in cold water and dry it. It will lighten as it dries. If the color isn't dark enough, put the fabric back in the tea bath for a bit longer. The fabric can be made several shades darker with extended time in the tea. 

To achieve very dark stains you may need to reheat the tea with the fabric in it. That's what I did with the darkest sample in the photo below. It took about half an hour to reach that lovely, nut brown, flesh color.


Four shades of flesh tones achieved through being left in the tea for longer periods of time.
They are placed on top of the original peach cotton.


Trick # 2

Faces made of real flesh are not a solid color! Color adds health and beauty to a face. Why else would we need makeup?

My flesh colored fabric needed to look healthy and alive, too! Instead of makeup,  I added color with colored pencils and embroidery floss. I started with a red pencil and a brown one. 

Using a blunted red pencil I added a soft blush to the cheeks, the inner parts of the ears, and the nose. After that I added definition to the ears and nose with a very sharp brown pencil. I felt like I was a little girl again, coloring in my coloring book! Definitely playtime for me.


The eyes and mouth were embroidered, but they really don't have to be. Drawing them with a fine tipped magic marker is just fine. Just make sure to test the markers on a small scrap of your fabric first! Sometimes the markers will bleed into the fabric and ruin it. 


Trick # 3

Some of the pieces in this pattern are pretty small, so they were a bit tricky to place. First I planned my layout, then I used a straight pin to get the pieces where I wanted them. I found that it was best to fuse one layer at a time to keep the pieces from slipping out of position under the iron. It helps enormously to avoid ironing back and forth on them. Simply press the iron straight down on top of the appliques and apply pressure.


Ta-da!
"Wrapped and Ready", the finished mug rug! 


I'd be grinning too if I had my Christmas packages all wrapped and ready to go!

And now it's time to move on to the next project. If I'm not mistaken, somebody wanted a table runner. Back to the sewing room!


Wednesday, November 12, 2014

Toss-it-Together Crock Pot Chili

Brrr!!!


The Polar Vortex has arrived!  

Yesterday I was out running errands in the bitter cold. No fun at all! Today, though, I didn't have to be anywhere so I could stay warm and focus on doing things indoors. Goodness knows, there is always plenty to do around the house!  There were the typical morning chores - make the bed, get dressed, take care of laundry, think of something to fix for dinner, and such. Then I planned to stitch the binding onto my latest mug rug and work a bit on the pattern. That was all.

Wow! There was time to do some real cooking for a change! It seems like I've been pulling food from the freezer and heating our dinners in the microwave a lot recently. I considered dinner while I stirred my morning oatmeal on the stove. What to cook on a day like this? It would have to be comfort food - something hot and flavorful.

I checked quickly for ingredients on hand. I had everything needed for chili. Perfect. A super choice for a cold, wintery day. I could make a great, big old pot of it, enough for two meals and some for the freezer, as well.

Since I was cooking chili, I had to bake cinnamon rolls, too.

I mean, I HAD to. We live in Nebraska.

Is it only in Nebraska that chili can't be served without cinnamon rolls? I'd never heard of this combination before moving here. In this part of the prairie, cinnamon rolls can be found without chili, but chili is almost never served without cinnamon rolls. We've been here for 36 years, so I've got used to this tradition.


It's actually a very tasty combination, nothing like my mother's pairing of liver and onions with spinach. That was a meal my father had grown up eating, and he asked Mom to cook it fairly regularly. When we frowned at our plates, he'd say, "Eat healthy food or go hungry". We ate.

I used a Paula Deen recipe for the cinnamon rolls. Decadent, but oh, so yummy. There was only one minor little hitch. The recipe says to allow 1 to 1 1/2 hours for the first rising and about 30 minutes for the second rising. I had to triple those times to get the dough to double! I used quick rising yeast and placed the dough in a warm oven, too. I have no idea what the problem was. I wonder if I need a new batch of yeast. I had almost given up hope, but thank goodness, the dough did rise eventually. I was so glad I'd started early in the morning!

http://www.foodnetwork.com/recipes/paula-deen/cinnamon-rolls-recipe.html

Back to the chili.

My recipe is really basic. There aren't many essential ingredients, and I pretty much toss everything into a pot without much measuring. When I was young and just learning how to cook, I followed my mother's recipe faithfully right down to the last 1/2 teaspoon of pepper. But that was more than 50 years ago.

Baking requires exact measurements, but other foods not so much. My toss-it-together chili varies a bit from time to time depending on what ingredients I have available. This time there was no need for substitutions.

Toss-it-Together Crock Pot Chili 

1 large onion, chopped
2 cloves garlic, minced
3 or 4 baby carrots, grated
1 green pepper, chopped
1 T olive oil
1 lb. ground beef or ground turkey
2 T dried parsley
1 8 oz. can of tomato sauce
2 16 oz. cans of diced tomatoes
3 cups of water (more or less depending on how thick you like your chili)
1 1/2 tsp chili powder (more or less depending on how spicy you like your chili)
Salt and pepper to taste
2 16 oz. cans of dark red kidney beans

Saute the chopped onions it the olive oil until golden. Add the minced garlic, grated carrots, and chopped green pepper. Stir and fry a couple of minutes more until the garlic starts to brown. Toss this mix into a crock pot. Brown the ground beef in the same pan.

Add the beef, parsley, tomato sauce, canned tomatoes, water, chili powder, salt and pepper to the crock pot.

If the crockpot is set on low, the chili can simmer all day.  

I don't like to add the kidney beans until about an hour before we plan to eat. If they are added too early they can get mushy.


As the chili simmered and the cinnamon rolls rose (ever so slowly) I finished the stitching on my mug rug. Everything on my list was complete.

*****

Dinner is over now and the kitchen is cleaned. I didn't even have time to think about the weather!

It's been a fairly busy day, so I'm planning a very relaxed evening.

I'm going to lean back in my recliner, pull my "Snowball Fight" quilt over my lap, and read on in my book until it's time for bed.


Wishing you all a lovely evening!


Thursday, November 6, 2014

A Table Topper, Some New Skills, and Wanting Your Opinion

A fat quarter here, a quarter of a yard there, a small scrap of something else, and an idea sprang into being. I didn't know what would come of these pretty fabrics when I bought them last summer.  I used some of them in "Mitten Weather", but a mug rug uses so little fabric, and I still had more than enough for a small holiday table topper.

I never would have guessed that one little pattern could take so long to make! It was my own fault, of course. The table topper, itself, stitched up quickly. It really is an easy little thing.

I can just see this made up in different color schemes and fabrics.
 Patriotic colors, soft baby colors, vibrant autumn colors, and on and on.
The time consuming part came from my gathering enough courage to take a plunge and do something totally new - an experiment in pattern making.

Until now, I've mainly illustrated my patterns with photos, and since my patterns have been based on applique, that technique has worked very well for me. Sometimes, though, a person needs a change of pace.  My newest table topper doesn't have one little bit of applique. Nothing at all for me to draw out by hand!

Using photographs for every step of making a pieced quilt, even for a tiny one like this, takes a ton of photos and lots of space. I felt that I needed to cut down on pages, so I showed the piecing and construction of the pattern entirely with computer drawn diagrams! That was the part took so long.


I've been learning how to make these illustrations bit by bit over the past year and a half, but using them exclusively for whole pattern turned out to be a much bigger bite than I'd expected! I still don't have it perfected. Ha! Not by a long shot!

So far, I've learned to work with geometric shapes only, but that's a beginning. I'm learning,  and I feel pretty good about figuring it all out on my own.

So...
     no applique,
           diagrams rather than photos to illustrate construction ...

I wonder how my customers will respond to this new side of me.

I will continue to make my applique patterns with lots of photos, and I'll likely mix photos and diagrams in more patterns in the future, but I really want to know how well this computer generated style of pattern works for you quilters.

Please let me know what you think!!


And happy stitching!!


Tuesday, October 28, 2014

Autumn Pies

It's a cool autumn day and I reached a standstill, unable to decide which way to go with my latest sewing project. Sometimes you just need to take a break and let your mind settle on other things.

So, I baked pies this afternoon. One apple, one pumpkin, and one batch of leftover crust sprinkled with sugar and cinnamon, rolled up and cut into little pieces just like my grandmother made for me when I was very small.


Alright, I admit it. My pie crusts are not at all beautiful to see. 

I simply can't get the knack of forming those pretty edges. I cut little hearts for the apple pie and twisted some 1 inch strips for the pumpkin pie. Not photo worthy, but it was the best I could manage today.

On the bright side, though, no one at my house worries much about the beauty of the crusts because they are too busy savoring the flavor and texture. You see, I have this special recipe. My crusts are light and flaky and downright yummy! 

I don't believe in secret recipes. Food is meant to share and so are the recipes. So here it is. 

Two little tricks for flakiness:  
1. Keep everything super cold. I even place the bowl and the flour in the freezer for about half an hour before using them. 
2. After the pies are filled, put them back in the refrigerator while you heat the oven. The colder the crusts are, the flakier they will bake. 


Master Pie Pastry

4 cups unbleached flour
3/4 cup very cold vegetable shortening
1 cup (2 sticks) very cold unsalted butter, cut in chunks
1 egg
2 1/2 teaspoons sugar
1 1/2 teaspoons salt
1 tablespoon lemon juice
1/2 cup ice water

To make by hand: Place the flour in large mixing bowl. Cut in the shortening and butter until you have a crumbly, uneven mixture of small and large lumps of flour-covered fat. Stir together the egg, sugar, salt, and lemon juice. Make a well in the center of the flour mixture, stir in the egg mixture with a fork and drizzle in most of the ice water. Using a fork or your fingers, toss the mixture together to moisten the flour. Stir to make a soft mass and pat it into dough consistency. Add remaining (or additional) ice water as required to make sure the dough sticks together.

Turn the dough out onto a lightly floured work surface. Knead briefly into a smooth dough. Divide it into two portions, and wrap in plastic wrap or place in ziploc bags. Refrigerate for at least 1 hour if using immediately. The dough can be kept in the refrigerator up to 3 days. It can also be frozen for up to 3 months. (To defrost, leave it in refrigerator overnight, then leave it on the counter for 2 hours or until it's defrosted but still cold.)

This makes enough dough for two 9-inch double pie crusts plus one 8" or 9"single crust, or for 12 mini tart shells plus 1 double pie crust. Follow your pie or tart recipe for baking temperatures and times.

Enjoy!

Now, I need to get back to my sewing! 


Tuesday, October 21, 2014

The New "Baby" at my House


I've been watching and dreaming for years and years, and finally I have a special new baby! 

She is not a puppy or a kitten, or any other cute and furry little creature! Not that I would mind having a cute little pet, but between allergies and intolerance for animal hair on clothes and carpet, furry animals and my house just don't go together very well. 


My new "baby" is something entirely different! 

She's a Baby Lock sewing machine with a lovely wide throat.


And, she needed a complete sewing room makeover. 

After several days of rearranging furniture and figuring out storage space this is what her room looked like. 

The view from the doorway

Her space is waiting.
Other sewing machines had to go. The Singer 201, my indestructible black workhorse, is going to my granddaughter, and the 1905 treadle has been banished to the guest bedroom.
Oops! A bit out of focus.
Once she arrived I needed to do just a bit more rearranging, but now she fits quite nicely.


Sometimes it pays to be patient. 

Now, to figure this thing out! My nose might be buried in the manual for quit a while.

Poor hubby will have to get his own meals for a few days. 

Hope he doesn't get too awfully tired of the one recipe he's perfected.


Saturday, October 18, 2014

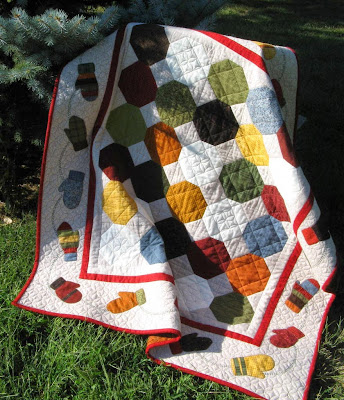
Mitten Weather


Autumn is definitely here. My trees are turning wonderful shades of red and gold and my neighbor kiddos are raking the fallen leaves into "jumping piles".  They keep ringing my doorbell and asking me to watch them rake and jump. 


You see, I'm that funny old retired teacher who will sit on the porch and read stories to them or look at the bugs and caterpillars they have found - whether dead or alive, so my doorbell rings a lot! Too much fun!

But, I'd better get back to the point of this blog entry. 

As I said, autumn is here. That means winter is not far behind. And that thought led me to one of my favorite children's poems.

"Thumbs in the thumbs-place,
Fingers all together!
This is the song
We sing in mitten weather."

How perfect for a quick, little project. After "Autumn Flight" and "Snow Family Holiday" I was ready for a super easy mug rug.

Hope you like it!

"Mitten Weather"

If I have time, I might just make a few of these for the neighbor kiddos. 

I wonder how the pattern would look on a little book tote. Hmm...

Have a super day!

... and keep warm this winter!
... and don't forget your hat and mittens!


Saturday, October 11, 2014

The "Home" Quilt Along quilt top is done!

I am really excited about the way this little mystery wall hanging has turned out!  I do hope you like it as much as I do.

Thank you, everyone, for contributing your ideas as we designed and made this together!


This project was more than a bit scary for me!  I was as much in the dark about the finished product as the brave, faithful folks who bought the block patterns and stitched them up without knowing what the end result would be.

What if it turned out to be a disaster? What if everyone hated it?

What if... what if... what if ....


What ifs counted for more than one sleepless night. But now it's done!
Well, except for the finishing, but that will come later.

The Layout

The final layout that I settled on uses narrow (3/8") dark borders around the blocks to make them pop and wider soft green sashing to pull all of my colors together. Any two colors that bring out the best in your blocks will be wonderful.

I arranged and rearranged the blocks at least a dozen times. In the end, I balanced shapes, sizes, and colors in the best way I could. If you are making this, your block arrangement may be very different, and that is just fine! Who wants a quilt that's identical to everyone else's?

Then came the math. Oh my goodness!
All of those fractions!


Measure, measure, calculate, calculate.
Sew, write, check for errors - I thought I'd never get it right!
Thank goodness that part is done!

I've posted the layout pattern on Craftsy as a free pattern. If you like the layout, you could also use it with any other blocks of the sizes in this quilt. You might use some of my blocks and toss in some of your favorite blocks from here and there. Why not? We quilters are all creators of art, and art is definitely personal.

I said that the finishing will come later. I need to sandwich the top, batting, and backing, then quilt and bind. Sometimes waiting is a good thing! Do you see me smiling?

This quilt is pretty large for quilting on my little sewing machine, but I plan to get a new machine with a wider throat space within the next couple of months. Not a long arm or anything that fancy, but a machine with a 16" throat space so my quilts won't be quite so squished when I work on them. If all goes as planned, this will be my Christmas gift!

That's why I'm smiling!

When I have the new machine set up "Home" will be the very first quilting project.

Wishing all of you happy stitching and a very happy home!

And, please send me photos! I'll add them to the Quilt Along Photos page at the top of this blog. Can't wait to see what you do with this!


Monday, September 29, 2014

An Alternate Quilt Along Block and My Layout Plan

I've known for quite some time that the fabrics in my cookie jar block didn't fit in very well with the other blocks. As the quilt grew, the colors in the cookie jar stood out more and more as being out of place.

I couldn't deal with it! Not at all!

No choice but to make it over in fabrics that coordinate with the others. I chose chocolate cookies, too, this time. Because they added more contrast. And because I like chocolate. A LOT.

Since I was remaking it the block, I made a few other changes, as well.

First off, I thought I'd like the cookie jar better if it were smaller. Of course, when it was smaller it didn't fill the block completely, so a cup was added.

Oops! Others might prefer the changed block, too, and I can't expect anyone to pay for the block twice!

So it's FREE!!

All the changes inspired a new name for the block - Cookies and Cocoa.


My Layout Choice:

I'm now ready to begin putting this little wall hanging together. The plan with the house block in the center was by far the most popular with all of you, so that's what I'm using. I've added some little details for my own quilt that you may or may not want. For that reason there will be two sets of instructions. 

I've chosen to work with green sashings because greens pull the colors in my blocks together better than anything else I tried. I'll outline each of the blocks in a 1/4" dark green and then I'll separate everything with light, apple green sashings. 

As soon as I can, I'll post instructions for my layout (with 1/4" narrow borders) and for a similar plan without those little borders. 


This may still change a bit as I go along, but I'm hoping to have the quilt top finished within a week. Fingers crossed! 

And, if you do want the plan with the house block at the top center of the quilt, please let me know and I'll try to prepare that, too.

Now, back to work!!


Happy Monday, everyone!!


Wednesday, September 24, 2014

A Family of Snowmen for Christmas

Here it is! I've finished work on this little "Snow" family and their holiday preparations. Oh, my, what fun I had with these little characters!


Once again, I used a few new little bits plus lots of scraps from Christmases past. You may recognize the border fabric from last year's "Christmas Magic" mug rug and table runner. I so fell in love with that piece that I bought a LOT of it. You may be seeing it again. 

The holiday print is Blitzen by Basic grey for Moda #30290-14. It's actually from the year before last. My local quilt shop still has half a bolt or so, but it's getting harder to find. I went searching online and I found some on Etsy and some on another fabric website.

I have to tell you about my hubby's reaction to this quilt, but first I'll give you the background. 

When I first started quilting, 20 years ago or so, my guy simply didn't get it. Why was I cutting up nice fabric and putting little pieces together? He didn't even understand why the back of the quilt with the big fabric was not the top of the quilt. I tried to explain very carefully.

"Quilting is an art form," I said. "Designing these blocks and choosing the shapes and sizes of the pieces is creating a piece of art!"

"Nonsense," he responded. "Sewing is just sewing and a quilt is just something that goes on top of a bed." 

You can see we had a long way to go. 

Then, as time went on, he gradually became more interested in my quilts. When I started selling patterns he began to see things in a different light. "This quilting is really popular, isn't it?" he asked. Eventually, when looking at a new design, he said, "I didn't know you were such an artist."

Finally he had come around, but is it possible to go too far?


I brought up my finished Snow Family Holiday and the man asked for exact dimensions. Why? Because he wanted to go and order a frame for it!

"No, no, no!" I said. "It's a quilt! It's meant to be touched! It's fabric! You don't don't put a quilt behind glass unless it's a priceless antique in a museum!" Sigh... I wonder if we'll ever get it together. 

Well, time to get on to the next endeavor. 

Fall housecleaning, here we come!


Saturday, September 13, 2014

Autumn Purse: Days 3, 4, 5, and DONE!

It's finished! The autumn purse is packed with my "stuff" and the yellow purse has been put away till next summer.

This one was made with a lightweight upholstery fabric that will have much more durability than quilting cottons. It's more of an all season bag than it is something specifically for the winter months. I'll work on a real winter bag in a couple of months.

I wish I had a pattern for you, but I'm still trying to figure out how to write a pattern for something with this much complexity. If you've used any of my patterns you know that I don't want there to be any confusion about any part of the construction. A purse pattern written that way could cover up to 30 pages. I've been studying other patterns to see if there isn't some kind of middle ground between too vague and absolute overkill.

But on with the sequence of purse making.

This has been such a crazy week! I feel like I'm getting nowhere until I look back. In actuality quite a bit was accomplished.

Tuesday
Other stuff to do. No purse work.

Wednesday
I cut out the sections, stitched the seam at the bottom of the bag and made the casing for the plastic canvas insert that gives it a firm base.


Thursday
I only made the straps for the bag.


Friday
Day 1 of a two day marathon of purse making. Pockets were made and attached, straps were stitched in place, and the body of the bag was done by bedtime.


I did insert the pocket flaps into a seam this time and that worked so much better!
There is one large pocket on the back.


Friday

Zipper first. 

Then the lining. 

And the rest was easy, lickity split.

I had the entire purse competed by 3:00! Feeling good!


Three open pockets in the lining.

One 9" zippered pocket .

Tomorrow, I'll take some time off from sewing, but I'll think about which idea to work on next. 


Holidays are coming!


Friday, September 12, 2014

Quilt Along Layout Ideas

"Home" Layout Options

I planned to make progress on this purse today, but Glenda finished the last of her quilt along blocks and asked about a layout plan. So the morning was spent on ideas for the plan. I actually came up with a three plans and a new idea, too.

I really want to hear your opinions on this so I'll know how to go about writing the instructions.

This is what I've sketched out so far. I like all of these plans, but the layout might be dictated by size.

One of the 48" x 48" plans would be fine for a wall hanging.

Layout 1: 48" x 48"
This plan has the house at the top of the quilt with the word, "Home" appliqued above it.  The photo shows an arrangement that could work with my blocks. The diagram below it shows the plan measured out to scale.


Layout 2: 48" x 48" 
I don't have a photo example, but I did make a layout to scale. The big difference is with the location of the house. In this plan it's centered.

Layout 3: 54" x 54"
With secondary sashing and a double border, this quilt layout has grown into a good size for a small lap quilt or a larger wall hanging. Again, I've shown the scale drawing below the photo layout.


A final option: I haven't made a sketch to go with this idea. I was thinking of taking Layout 3 and adding to both the top and the bottom with some border additions. If it grew to 54" x 72", it would be a larger lap quilt, but it would also look lovely when laid over a plain bedspread on a single bed. I have just such a bed, so it's an idea in the works. 

With borders going all the way around this quilt could grow to a bed quilt, but it would immediately become too large to quilt on my little machine. 

Do you have preference? 
Waiting to hear from you!