I had planned to finish the summer purse tutorial with this post, but it was simply getting to be too long. There will have to be a sixth and final post. This post covers making the lining with the pockets that are found inside the purse. The last post will cover assembly and finishing the bag.
Pockets galore!
I want lots of pockets inside my bags, and I used my favorite combination in this purse. One side of the lining has four open pockets lined up in a row. They keep my odds and ends of little things neat and easy to grab. The other side of the lining contains a generous zippered pocket which is partially unzipped in the photo. This pocket is for my wallet, receipts, and any other items that I want to keep secure. I keep a notebook in the center of the bag, and I can toss my keys in there as well. There is still plenty of space to add a book, a snack bag, or whatever small something I may want to carry on a given day. Since the pockets have done away with clutter, I don't have to go digging and searching for the things I want.
Getting ready to cut.
I definitely recommend that a lightweight fusible interfacing be ironed onto the wrong side of each piece of fabric in the lining. The interfacing should be just a hair small than the lining fabric to protect your iron. The fusible substance can be nasty if it's melted to the iron, itself.
The little bit of extra thickness and firmness added by the interfacing assures that linings hold together over the long run. Pockets don't rip out so easily, and the linings will look and feel more substantial. This step is optional, of course, but interfacing is cheap, the extra work is minimal, and it makes a world of difference.
Note: All seams allowances are 1/2" unless instructed otherwise.
The open pocket section
Cut one of each of these pieces from the lining fabric.
A. Make the open pocket unit
When finished, the pockets in the unit will be the sizes shown in the diagram below. Pleats between the pockets give them depth.
Note: I gave this piece of fabric a good spray of heavy starch before beginning. It helps with pressing the pocket pleats for sewing.
1. Fuse a 4 1/2" x 15" piece of interfacing to one end of the wrong side of the 15 1/2" x 9" lining fabric.
2. Fold the lining with right sides together.
3. Using a 1/4" seam allowance, sew around the three open sides. Leave a space of about 2" open on the long side.
4. Trim the corners and pull through the open part of the seam to turn right side out. Press.
Stitch the opening closed by hand. The long edge with the seam will be the bottom of the pocket.
 |
| The piece now measures 4" x 15". |
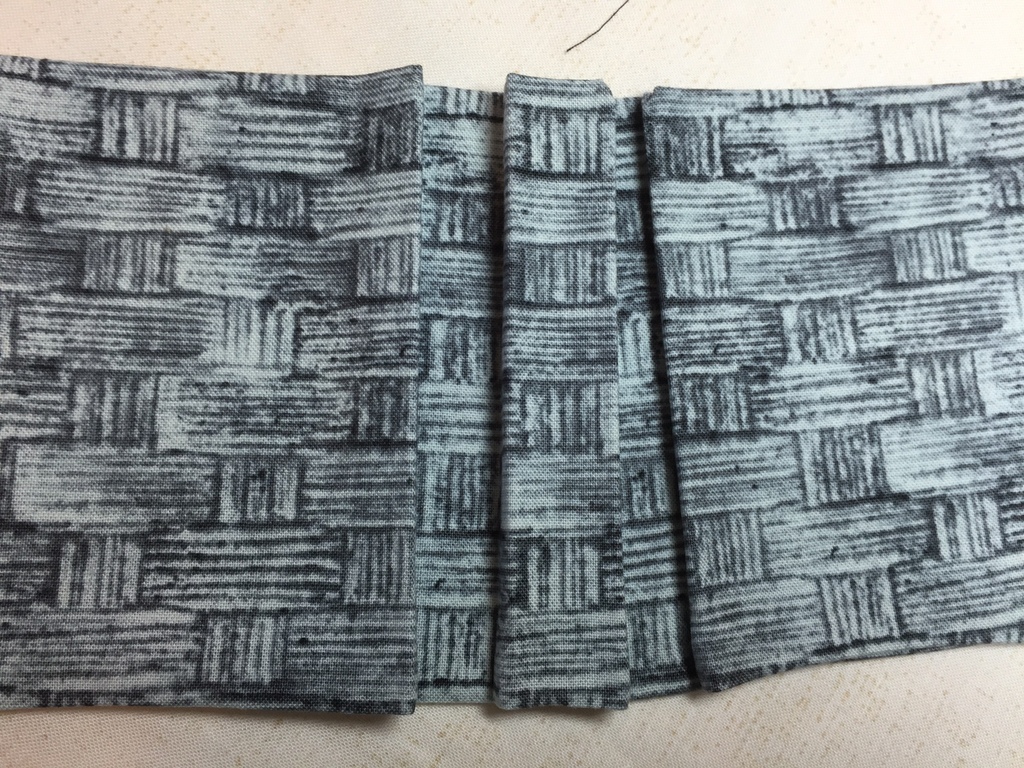
5. Measure and mark the pleats using the diagram below. The spaces for pleating between pockets are each 1 1/4". The edges of the pockets are folded to the center of the pleated areas as shown by the red arrows. Dotted lines show the inside center of each pleat.
I marked the pocket edges with pins and pressed a line from top to bottom along each edge.
I pulled the pocket edges together and pinned them to the center of the 1 1/4" space between pockets to form the pleats.
After a good pressing with steam, the pocket pleats hold their shape nicely.
B. Sew the pocket unit to the lining section.
1. Lay the 11" x 16" piece of lining with a long edge at the top. Center the pocket unit 2" down from the top of this piece. Pull the pocket edges snugly against each other and pin in place.
Place the pins back a bit from the edges of the creases.
2. Sew the inside centers of the pleats to the lining.
Fit a narrow foot to your sewing machine.
I used my quarter inch
foot.

You will be sewing in the center of the spaces between pockets. The seam will be at the bottom of the ditch between pleats. Start at the bottom of
the pocket and stitch up to the top. Pivot at the top, sew one stitch over to
the side, pivot again and sew back to the bottom. Do this for all three of the pleats.
3. Topstitch close to the edge all around the sides and bottom edges of the pocket.
Begin 1/4" in from the side edge and 3/4" down from the top of the
pocket unit. Stitch a "u" at the beginning and end of the stitching.
The diagram shows it much better than the photographs do. The "u" shaped
stitching on pockets protects them from ripping out easily.
The finished lining section will be 16" wide and 11" tall.
The Zippered Pocket Section
Cut these pieces from the lining fabric.
A. Make the zippered pocket.
Put the two 4" x 11" pieces aside for now, and get out your 9" zipper.
If your zipper is too long, you can trim it off after the pocket is
finished. I already had the perfect color in an 18" zipper, so I used
it.
1. The zipper will be sewn onto the 10" edge of the lining fabric. Start with the zipper pull side facing down against the right side of the 10" x 9" lining.
(I like my zipper to open from the left, so I make sure that the zipper pull is on the left side of the top of the fabric.)
Line the zipper up at the edge of the fabric and sew with a zipper foot.
2. Flip the zipper over so the zipper pull faces up. Pull the larger section of the lining out of the way to the left. With right sides
together, sew the 3" x 10" strip of fabric to the other side of the
zipper.
3. Lay the piece you've just sewn on top of the pocket fabric. The
wrong side of the section with the zipper will face the right side of
the pocket. Sew along right on the stitch line from step 3 to sandwich
the zipper between the pocket and the lining.
5. Take the opposite side of the pocket fabric and fold it up and over the zipper.
Align the edge of the fabric up against the edge of the zipper and sew
it in place.
 |
| The zipper is sandwiched between the the pocket and the lining on both sides. |
|
|
 |
| Wrong side of pocket unit. |
 |
| Right side of pocket unit. |
6. Press the pocket down toward the larger piece of lining.This zipper
unit should measure 10" wide and 11" long. If needed, trim the bottom of
the lining fabric to get the right measurement.
7. Before finishing this piece of lining, unzip the zipper part way.
8. Sew a 4" x 11" piece of lining fabric to either side of the pocket unit. If your zipper was longer than 9", trim the ends off.
 |
| The zipper opened to show the pocket. |
The finished lining section should be 16" wide and 11" tall as shown below. Trim if necessary.
The last post for the summer purse will be out in a few days. I promise not to keep you waiting too long this time.
The Finish.
Coming Soon!
Happy Stitching!!


