Thursday, December 26, 2013

"Come Into My Parlor"


"Will you walk into my parlour? said the Spider to the Fly,
'tis the prettiest little parlour that ever you did spy;
The way into my parlour is up a winding stair,
And I've many curious things to shew when you are there."

from "The Spider and the Fly" by Mary Howitt


My daughter likes spiders.
Honestly.
She really does like spiders!

When she was a little girl she was afraid of all kinds of flying and crawling "bugs", spiders included. I really tried to teach her that most of these critters were completely harmless, but after the experience of sitting on a bee when she climbed into a small tree, it was pretty much a lost cause.  It didn't help that she has a severe reaction to mosquito bites, as well.

Somehow, though, she could appreciate a spider as an artist. She was fascinated by the symmetry and beauty of delicately spun webs. She also liked the idea that spiders got rid of creepy, scary insects.


And then came the experience with wolf spiders. 
Scary looking creatures, aren't they?

Wolf spiders sometimes come indoor as weather turns cold. As autumn approached we noticed that our house had absolutely no insects anywhere - nothing. Not a fly, not a cricket, not even the little spiders that like to hide their webs in corners and on ceilings. Nice! 

And then we found the wolf spiders. A pair of them had found a home in our basement. They were calm, and pretty much harmless as long as you didn't try to pick one up, so we kept them as pets. They lived in our basement for over a year, rarely seen, but working hard for their keep. 

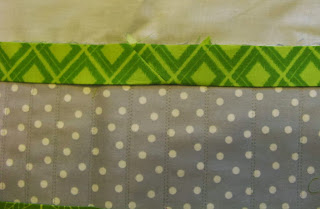
So, my daughter likes spiders. That's why I made this mug rug for her for Christmas. 


Oh, do come into my parlor!

Happy Stitching!!


Tuesday, December 24, 2013

Home For Christmas - Tutorial

It's Christmas Eve at my house and all is calm and peaceful. Christmas chores complete, no noisy children underfoot, only soft holiday music in the background, and no wet birds, thank goodness.

I pulled out this Christmas quilt a few days ago and settled it on my couch by the fireplace. Of all my quilts, this one may be my favorite.


I love the log cabin pattern and the fabrics, but most of all I love how it reminds me of my mother. It was made to remember her. She was so heartbroken after my father died and wanted only to join him. Less than two years later, on December 15, 2005, in a house beautifully decorated for the holidays, she passed away. Her prayers were answered and she had truly gone home for Christmas. That's how the quilt got it's name.

People often ask me what I did to make the flowers look like they are dancing around vines. I'm sharing the trick with you. You might consider it a Christmas gift.


The finished log cabin blocks are 9" squares. This quilt is rather long and narrow, 4 blocks wide and 6 blocks long. If I were to make it again I think I'd either make it 4 blocks by 5 blocks or 5 blocks square. There are 3 borders, 1/2", 1 1/2", and 2".

The finished dimensions are 44" x 62".

It's all about the fabric choices. It begins with a very large floral background on a light or white background. The petals have to stand out individually with lots of light colored spaces in between. Then, a green leaf print. Again, the leaves should be rather prominent, though the light background isn't required. The rest of the fabrics in the log cabin blocks should be light or rather neutral.

The fabrics I used.
Only this one block is used, throughout the quilt. The numbers on this diagram show the order in which the strips are added.

Cutting measurements for one block. Multiply the number of strips of each fabric you will need for one block by the number of blocks you choose to use.
Strip 1: 1 1/2" x 1 1/2"
Strip 2: 1 1/2" x 1 1/2"
Strip 3: 1 1/2" x 2 1/2"
Strip 4: 1 1/2" x 2 1/2"
Strip 5: 1 1/2" x 3 1/2" 
Strip 6: 1 1/2" x 3 1/2"
Strip 7: 1 1/2" x 4 1/2"
Strip 8: 1 1/2" x 4 1/2"
Strip 9: 1 1/2" x 5 1/2"
Strip 10: 1 1/2" x 5 1/2"
Strip 11: 1 1/2" x 6 1/2"
Strip 12: 1 1/2" x 6 1/2"
Strip 13: 1 1/2" x 7 1/2"
Strip 14 1 1/2" x 7 1/2"
Strip 15: 1 1/2" x 8 1/2"
Strip 16: 1 1/2" x 8 1/2"
Strip 17: 1 1/2" x 9 1/2"

This diagram shows how to assemble  the blocks. They are turned in only two directions for this quilt pattern. 


The finished layout of the blocks after being sewn together. The dancing petals don't show up in this diagram at all. The main reason is that I couldn't find a picture of poinsettia fabric that had leaves as large and a background as light as it needed to be.  The inner green computerized design is also too solid. It should have a very light background with little green showing at all - more like the fabric I actually used. 


This photo shows the borders. The red is 1/2" wide, the floral is 1 1/2" wide, and the green is 2" wide. 


Merry Christmas from my house to yours. Whether home or away from home, may your holiday be filled with joy.


Sunday, December 15, 2013

Christmas Eve: A True Story - Honest!


Christmas Eve - in the morning, I was bustling to and fro,
Stitching this, baking that, making piles of presents grow.
A needle jabbed into my thumb, clock hands were swiftly turning.
While searching for my Christmas list I smelled the cookies burning.

My kids were blasting music (not the kind that I would choose),
Their father yelled for quiet, then turned up the TV news
My head was really throbbing, but I could not slow my pace.
To leave something unfinished would have been a huge disgrace!

The telephone began to ring, my daughter raced her brother,
Not noticing that in their haste they'd nearly killed their mother.
I chased out of the kitchen to answer knocking at the door,
And I tripped upon the carpet and fell sprawling on the floor.

The florist smiled, "Good morning! Please just sign your name right here.
A poinsettia from the neighbors to bring you Christmas cheer."
I sat down on the lowest step, the flowers on my lap,
I couldn't deal with any more until I'd had a nap.

I retreated to my bedroom and stretched out on my bed.
Quiet peace flowed over me ... then my eyes flew wide with dread!
From the bathroom in the hallway, the children's, not my own,
Came a sound I'd heard before, one I wish I'd never known.

I tiptoed very slowly, till before the stool I stood,
Wishing it would go away. Praying that it would.
One gurgle. Then another. My body swayed with fright,
What I imagined underneath the lid, was a plumber's true delight.

My first thought was to flush it. Maybe it would come unplugged.
Then I visioned murky waters overflowing on my rug.
So I raised the lid so slowly, peeked to see what I had heard,
And there, splashing in the toilet, was a wet a frightened bird!

This was not what I'd expected, and I slammed the lid back down,
As I screamed so very loudly that my voice was heard downtown!
Well my husband, he came running, and the children followed suit.
"There's a bird in the toilet!" They just stood, three statues, mute.

I repeated in a softer voice, and I motioned with my hand,
But they looked upon me blankly like they didn't understand.
"There's a bird in the toilet! Do you think that I am blind?"
I heard my husband whisper, "Son, your mother's lost her mind.

"Dear, it's been a trying day," soothed my husband with a frown.
I just shouted, "Go do something - or that bird will surely drown!"
So they looked, just to humor me, and guess what they found there -
Yes, a bird, flopping desperately! Not a moment left to spare!

My son retrieved the dripping thing and wrapped it in a towel.
He placed it in a spot of sun to dry the soggy fowl.
Did it fall down the chimney? No, we had closed the flue.
Then how did it get there? I really wish we knew.

Did it swim up the sewer? That seems quite absurd,
But stranger things have happened close to Christmas. So I've heard.
After awhile we took it out, and watched it fly away.
And I thought, how very fitting as an ending to this day.


Merry Christmas, everyone!!

Tuesday, December 10, 2013

One of Those December Days!

What a glorious, sunshiny day! My backyard is blindingly white and beautiful.


I wish I could just sit and look out the window, but it is December, and it truly is one of "those" days that seem to comprise most of this month. I'm not sure if I'm multi-tasking today or if I'm simply running around like the proverbial headless chicken.

Crazy choice of days to be writing this blog.

Let's see. First off, this is the day of the "big clean" in my sewing room. I couldn't put it off any longer. I've made a good start. I've piled everything on a table so I can clean the floor and get behind things. It's a beginning, right?


What else? 

A while back my daughter gave me a tub of fresh dates. I'm not kidding! A tub! At least a quart! I really need to use these and I needed a quick recipe. So this morning I got online and found a recipe for date nut bread. It had 5 stars! That means fabulous, right? I'll let you know when it cools off enough for me to try it for a morning snack. 


This is the piece I've cut for my snack later on. It looks yummy enough, doesn't it?


I had my snack a while ago. Not bad. I wouldn't give it 5 stars, though. Maybe four. :)

Okay, what else? I have five - that's right, FIVE - new mug rugs in the works. These are the little gifts for family. So am I making them one at a time? That would be boring! I've been doing them all at once. Here they are on my design board, waiting for applique stitching, quilting, binding - all that stuff. 


My son-in-law gets the truck rug. That's a story in itself. He has this old truck, the first vehicle he ever bought for himself. No one really knows why he keeps it. It's badly rusted and has been sitting unused in the driveway for several years. Last summer he decided to fix it up. Now it's in two pieces - the main truck in the garage, and the topper on the driveway. I'm sure he'll get it up and running someday, but not during the cold of winter. 

The football is for my grandson. Typical 15-year-old boy. I think I'll work on finishing that one up first because some of you may want the pattern before football season is totally over.

My son is a reader - always has been, always will be. Thought I'd give him a stack of books. 

My granddaughter is involved in way too many activities, but music is a huge part of her life. She's been playing the violin for the past 7 years.

As for my daughter who reads my blog ... well that's not going to be visible till after Christmas. She's the one who, through blatant snooping absolutely everywhere, discovered the stash of Santa toys the year she was eight. I'll just let her guess. 

That's it. Time for my mid-morning snack, then down to the sewing room - clean first, sew after.

Have a super day!!


Thursday, December 5, 2013

Muffins!

What to do on a cold, cold day?
Bake muffins, of course!
At least that's what I did.

The wind was blowing and the temperature dropping as arctic cold pointed it's icy finger right at Lincoln, Nebraska! We didn't even get a blanket of beautiful, white snow to gentle the harsh view of barren trees and dying grass. Just wind. And cold.

Brrr....
I  looked out through my window and shivered.

Definitely a day for baking. I decided against buttery, sugary, calorie laden cookies and pulled up my favorite muffin recipe. The recipe calls for buttermilk and fresh fruit, so I figured I'd at least get some calcium and good vitamins with my calories.

I split the recipe in half and made two batches. The kitchen warmed up, the house smelled heavenly, and I made a lovely mess while listening to country music on the radio.

Here's my recipe. It starts with a basic recipe to which you add your own favorite fruit.


Fruit Muffins with Buttermilk
I get 2 dozen muffins, but my ancient cupcake pans are smaller than the new muffin pans. 

Start with this basic recipe. I've suggested some variations at the end.

INGREDIENTS:
  • 1/2 cup butter or margarine, room temperature
  • 1 1/2 cups granulated sugar
  • 4 large eggs
  • 1 teaspoon vanilla extract
  • 3 cups all-purpose flour
  • 1 teaspoon baking powder
  • 1/2 teaspoon baking soda
  • 1/2 teaspoon salt
  • 1 cup buttermilk 
  • 1 cup of *prepared fruit (see variations below)
PREPARATION:


Cream butter and sugar till light and fluffy. Add eggs, one at a time, beating after each addition. Blend in vanilla extract. 


In a separate bowl, stir together flour, baking powder, baking soda, and salt. 

Stir flour mixture into creamed mixture with a wooden spoon. Gradually add buttermilk stirring just enough to moisten the dry ingredients. *Stir in fruit. 

Spoon batter into prepared cupcake or muffin pans, filling each cup  2/3 full. Sprinkle the tops with coarse granulated sugar.

Bake at 350 degrees for 20 - 25 minutes, or until a wooden toothpick inserted in the center comes out clean. Cool in the pan for 5 minutes. Gently move muffins onto a wire rack to finish cooling. 

A FEW VARIATIONS: 

Blueberry Muffins: *Add 1 cup of fresh or frozen blueberries. A teaspoon of grated orange or lemon peel is also delicious with blueberries.

Strawberry Muffins: *Add 1 cup of chopped fresh or frozen strawberries.

Apple-cinnamon muffins: Add 1 teaspoon of cinnamon to the flour mix. *Add 1 cup of freshly grated apple, skin included.

Pear-walnut muffins: Add 1 teaspoon of cinnamon to the flour mix. *Add 1 cup of chopped fresh pears and 1/4 cup of chopped walnuts. 

Pineapple muffins: *Add 1 cup of drained, crushed pineapple.

Invent-your-own muffins: You get the idea, I'm sure. Toss in a cupful or your favorite fruit and add any flavorings you like. Be creative!

I think I'd like to try cinnamon-raisin with streusel topping. Maybe substitute brown sugar for half of the white sugar.

Oh, and zucchini! Wouldn't that be fun!

Dates? Might need to reduce the sugar a bit. Maybe with orange zest.

What else? Send your ideas to me here: klee2strings@gmail.com

Turn on some happy music and sing along as you fill your kitchen with warm, appetizing fragrances, and banish winter's chill from your home!


Happy Baking!!

I think I'll bake bread tomorrow. 


My Daughter Wanted Something, So ...

"I have so many crochet hooks," my daughter said. "I wish I could find a case that would hold them all in order! Everything is too small, and it's such a headache to dig through the whole pile every time I want one." Then she smiled and showed me some of the lovely and fun crochet projects she's been working on for Christmas gifts.

Those might not have been her exact words, but I knew what she was really saying with that pretty smile that I can never resist. "Mom, I'm not going to ask you outright, but I really want you to make a case for my crochet hooks. Please. With sugar and cream."

Melt. Of course. Anything for my sweet daughter.

The minute I got home I headed to my sewing room and got out paper, rulers, a pencil, and a calculator. Then I sorted through my stash of fabrics and "stuff" to find what I needed.

Yes! That last little bit of tape measure fabric will do. And, it goes perfectly with this yellow and black floral that I used to make that tote and iPad holder. (For my daughter, of course.)

Oh, and here's a black button, a great zipper, and magnetic snaps. Oh, look! Skinny elastic cord! Happy, happy!

Twenty four hours later ...


As for the crochet hooks ... 


But would she like it?

There was only one way to answer that. Forget waiting till Christmas morning. I was too anxious to have her to check it out. I could alway make another, better one for her if I needed to. 

"I have something for you to look at," I said. "It's just a prototype," I said.

"What is it?" she asked, grabbing it from my hands. (Maybe I handed it to her, but grabbing sounds more interesting.) 

She immediately pulled out her crochet hooks and slipped them in the pockets. Room to spare! Then she found the little pocket and squealed! (Or, perhaps she just said something about it being perfect, but I like the idea of squealing so much better.)

"It's a prototype," I said, pulling hooks out and taking it from her. "I need to improve it for a pattern." 

"But...." Oh, those puppy dog eyes! (She really hasn't made those eyes for years, but don't those words make for a great picture?)

So, in spite of her objections, I brought the case home so I could make a pattern. I hadn't been sure about the pattern idea until I saw her reaction. Perhaps other crocheters could use something like this, too.

I changed the pocket up a bit to make it more spacious and easier to attach. I used different fabric, too. The tape measure fabric is pretty much used up, now. 

Measure, cut, mark, stitch ...

and here it is!


I hope you will like what I've done. 

Happy Stitching!!


Tuesday, December 3, 2013

Mitered Binding - No Hand Stitching!


Use 1/4” seam allowance for all seams.

The photos in this tutorial come from my Craftsy sewing pattern, “Trifold Crochet Hook Case”.

Note: When binding smaller projects like mug rugs and this crochet case, I always starch the fabrics before cutting. Fabrics that are stiffly starched will press firmly in place. This will make a huge difference when the time comes to press the mitered corners of the binding into a perfect 45-degree angle. Corners will keep their shape beautifully with minimal pinning when you do the final stitching on the front of the quilt.
1. Measure the distance around the item you will be binding. Add 6 inches to this measurement to find the length of the piece of binding you will need. (It's always better to be generous in cutting rather than skimpy.)  

2. Cut strips of binding fabric 2 1/4” wide. If you need only a single strip, add 6 inches to the needed length. If you need more than one strip you will need to add the extra 6 inches when your strips are sewn together.

3. Cut the ends at a 45-degree angle.  There are several ways to do this, but I usually use a rotary cutting ruler with a 45-degree angle on one end.


4. Sew the strips right sides together as shown in the photo. Press open. Measure to make sure that you have the extra six inches in length.


5. Fold the length of binding in half and press. It will now measure 1 1/8 inches in width.


Note: you will be stitching the binding to the back of your quilt.

6. Place a pin to hold in the binding in place at the center of one side. Lay the binding along the back of your quilt. The raw edge of the binding should be against the raw edge of the quilt with the folded edge pointing inward.

7. Allow six inches of unattached binding before beginning to sew. Backstitch a few stitches, then stitch to within 1/4” of the corner.


9. Lift the presser foot and turn toward the corner. Stitch diagonally right through the edge of the corner. Remove the quilt and snip the threads.

 10. Turn the quilt. Fold the binding straight up. This will create a diagonal fold into the corner. Then fold the binding back down. Make sure the top of the fold is even with the edge you just stitched. The raw edge should line up evenly with the next side to be stitched.   


11. Stitch down the next side to within 1/4” of the corner and repeat steps 9 and 10.


12. Continue stitching the binding to the edges of the quilt and mitering the corner turns until you are within 6 inches of the pin holding the other end of the binding in place.   Backstitch, remove quilt from the machine and snip threads.

13. Place the two loose ends of the binding together.  Use a pin to mark exactly 1/4” back from the cut edge on the fold of the first section of the binding. Lay the end of the other section of binding right on top of, or tucked right under, the first piece. Make sure the binding lies smoothly along the edge of the quilt.


14. Put a pin through the fold of this end in exactly in the same place as the first pin. This pin will serve as a cutting guide.

15.  Open this end of the binding and lay it right side up on a cutting mat. Carefully measure 1/4” out from the pin toward the uncut end of the binding. You will be adding 1/4” to the binding before cutting it.


16. Cut at a 45-degree angle that matches the angle of the original cut.

17. Place the two ends of the binding right sides together and stitch 1/4 inch from the edge just as you did when attaching strips of binding to each other.


18. Press the seam open. Refold and press the binding. Lay it in place along the quilt edge and stitch in place. Snip threads.

19. Turn the quilt over to the back.  Press the straight seams flat. Don’t press the corners from this side.


20. Turn to the front. Fold the binding in and press all along the sides. At the corner, continue pressing along the same fold.


21. Turn the quilt a quarter turn. Beginning at the corner you just worked on, fold this side over and press. Continue until all sides are pressed in place. Pin.


22. Stitch close to the edge of the binding all around the quilt.

Front and Back Views


That’s it!

Tuesday, November 26, 2013

Cookie Exchange Recipes #2

My house smells like oranges! I just finished frosting this batch of yummy orange and walnut refrigerator cookies. Some we'll eat, and the rest will go in the freezer for now. I can easily do these in advance because they freeze beautifully and retain their fresh taste for a very long time.   

This is my own recipe and it's another or our family favorites. The cookies are full of lovely walnut chunks, frosted with orange buttercream, and garnished with grated semi-sweet chocolate. I'm not sure how this recipe came to be, but it had something to do with my husband liking walnuts and two family members not caring for the sour of lemon. I make them small. Somehow small cookies seem more festive, don't you think?

The recipe is simple and these little guys are truly very tasty and just bursting with the flavor of fresh oranges.   


KAREN'S ORANGE-WALNUT REFRIGERATOR COOKIES
Makes about 3 dozen 2-inch cookies

1 c butter
1/2 c packed brown sugar
1/2 c white sugar
2 tablespoon orange juice
1/2 - 1 teaspoon grated orange rind (or whatever you will get from one medium orange)
1 egg
2 3/4 cups flour
1/4 teaspoon soda
1/4 teaspoon baking powder
1/4 teaspoon salt
1/2 c chopped walnuts

  • Cream the first three ingredients. Add egg, orange juice and orange rind. Mix thoroughly.
  • Sift flour, baking soda, baking powder, and salt together. Blend until smooth. 
  • Stir in walnuts.
  • Shape into rolls about 1 1/2 inches in diameter. Wrap in plastic wrap. 

(I always square the rolls up at this point so that we'll have square cookies)
  • Refrigerate for several hours or overnight. 
  • Slice about 1/4" thick and place 2 inches apart on a very lightly greased cookie sheet or one lined with baking parchment. 
  • Bake in 350 degree oven for 10-12 minutes or until lightly browned on the bottom.
  • Cool completely before frosting

ORANGE-BUTTER FROSTING

3 tablespoons softened butter
2 1/2 cups powdered sugar
1/2 - 1 teaspoon grated orange rind (or whatever you will get from one medium orange)
3 tablespoons orange juice or enough to make a smooth, spreadable frosting
semi-sweet chocolate

Cream butter. Alternate adding powdered sugar and orange juice. Blend thoroughly after each addition.
Frost the cookies and garnish with a bit of grated chocolate.

At this point my two children would come running for their "lickum stick", and each of them grabbed one of the mixer blades and "cleaned" the bits of frosting stuck to the blades.  

Enjoy this beautiful week, and have a wonderful Thanksgiving!

Don't forget to send your cookie recipes to my email address: 2strings@gmail.com


Sunday, November 24, 2013

Cookie Exchange Recipes #1


To share your recipes here, send them  to klee2strings@gmail.com
Don't forget to tell us why the recipe is special. Attach a photo to the email if you have one.
All recipe posts can be seen on the right side of this blog under the heading, "Holiday Cookie Recipe Exchange".


Gaynelle is the first to send in her favorite cookie recipe. Thank you so much, Gaynelle! These raisin filled cookies sound scrumptious.


"I think, of all my cookie recipes, this is my favorite. It is a Holiday Season favorite of ours, a Christmas Cookie made with dear memories of a precious patient.Her family would always bring us a big platter of these cookies during the Holiday Season. I always think of her, and it has been many years since her passing, as she would say,"My name was Carr and I married a Ford" and we would all laugh and eat cookies together.She was a special lady. Her daughter gave me the recipe many years ago as a gift, and I cherish it.This recipe was their grandmother's, so it is very, very old."  from Gaynelle

RAISIN FILLED COOKIES

Dough:

3 cups brown sugar
1 cup Crisco Shortening
2 eggs
1 cup milk
Cream together and add:
2 teaspoons baking soda
3 teaspoons Cream of Tartar
6 cups flour

Mix all together. This makes a lovely, soft, brown dough. Refrigerate at least 30 minutes or more before rolling out. I roll out just small batches at a time. (This also makes just wonderful, plain sugar cookies)

Filling:

1 box of raisins (I prefer the dark brown ones) Cover with water and add sugar to taste, I like mine sweet. Simmer till done, use flour to thicken. (Use a couple spoons of flour to make a paste, drop in the hot raisins, and stir till nice and thick. Cool filling. Cut out the rolled dough. I usually just use a glass, and dip the rim in flour, then cut out my circles. Works great for a cookie pattern. Pinch the edges of the cookie together after you put about a TBSP of filling in it, use the amount you want, or use a fork and dip the tines in flour, press all around the circle of the cookie if you want them to be fancy.
Bake at 375 degrees for 10-15 minutes. Reduce heat to 350 degrees if the cookies seem too brown. I use Pam spray on my cookie sheets.


This wonderful peanut brittle poem was also contributed by Gaynelle. 
She says, "I love recipes in poetry form..."


CHRISTMAS PEANUT BRITTLE
by Myrna Skousen

When it is Christmas candy time,
or any time of year,
This peanut brittle recipe
Becomes especially dear.
You add to one large cooking pan
Two cups of sugar if you please--
One cup white syrup, 1/2 cup of water too
And blend with gentle ease.

A dash of table salt,
When it is added too,
Will mean that you have reached the point
When you must cook the brew.
So cook it to the soft crack stage
And when it's time to add
Two tablespoons of butter
And the peanuts to your pan.

It takes one pound of peanuts
That you've purchased in the shell (2 cups raw)
And shucked yourself ahead of time
To make this turn out well.
With all the ingredients in the pan
You cook until it's brown,
And take your pan from off the stove---
Your candy's almost done.

Stir in one TBSP soda and one teaspoon vanilla,
Pour on a buttered sheet,
And let it harden as it will.
Then break in chunks your treat.
The rest comes very naturally
Just eat to suit your will,
And have a Happy Holiday
That's peanut brittle filled.