Showing posts with label Yellow Purse. Show all posts

Sunday, March 30, 2014

Finished! The new yellow purse is done!

So pleased. The yellow purse looks just the way I had hoped it would look!


I bought a new zipper yesterday, and this time it went in place as slick as could be. We learn so much from our mistakes! I'll never be intimidated by recessed zippers again. Quilted pocket flaps, though, are another story. There must be a better way!


Next time I make a recessed zipper I'll take photos so I can post a tutorial.

In the meanwhile, I'm going to enjoy all of these lovely pockets.


The bag isn't overly large at all, 15 inches wide at the top and 11 inches tall. It has a 3 inch wide base, so it's nice and roomy.


On to the next project! 

What shall it be? 
Mug rug? 
Quilt? 
Another bag? 

Have a lovely day!


Friday, March 28, 2014

The saga of the new yellow purse continued...

I had to put my new yellow purse aside for a quite while as I worked on quilt along blocks and setting up my new sewing room. But, nothing else was pressing to be finished in a hurry, so I got the purse out and worked on it some yesterday and a bit today.

The body of the bag is finished. I added a simple large pocket to the back and stitched up the bottom. That went smoothly, but it's so easy to do. This is what it looked like.


Next, I put the handles together. They are reinforced with pieces of Stiff Stuff. I made them 24 inches long and 1 1/4 inches wide. 
Top side

Underside 

The purse was just a bit deeper than I wanted so I cut an inch off the top before attaching the handles.

The zipper. Oh, my...

I hadn't made a recessed zipper before, so I found an excellent tutorial online. The only problem was that I mis-measured. First off, I followed the tutorial for the width of the insert and the depth of the lining section. Not good. It was simply too wide and too deep for my little bag. In addition to that, I followed the directions for zipper length. It came out too short. I guess that my needs were a bit different than that of the person who made the tutorial.


And did I realize all of this right away? Ha! Of course not! I stitched the zipper to the lining first. Big, big oops! So, out it came. Tomorrow I'll be off to purchase a new zipper. 

In the meantime, this is what I've done with the lining. Lots of lovely pockets! Have I told you that I love pockets in my bags?


I usually put a large, zippered pocket on one side, but I decided to skip the zipper today. The lining is partially stitched along the bottom of the bag, but an opening has been left for turning it right side out when all is finished.

Done for today!

I'm off to cook up some dinner. 
Have a super Saturday, everyone!


Tuesday, February 11, 2014

My New Yellow Purse, Day 3

It' been a busy, busy day at my house. I devoted part of the morning to sewing, but the rest of the day has filled rapidly.

You may not be aware, but gremlins have moved into my house. Very strange things are happening. Two weeks ago I changed the bobbin in my sewing machine. Sounds simple doesn't it? Remove the plastic bobbin cover, remove empty bobbin, drop in new bobbin, replace cover. Simple as pie.

This time, though, I couldn't replace the bobbin cover. It had vanished! Seriously! Just vanished! I searched everywhere - over, under, inside everything. I even dumped my trash can onto the floor and went through it carefully. No bobbin cover. I was sure it would turn up in a day or two, but no such luck.

I finally gave up yesterday and called the shop to order a new one. The paper and scotch tape solution was getting old.

This morning they called me back. They had found one in the back and had it waiting for me! Well, that was a pretty urgent trip, so off I went. 

While I was out I made a stop at the quilt shop a few door down to look at new fabrics. Lots of pretty things, but I was strong! Wonder Karen, no less. I walked away with nothing new! How often does that happen? (Patting myself on the back here.)

Another stop, this time for groceries, then home to bake blueberry muffins to serve to my sewing group ladies who are coming by this evening. I took eight of the muffins straight from the oven and ran them to the neighbors who, once again, had scooped yesterday's light snowfall from my sidewalk. Love these neighbors and their darling little girls!!

Then, down to my sewing room to give it a quick cleanup. One of the gals coming tonight is a true sewing novice and just learning to sew. She's making a t-shirt quilt for her son, and I'm pretty sure she's planning to work on it. Most of the ladies bring handwork, and we'll just all gather and have our giggles and gossip in the sewing room with the whirr of a sewing machine lending a musical background.

Oh! The new bobbin cover! What a welcome change! It's in place, but it's clear, so hard to see in the photo. The gremlins must have found the shiny, clear plastic quite desirable. Not that I really know that much about gremlins. Maybe they just enjoy playing pranks. 


Now that my bobbin has a cover, my wedding band has disappeared! I took it off in the bathroom to put lotion on my hands. I forgot to put it back on right away and now I can't find it. It will likely show up in a drawer or some other odd place in day or two. These gremlins are making me crazy!

I'm sure that in spite of their mischief making, my gremlins are really cute little guys. They probably look a lot like this. :)


On to the sewing.

I had only two hours this morning to work on my purse. By the way, I decided not to worry about the ridge under the piping. So much of it is covered anyway that it won't be obvious at all.

Today I only finished the pockets. It was actually much more work than I'd anticipated, but it's my first time at making pockets with quilted flaps. I've made lots of quilted pockets and tons of pockets with flaps, but quilted flaps are new and more complicated than I'd thought. Sometimes it's a learn as you go process.  I know for sure that I need to come up with a better method.

Oops! Door bell is ringing. I'll need to tell you about the pockets tomorrow!

Have a super evening, everyone!

Monday, February 10, 2014

My New Yellow Purse: Day 2

It's after 3:00 PM - time to put the sewing aside for today. I worked for two hours before lunch and another two hours after lunch - not a bad sewing day at all. My days are too busy with other things to devote more than a few hours to sewing.

(Shhh... this is a secret - just between us! I also tire out from the intensity of focus much sooner that I used to do, but we don't talk about that.)

A change of plans.
The day's sewing began with the realization that my plan to attach pockets between seams just wasn't going to work. The seams become way too thick and lumpy! So I put the pockets aside for later when I will need them, and I went to work on the body of the bag.

First, I cut two pieces of the yellow print 8 1/2" x 17" and two pieces of the gray fabric 6 1/2" x 17". The yellow makes the main body of the purse, and I'm using the gray for the base. I hope the gray won't show the dirt quite as much as the yellow might have if it were on the bottom of the purse.

Everything that follows about the body of the bag was done twice. Once, for the front section of the bag, and once for the back.

Now comes the fun part - attaching my lovely piping between these colors. First, I sewed the piping to the yellow fabric, lining up the seam edges like I did with the pockets yesterday.


Then, I sewed the placed the gray and the yellow right sides together sandwiching the piping between them. I lined up the seams and stitched from the yellow side right on the same line of stitching that secures the piping. I pressed the seam towards the gray.  


Time to quilt! I used a fairly lightweight cotton batting for the pockets, but I chose Stiff Stuff batting for the bag, itself. It holds it's shape beautifully.

Quilting! The same treatment on the yellow that was used on the pockets, but vertical lines 3/4" apart on the gray to give an interesting textural contrast. I drew the lines onto the fabric first.


Then I stitched. Up one line, across in the ditch between piping and gray, down the next line, across the bottom - one continuous line of stitching. It shows best on the back.


Now, I trimmed everything even and squared it up. The gray measures exactly 4 1/2" from the piping seam to the bottom, and the yellow is precisely 7, from the piping seam to the top. That makes a total height of 11 1/2". The width of each piece side is 16". This is what the two pieces of the bag look like after trimming.

Yikes!


Look how those four layers of seams show up on the gray! 

That ridge is even more noticeable in the photo! I wonder how I can make it less obvious.  Maybe I should have quilted the pieces first, then sewn them together. I was trying to avoid a getting seams too thick for sewing together. Hmm...
And on to pockets.

Step one, pocket flap.

First thing I did was to add the "male" part of a small magnetic snap to each of the pockets. A picture is worth a thousand words, they say, so I'll just let these pictures do the talking. 


The short rows of stitches above and below the snap go through the quilted front.
Those few stitches really add to the snaps stability.

Next, I made a quick row of zigzag stitching along the raw edge of the flap. 


You can see how I measured and marked the location for the pocket flaps. Everything had to be centered and made level.


Finally I trimmed the bottoms of the flaps evenly and finished them by sewing to the bag with a tight zigzag stitch.


And that was it for today! 

More to come tomorrow.


Sunday, February 9, 2014

My New Yellow Purse

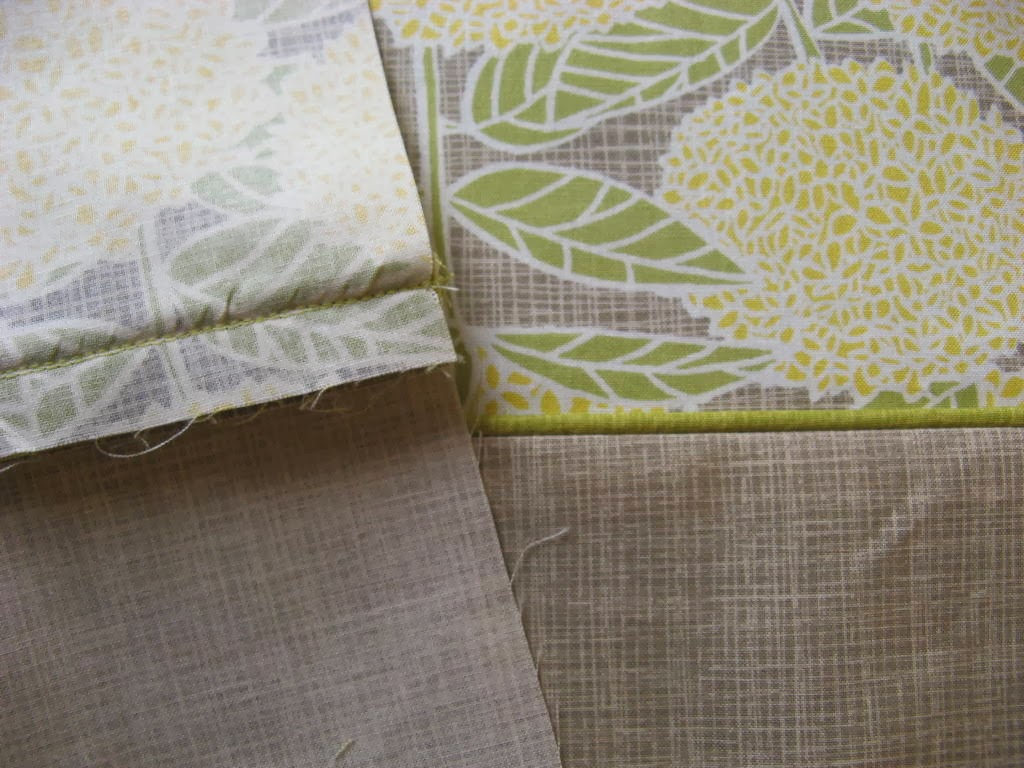
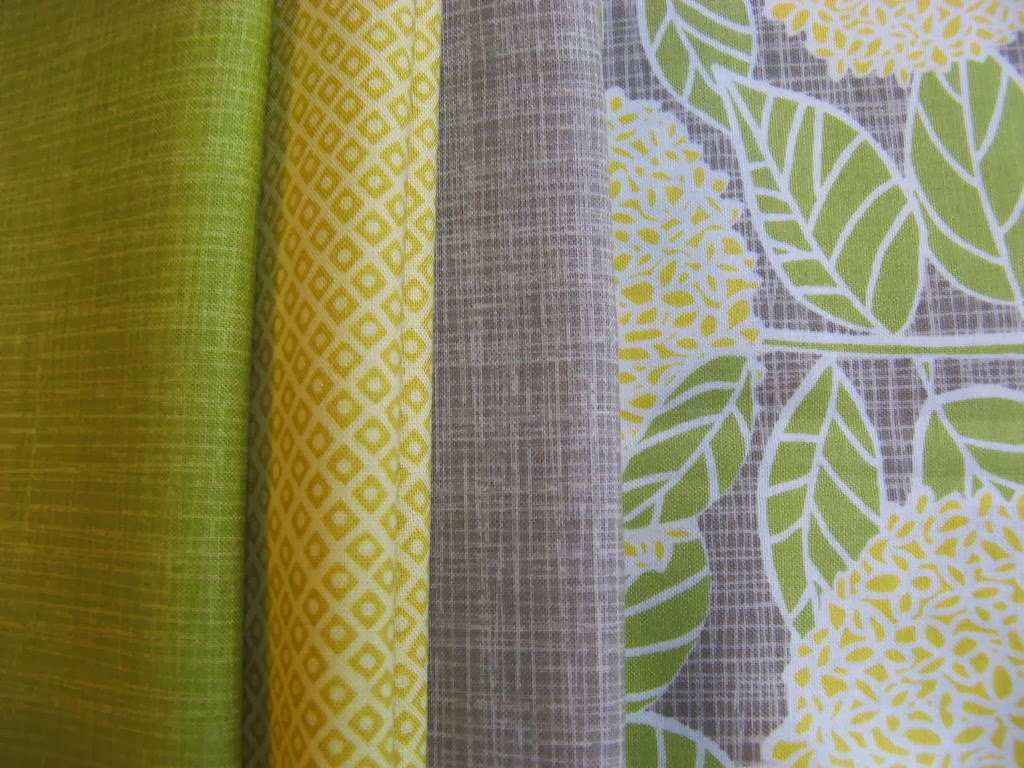
I found these fabrics last week.

Actually it's more like they found me. I was completely innocent. I swear! I just walked into one of my favorite quilt stores to get a fat quarter of something and this fabric jumped out at me shouting, "Me, me, me! I want to be a purse!"


I don't know about you, but sometimes my resistance is at zero. And, truth be told, I desperately need a new purse. Maybe three. The old ones are totally, without question, completely worn out.

I'm going to try to keep a journal about the whole purse process on this blog. I'd be delighted if  you'd like to follow along and sew with me. Measurements are all in bold type so you'll know exactly what I'm doing.

Now for the pattern. Oh, yes, I could easily go to Craftsy and download a lovely pattern. There are literally hundreds to see. But, I have this thing about liking to make my own designs. Nothing is ever quite exactly what I want. As I've said, I can't follow a pattern to save my soul. By the time I'm done tweaking it will have become something else. May as well start from scratch.

So I began mentally sketching it out. A germ of an idea formed. I definitely wanted to incorporate piping. I know, totally crazy. So much work! But that's another side of me. I don't mind lots of fussy work. I enjoy it, in fact. And this purse is just for me. I don't know if I'll write a pattern or not because it really does have a lot of detail and it won't go quickly.

After three days of experimenting on paper and in my head I finally came up with a plan. This is it. Incomplete, but enough for me to begin work.

The purse will be mid-size. I usually prefer either small purses or big totes, but the fabric in this one needed a bit of space to show off. It will measure about 10" tall and 15" wide at the top. The base width will be 11".  Two pockets with flaps on the outside because I like to keep my cell phone and my sunglasses within easy reach. I haven't decided if I should place a big pocket on the back, but I might do that. I love having lots of pockets to keep everything organized. The bag will have a recessed zipper at the top and more pockets on the inside.


Once I start sewing I know that it will have lots of alterations to the plan, but there has to be a beginning.

Today's progress:

1. Make the piping. (This is definitely optional.) The piping I'm using came from Hobby Lobby. I couldn't find the soft, flexible piping in the size I wanted anywhere else. Believe me, I looked!


Next, I cut two strips of the green 2" times the width of the fabric. It will need trimming, but that's good. I want the width of the finished piping piece to be exact.

I folded the piping inside the fabric strips, adjusted my zipper foot to allow me to get really close to the piping and started stitching.

When I had sewn the piping inside both strips of green fabric I needed to trim it. All of my seams are going to measure 1/2", so I used my handy-dandy 1/2" rotary cutting ruler and trimmed away.


2. Make the pockets and flaps. That's right. Pockets first. The reason is that my pockets and pocket flaps be will quilted and stitched into seams in the purse before I quilt the rest of it. At least that's the current plan. 

First off, I cut pieces of fabric, batting, and very thin muslin. I made them large enough to quilt both pockets in one piece and both pocket flaps on another piece. Once again I cut them a bit larger than I'll need because quilting can really alter the size and shape. I cut the pocket pieces 7 1/2" x 14" and the flap pieces 7 1/2" x 10". Then came making the quilt sandwich so all would be ready to quilt.


The free motion quilting was so much fun! It took awhile to decide how the flowers should be quilted, and I went for a simple suggestion of petals - so easy! 


After quilting the section for pocket flaps I realized that the inner quilting on every vein of the leaves was just not necessary. So, on the pockets section I quilted around the leaves and down the main vein only. The difference shows on the back, but one the front it can't be noticed at all.

Pocket flaps come first, both the right side and the lining. I cut them from the pattern I had made and began to began the job of adding piping.


(If you'd like the pattern for the flap, just send an email to klee2strings@gmail.com and I'll get it right to you.)

 I lined the cut edge of the piping right up agains the cut edge going around the pocket. Then I stitched as close to exactly on the stitching line from making the piping as I could. Going around the corners is just a bit tricky. The piping will fold out and away from the pocket when it's finished, so I needed to use easing to make sure that it wouldn't pull too tightly.


Once the piping is on the quilted section of the pockets it needed to be snipped so the seam allowance wouldn't pull in. You can see that happenning as I stitch around the corner in the photo above.


Next, I actually basted the pocket lining to the front! Folks prefer even to skip pinning. Not much basting goes on anymore, but I really needed to bast if I wanted that lining to stay in place when I sewed it. 

Then, once again with the zipper foot, I sewed the pieces together from the quilted side trying to follow as closely as I could to the original stitching lines.


Trim, turn, iron. This is looking good!


Pockets are up next. I cut two pocket front and lining pieces in 7" x 7" squares. Then I drew a 1/2" seam around three sides of the pocket. I know, overkill perhaps, but that's the way it was. I do want these pockets exactly the same. I stitched right on the lines, trimmed, turned and ironed.


Oops! I had mis-measured! Oh, no! 
The pockets are 1/2" too narrow!


Okay. No choice. Make new pockets from scratch. That took the wind out of my sails, but they are finished and just right. Whew!

The last two photos may be misleading. The pockets really are sewn on three sides. The open end is on the bottom because that will be sewn into a seam as will the top of the pocket flap. I think.

Enough for today! Time to fix dinner. Tonight I'll do some crocheting while getting my "Downton Abbey" fix.

Continued sewing and blogging can wait for tomorrow.