Showing posts with label B.O.M. 2016. Show all posts

Wednesday, May 25, 2016

Tutorial: Bias Binding on a Scalloped Edge


I love the curvature of scalloped borders on quilts. It takes a bit of patience to put the bias binding around the curves of the border, but when I buy the most perfect fabrics I can find and spend many days working on a quilt, I'm not about to cut corners at the end. I'm sure there are almost as many ways to bind a quilt as there are quilters. I'll be describing the way I work with bias binding. I'm sorry to say that I know of no wonderful shortcuts for this job. 

I think that most of us are often intimidated by something new, and at first, the very idea of working with bias binding can sound pretty scary. Binding edges with curves does require fabric cut on the bias, so it pays to at least give it a try on practice piece. Attaching binding around a  curved edge is like any other skill. Once you've practiced a bit, the fear almost always disappears.

There are two main disadvantages to working with bias binding.  First, it uses more fabric than straight binding does. In order to get binding sections that aren't too short, large triangles from the corners of the fabric will wind up in the scrap basket.

Then, there is the pinning. I don't know of a way to avoid using lots of pins to get the fabrics to lie flat and smooth in the end.

Other than the need to pin around inner and outer curves, sewing bias binding onto a quilt is very much like attaching any other binding

The "Kitty Craft" quilt shown in this tutorial has been designed with a gently scalloped border.

Part 1: Make the binding. 

160 inches of binding ready to attach.

My favorite tool for measuring 45 degree angles on bindings

1. Measure halfway around the quilt, snugging the tape measure up against the scallops. Multiply by two to get the distance around your quilt. I recommend adding 10" - 12" to that length to determine how much binding you'll need to make.

2. Lay your cutting ruler at a 45 degree angle and cut as many 2 1/4" strips from the fabric as you will need. From here on, the binding is made much like any other binding.


3. Cut both ends of each strip with the 45 degree angle going in the same direction.


4. Lay two strips perpendicular to each other. Stitch the seam with a 1/4" seam allowance.


5. Press the seams open and trim off the little ears.


6. Press the binding in half lengthwise.


Part 2: Attach the binding.

1. Pin the raw edges of the folded binding to the edge of the quilt. Leave a tail of about 6" and start pinning in the area where the outer curve begins to transition to an inner curve. Joining the ends of the binding on an outer curve is easier than it is on an inner curve.

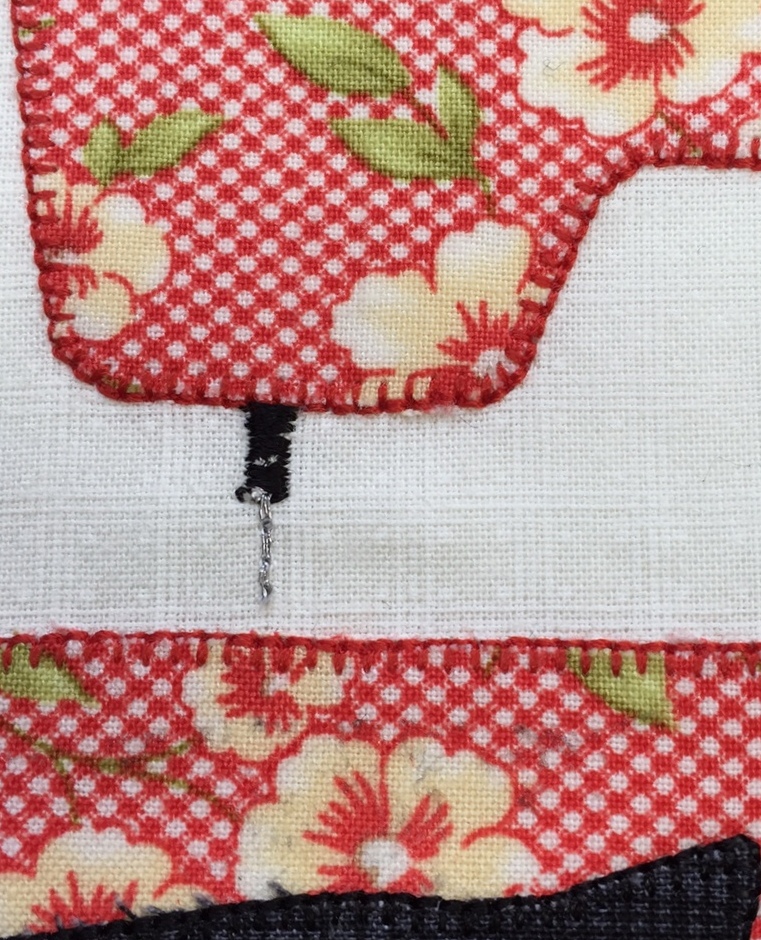
I like to pin and stitch about 2 to 3 feet at a time. Be careful not to stretch the binding as you pin it around outside curves. It shouldn't be so loose that it gathers, but it shouldn't be at all stretched. If the binding is too tight on those curves it won't lie flat when you fold it over and stitch it to the edge of the quilt.  The inner curves need to be treated in exactly the opposite way. Pull the binding nice and snug on those inner curves. That will help to minimize puckering on the inside of the curves. Backstitch to secure the stitches and sew with a 1/4" seam.


2. Stop about 6" or so from the starting point. Backstitch.

3. Lay the binding on the curve bringing the two ends together in the middle. Pinch the ends together and connect them with a pin. 


4. Mark both ends of the binding with pins exactly where the ends need to meet.

5. This next part gets a little trickier. Work with one tail of the binding at a time. Keep your ruler at a 45 degree angle. Align the sewing line of your ruler with the pin exactly on the marked center fold. You need to cut 1/4" on the outside of the sewing line so you will have that 1/4" seam allowance for stitching. Do this on both tails of the binding.

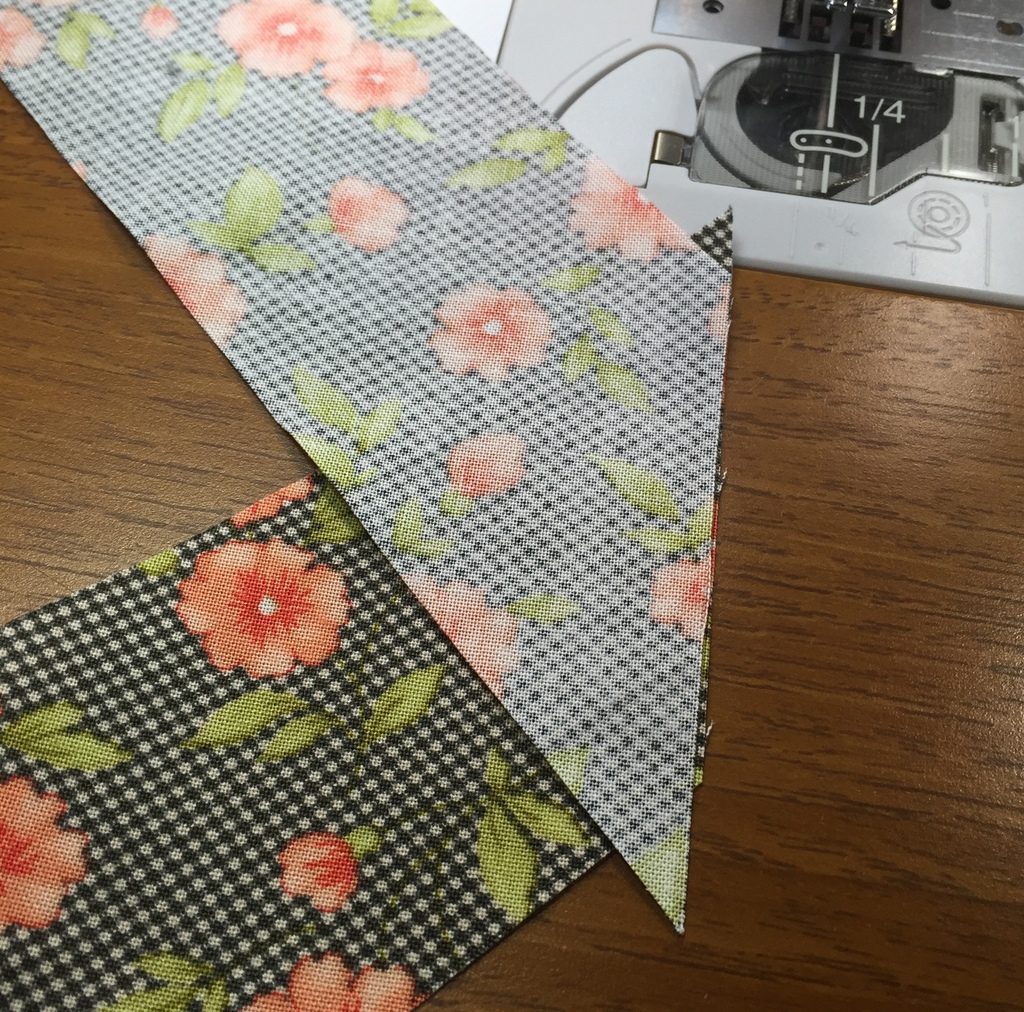
Take extra care to cut those edges at the very same angle! When you go to sew the ends together you don't want to find that one is cut on the opposite slant from the other. I've done that. Not fun. :(


6. Pin the two ends of the binding together. Double check to make sure that the pieces aren't twisted.  Sew in the same way that you sewed the strips together to make the original long piece of binding.

7. Finger press the seam open. Fold and pin to the quilt edge. Stitch in place.

 8. Fold the binding to the back of the quilt and sew it down with neat hand stitching.


9. Press. Place the iron flat on the bound edge of the quilt, press down, and give it a burst of steam. Bias binding has a lot of give. The steam sets it so it will lie smooth and flat on the scallops.


Friday, April 15, 2016

The Last Kitten and Struggling to the Finish Line

I made it! I wanted this last kitten block for "Kitty Craft" to be out by mid April, but, to be honest, I didn't think I'd even come close to my deadline. He's a cutie, but this little guy fought me every step along the way.


The journey with these kitties has been quite an adventure. Fitting a busy kitten or two into a specific space was much harder than I'd imagined it might be. I threw out tons of ideas for crafts the cats might play with simply because they wouldn't stay confined to the shape and size of my blocks.

This last kitten went through quite a metamorphosis this past several day. I was sure I had it all figured out on Monday. I whipped up the block and it looked just fine. My little kitty was so cute looking straight out at me with guilt written all over him. I put him in place on the design board, wrote on the pattern for awhile, and went to bed happy.

When I walked into the sewing room Tuesday morning, though, the kitten looked just plain wrong! As I was designing and stitching the block I'd visualized the little face, but a straight forward silhouette has no face. And his head was too big!

Back to the drawing board! I redesigned and stitched the entire block again in time for a late lunch. It was perfect! I put the kitty in place on the design board. Then I took the companion heart block upstairs to work on writing the pattern. The rest would be smooth sailing. There was only one little star block to whip up quickly and then I'd have most of Wednesday and all day Thursday to finish writing the pattern.

I took the heart block downstairs quite late in the evening, and looked at the design board. The kitten looked funny. It took a few minutes to figure out that to show him trying to get to the flower, he desperately needed a second front leg. Thank goodness he's black! I carefully removed the blanket stitching on the front of his chest, inserted a leg, and stitched the new leg in place. I went to bed very happy.

Metamorphosis of a Kitten

That was the night the gremlins chose to come visiting again. They hadn't played a trick on me in quite awhile, so I guess they thought they owed me a super big one. They stole the hearts!! Honestly, they did. I turned the entire house upside down, searched everywhere - including waste baskets! Now In addition to the star block I had to make the hearts all over again. Sigh. All the pieces were finished and on the design board Wednesday afternoon, but I had no time to write on the pattern in the evening. I did not go to bed happy.

Thursday morning I wrote like a mad woman. By noon my head was woozy, my knees were stiff from sitting, my back hurt, and I definitely needed to get away. I met a friend for lunch and did a bit of shopping. I even took a nap when I came home. The pattern would just be late. 

After dinner, though, I got a second wind, and by the time I went to bed the pattern was finished!

Tonight, I truly will go to bed happy!

Look at that! 
Only one very small block and the borders to go! I just might get the last of the pattern out in May - right on schedule. 
Happy Weekend!


Tuesday, March 15, 2016

Cat In the Sewing Room, & the Hazards of Piecing Stars

Block 3

There's only one appliqued block to go on this little quilt, and the kitty has finally found the sewing room!


I've wanted to make this block from the very start. In fact, the idea of a cat in the sewing room was what got the whole idea for this little quilt going. I just couldn't figure out quite how to make it all fit. I envisioned the cat playing with the sewing machine or sitting on the sewing machine, but I couldn't translate that vision onto a 12" square. When I realized that I had to place the sewing machine in the background, the block came together.

I really enjoyed adding the extra details in this block. The scissors have that little French knot for a screw, and I used my machine's triple stitch to wrap the thread on the spools. I used that same triple stitch for the pins and the sewing machine needle, too. Hand embroidery would have worked just fine, but I've been enjoying this stitch a lot since I discovered it. I'll have to go back to the first block with the yarn basket and use this stitch to show the yarn wrapped on the balls, too.

The triple stitch on my machine.
 My very own, very ancient pincushion served as the model this time. The strawberry needle sharpener was lost long ago.
I'm not sure how I feel about the metallic thread used for the sewing machine needle. It Does it show up enough? 


I almost took this little bump out of the scissors handle. Now, it's nagging at me and I may yet remove and replace that one blanket stitch. Am I being too much of a perfectionist?

 
Pieced friendship stars two ways.

The friendship stars can be confusing! I made the first one with traditional piecing, then went on to make one with the paper pieced pattern. Look what happened! I got the half square triangle patches backwards when I pieced it the old fashioned way, and that one little patch on the upper right is a tiny bit shorter that it should be.  Paper piecing works so much better for me, and it's at least twice as fast.


Spring officially arrives this weekend. My neighbors daffodils are blooming early this year, and I need a new purse. I think the next week of sewing is planned out.


Wishing you a happy start to spring!

Thursday, February 11, 2016

"Kitty Craft" Block for February: Challenges and Do-Overs

I've boxed myself into an even tighter corner than usual with this year's B.O.M. As always, I started with a pleasing layout plan. Because I'd had so many requests for cats,  I'd already decided to use them for the theme. Fitting the cats and other items into specific sizes and shapes of blocks is the foremost design challenge.


This month I chose to let two kittens loose in the craft room.  With one kitten up and one down, I was able to fit them into the tall, narrow block that I needed to fill. One of the kittens has crawled into the pencil pot and the other is playing with scattered pencils. A shoofly block and a set of flying geese are the companion blocks.


The Do-Over

Sometimes it takes another person to point out a flaw, and sometimes that flaw becomes so distracting that there's no choice but to start all over. The block was completely finished when a friend pointed out that my pencils were too fat or my kittens too tiny. Or both.   Here you can see the first attempt and the do-over side by side. The pencils are thinner and the kittens just a tad larger in the final block, and I can sleep better.


The Construction Challenge

Pencils. Pencils have points. Colored pencils have colored points. I didn't realize that those colored points would be a bit of a challenge until I tried to hand embroider one of them. It was awful! The embroidery floss was way too thick, and the point looked like a big colored bump on the end of the pencil. As I've said before, my hand stitching leaves a bit to be desired. 

I moved to the sewing machine, and those points came out very nicely with only four or five stitches forward and back. With either method, I definitely recommend that you practice first.

I started at the very tip of the pencil point, inserted my needle, drew up the bobbin thread, and stitched two stitches in place to secure the thread. With a long stitch (stitch length 4) I stitched forward one stitch right down the left side of the pencil.


Now comes the tricky part. You have to back stitch one stitch and finish in the very same spot where you began your stitch. I messed up several times because I had moved the fabric ever so slightly before beginning the back stitch.


After the back stitch, with the needle still in the same location, angle the needle just a bit and forward stitch one stitch. This stitch will be very close to the first, but not on top of it. Continue as with the first stitch, angling each stitch a bit more to the right and always back stitching into that very same beginning point. Four or five stitches will do it.


Not bad at all. :)


I'm thinking ahead to March. 
What should the cats be getting into next? 

Oh, my gosh! Sunday is Valentine's Day!
Have a lovely one!


Saturday, January 9, 2016

"Kitty Craft", the B.O.M. for 2016 is Underway


I'm so excited! In spite of a week of computer/printer woes, the pattern for the first pair of blocks in this year's Block of the Month quilt is finally finished! 

I've named this wall hanging "Kitty Craft". The quilt combines four large applique blocks containing cats with several smaller pieced blocks. The center section will be 24" x 30", but with borders, the quilt will grow to 36" x 42". I'll plan on getting one pattern pair up each month. If all goes well, the B.O.M. will be completed in June.

I hope you are a cat lover, because this wall hanging is all about cats - cats in the craft room doing exactly what one might expect of them. In this first pattern the kitty has found the yarn basket, and she is having a grand old time. These first two blocks will fill the spaces in the upper right corner of the quilt.

I can easily imagine the single 12" yarn basket block in a mini quilt. It would look great alone with a pretty border, but it could also be combined with the spools block.

The center section will be 24" x 30". 


Full layout plan. 36" x 42".
I love a scrappy look, and this design works beautifully with scraps. This time, though, I've chosen to use fabrics from "Farmhouse Quilts" by Fig Tree on a cream colored background. Other bits will be tossed in, too, of course. I'll use blacks for the cats and a few coordinated smaller prints from other lines.

The pattern includes two options for making the spools block. There are instructions for traditional piecing of the spools block, but, since I much prefer paper foundation pieced patterns for small bits like these, I've added templates for that construction method, too.


I hope you'll join me in a bit of cat play this year. Remember, I want to hear all of your ideas. 
What might the kitty be up to next?


Wishing you a very happy week!