Showing posts with label Autumn & Holiday Projects. Show all posts

Thursday, August 9, 2018

Summer Progress

It doesn't feel like it's been a full two months since I posted here, but it has. I'm just beginning to find my footing in this new reality of life without the support and comfort of my sweet hubby. Summer sunshine, working in my garden, evening walks, visiting with neighbors, and spending time with my friends have been the best therapy possible. 

Etsy Listing,
Craftsy Listing
After I returned from a trip to visit my sister in June, I spent most of the summer setting up my new Etsy shop and writing a pattern for my tote design. I was still unable to come up with new design ideas, so writing the pattern was a welcome challenge.

I would never have gotten through writing the tote pattern without the help of four amazing and very patient ladies who volunteered to test the pattern. I"m afraid that none of us knew what we were getting into when this journey began.

Patterns for bags and totes are not at all like patterns for quilts and mug rugs. In all honesty, I stumbled and bumbled my way through the entire process. My testers were terribly patient with me, and found every one of dozens of mistakes. Every time I fixed one area, I seemed to screw up another. When it finally seemed like the pattern was finished, I got in a hurry and published it too soon. Then, I had to make corrections to the pattern that had already been published - not once, but three times!


These are two of the darling totes my helpers stitched. I'll post more photos when they come in. 

I love sewing bags and designing bags, but it will be awhile before I even consider writing another purse or tote pattern.

With the completion of that pattern, my mental dam cracked, and new ideas have begun trickling through..  The first to reach completion is this pair of rainy day mug rugs. I'm publishing on both Craftsy and Etsy now, so buyers have choices.

  Etsy Listing,  Craftsy Listing


Wishing you a wonderful August!


Saturday, September 23, 2017

Christmas Elves Quilt Along, Block 5: Elf Checking the List

This is very last of the Christmas Elves sections. Now, I need only to sew them together and come up with a border treatment that suits the collection of small and large blocks. This is such a busy quilt, that I think something simple will be best.

Block 5 Patterns on Craftsy

There really is a lot going on in this fifth group of blocks. The elf, the list, the bag filled with gifts, and one adorable puppy make up the main block. The list of names may be my favorite thing from all the blocks. I've personalized it with the names of my children and grandchildren. The names of a few friends and neighbors, some random names, and scribbles round it off. A fine tipped permanent marker made quick work of it all.

There they are - Mandy, BJ, Sara, David, and Tim. I didn't think to put the pups on the list until it was too late.
The snowman and the mittens are basic applique blocks, with a bit of embroidery added to the snowman. The cowboy hat is a bit different from the hats usually seen on snowmen, and gives him a unique flavor.


And now, the wreath. Once again, something unique seemed to be needed. A Dresden plate style in multiple fabrics worked nicely. The block is only 4" square, so the plates are tiny, and there are only twelve instead of the usual twenty. The center of a wreath should be recessed and in the background rather than the foreground. The usual treatment of a circle of fabric stitched on the top just didn't work this time. It looked more like a green flower with a puffy gray center than like a wreath. I finally resorted to fusible web and an empty center for a three dimensional effect. Once fused, the center of the wreath was stitched to the background with my favorite blanket stitch.


The friendship stars can be made with traditional piecing or with paper foundation piecing. I've included instructions for both in the pattern.

The lighting wasn't at all wonderful when I took this photo. The stars are really quite bright and colorful.

I'll start sewing it all together next week. The finished quilt should look so much better than this diagram made of individual photographs.
I can't wait to see how this looks when it's all put together and finished!

Have a super week!!


Saturday, September 9, 2017

Christmas Elves Quilt Along, Block 4: Elf with Packages

This group of blocks was so much fun!

Christmas Elves, Block4

My Facebook followers asked for skates and a toy train, so those items are here. They've also asked for a snowman and mittens, but I'll have to wait to see how or if those will fit in. I love it when people share their thoughts with me. Those ideas really do influence the final designs.

This elf may be in Block 4, but it was actually the very first one I made. It's a bit special for that reason, alone. I love the teddy bear, and this little elf as such a cute face.


The ornaments invited themselves, so here we are with a set of four blocks, all of which are made with applique. That was not really part of the plan, but I think it will be just fine. The block is 10" wide and 4 1/2" tall, so it's just the right size to make a great mug rug, too.


And now, the fun really begins. What is it about toy trains and Christmas? Every year at Christmas my grandchildren played with a little wooden train set whose cars were filled with tiny wooden soldiers. There wasn't space to make a whole train for this quilt, but I am very pleased with this little engine.


The final block I made is the one with ice skates. If you've been following my blog, you will know that I love adding little details. The skates gave me the perfect opportunity. It's all about the laces. Pearl cotton thread was just the right size for the laces and bows. Stitching the laces was almost like lacing real skates. In one side and out the other all the way from the bottom to the top.


 Only one set of blocks to go, and then it's time to sew it all together. The quilt is looking awfully cute and I'm getting excited now. I think I'll redo a couple of the smaller blocks in brighter colors. The gingerbread pair for sure. Don't you think  they look rather dull compared to everything else?

For now, I've positioned the skates and train above the elf block and the ornaments below. I may change that, but I'm not sure yet. It's a work in progress. 

Only one group of blocks to go!


Wishing you a wonderful week!

Monday, July 25, 2016

Ambushed by Tricky Autumn Batiks


Some designs are intentionally planned for a specific purpose, some suddenly appear out of nowhere, and still others are inspired by pure chance.

I was looking for the perfect little piece of green fabric to use in a new mug rug design. The "just right" piece wasn't with my regular green prints, so I went to my drawer of batiks. I hadn't looked at that group in several weeks, and I was suddenly immersed in the lush colors of autumn.  Golds, oranges, browns, plus multiple greens and deep reds screamed "autumn leaves". The fabrics begged to be stitched into something lovely for fall. Ideas swirled around my head in a visual autumn dance.

Ambushed and trapped by own own fabric stash!


The mug rug was forgotten as I plunged into a project for autumn. That was about three weeks ago. I took my time with this one. I love the single block and it's versatility, so I fiddled with placement and changed my mind several times. When it was finished I had two projects rather than just one. One table runner and one square table topper are finished and ready for fall.


I love these batiks!

I made two completely different designs by rearranging the placement of the blocks, but I can envision full lap quilts and bed quilts, too.

The complete block, 8" x 8".
Square Table Topper.
Table Runner
Now, I'll get back to that mug rug! 


Wishing you a super last week of July!

Saturday, July 25, 2015

When Everybody Knows You Can Sew

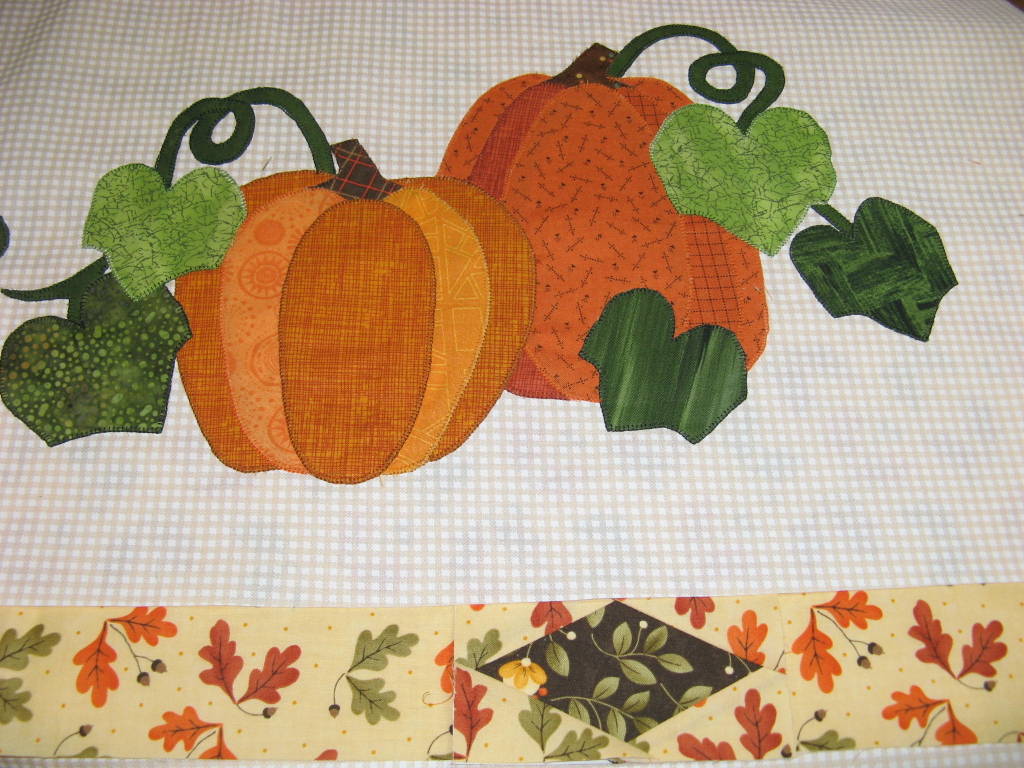
I've been struggling with this pumpkin table runner for several weeks, so I'm not going to talk about it today. I'll just say that more drama with the need for unexpected major repairs plus other crises have not given me enough time to really focus on sewing. Right now, I only know that my original border plan isn't going to work. I'll think about it tomorrow.


This doesn't look good at all. 

Today, I'd rather talk about a situation frequently encountered by that those of us who sew. It's that dreaded conversation that begins with, "You sew, and I just need this one little thing ..." Its usually followed by, "I'll pay you, of course." I feel like a deer caught in the headlights - momentarily paralyzed, not quite sure which way to run.


My high school graduation gift was a Singer featherweight sewing machine that I carried off to college with me. I sewed my own outfits, and I made a bit of spending money by sewing for the other girls in my dorm. I also worked in the drama department designing and sewing costumes. The experience was wonderful for expanding my skills, and the extra cash was more than welcome.

I learned something else, though. I loved to sew, but I absolutely hated custom sewing for others!

I  had no choice in fabric or design, and looming deadlines kept me working much too late at night. I dreaded fittings. People didn't seem to notice all the little imperfections when they'd purchased something factory made. They were disappointed when the finished item didn't look quite the same on them as it did in the artist's rendition on the pattern envelope.  It was so rarely quite what they'd had in mind. My goodness! What did they expect?

So, I don't do custom sewing. Period. I'll sew anything for my family and I'll enjoy every minute, I'll sew surprise gifts, Christmas gifts, and baby gifts, but I don't do custom sewing. I'd rather break my toe!

I don't think that people realize how much time is involved, and they assume they'll be saving money. If they were to pay me at the same rate they pay any other professional service, a plumber for example, the price would be ridiculously high. Just think how much it would cost to shorten a pair of pants at $50 an hour. It would likely cost more than the pants did in the first place. What about a prom dress at that rate?

If I really enjoy this person's company, I might say, "Why don't you bring your fabric over to my house and I'll help you to do it yourself?" More often than not, they'll withdraw the request, but several folks have taken me up on the offer, and a couple of them have actually discovered that they like sewing. More than once I wound up doing the sewing while my friend munched on cookies and chatted away. Only for a really dear friend would I allow myself to be manipulated like that.

"You want me to sew a flower girl dress?" The parent of a student had asked the question. "Oh, my," I said. "I don't know how I'd squeeze it into my schedule. I'd have to take three or four days of sick leave."

I hate being less than honest, but when I couldn't think of anything else, I've been known to say that my sewing machine was in the shop and at the end of a long waiting list for repairs. Fortunately, no one has offered to loan me a sewing machine to do their "one little thing".

When a person needs alterations made, I usually give them the name of someone who specializes in alterations.

The best response is usually the honest truth. "I'm sorry, I sew gifts now an then, but other than that I don't sew for anyone other than my family." I've stopped worrying so much about whether the asker will be offended.

Sometimes it takes awhile for people to get the message. Years ago, the principal of my school asked me if I'd shorten her daughter's gym shorts. She'd pay me, of course. I explained that I don't do that kind of sewing, I only sewed for family and to make gifts. I recommended two places she could go to have alterations made, but she was quite insistent, and she was my boss. I finally relented, but when she tried to pay, I refused, flatly. "I don't sew for profit," I explained. "Consider this a gift," and I walked out of the door. She never asked again.

It's become much easier to say , "no," now that I have this little pattern business. My sewing is more hobby than anything else, but when I say that I simply don't have time, that my business is making patterns, people seem to understand. Before the business that little word, "no," was much harder to say.

I'd really be interested in hearing how you respond to the request for sewing. I'm sure you must have a story or two. Send them to me, klee2strings@gmail.com, and I'll include them in a special blog post.

Wishing you a fantastic last week of July.
Happy Stitching!


Friday, July 17, 2015

Christmas in July 2015

It's the middle of July, the weather is hot and sultry, but Christmas fabrics are filling the shelves in all of the fabric stores. Those fabrics are flying off the shelves faster than they are coming in, too!

My favorite winter holiday is five months in the future, but sewing panic is already beginning to set in. Will I be ready? How many projects do I really need to make this year? What do I need for gifts? How shall I decorate? What on earth can I sew that's at least a little bit different from everything else I've done?

I'm working on new ideas for patterns that will come out later, but some of you may want to get started now. A number of my projects are new since this time last year, and I hope one of these might help you with your holiday quilting plans.

Mug Rugs: 

For easy gifts or handy table decorations, nothing beats mug rugs. They are small enough that they don't take very long to stitch, and your scrap basket will likely already contain all the scraps you will need. They can also be popped into an envelope and mailed for special greeting cards.

If you are really pressed for time, "Mitten Weather" is a perfect choice. There's no need to spend long hours sewing or shopping for fabrics. This one whips together so quickly that you can make a bunch, one for everyone using favorite color combinations.

Find 'Mitten Weather" here:
http://www.craftsy.com/pattern/quilting/home-decor/mitten-weather-mug-rug/117179


"Wrapped and Ready" is one of my favorites. If you love Santa and his elves, this is a perfect project. This whimsical little elf resting after wrapping bunches of Christmas packages is sure to delight any child - or the child in any adult.

Get "Wrapped and Ready" here:
http://www.craftsy.com/pattern/quilting/home-decor/wrapped-and-ready-mug-rug/120846


I've blogged about the "Ice Skates" pattern twice in the past couple of weeks. This is the newest of my patterns and one of the most versatile. The pattern can be used to make a mug rug, a table topper or wall hanging, or even a pillow. Anyone who loves figure skating will appreciate this design.

Get "Ice Skates" here:
http://www.craftsy.com/pattern/quilting/home-decor/ice-skates-table-topper-or-mug-rug/154260

A couple of cardinal families live in the trees in my yard. They are so beautiful that I become mesmerized watching them. It's harder to see them when the trees are thick with leaves, but in the winter they stand out beautifully against the bare trees and the white snow.  A while back I made a pattern, "Four Seasons", to showcase my birds, and cardinals were on the mug rug symbolizing winter. This isn't a new pattern, but it is one of my favorites.

"Four Seasons" is found here:
http://www.craftsy.com/pattern/quilting/home-decor/four-seasons-mug-rug-set/68227


Table Toppers:

Table decor can have a huge impact on the overall look of a room. Table toppers are small enough, too, that they make wonderful gifts that will be appreciated for years to come. 

This square table topper is entirely pieced and contains no applique.  "Shining Star" is easy for a beginner to piece, and since it would look fabulous in any number of color combinations, it doesn't have to be made specifically for a holiday. 

Find "Shining Star" here:
http://www.craftsy.com/pattern/quilting/home-decor/shining-star-table-topper/119907


"Holiday Tabletop Trio" is the most traditional of my table decor patterns. I can't imagine preparing for Christmas without decking my house with poinsettias. Last year, in fact, I didn't have much time at all for decorating, so I put up the tree and filled the house with poinsettia plants. Nothing else seemed necessary. I used this table runner and matching place mats, and everything came together as a theme.  The pattern is actually three patterns in one: a table runner, place mats, and a small table topper.

"Holiday Tabletop Trio" can be found here:
http://www.craftsy.com/pattern/quilting/home-decor/holiday-tabletop-trio/123210


"Snow Family Holiday" is another pattern that works on a tabletop, but I hung it on a wall. There is something warm and wonderful about a family preparing for Christmas together, but a family of snow people is both magical and fun. 

"Snow Family Holiday" is available her:
 http://www.craftsy.com/pattern/quilting/home-decor/snow-family-holiday-wall-hanging/113625


Lap Quilt: 

If you want something to snuggle up under on and cold and snowy day, "Snowball Fight" is just the thing. It can be made either in cotton quilting fabric or in flannel for extra warmth. Mine is flannel, and it's so warm and cuddly. Traditional snowball blocks make the pieced center, and colorful, wooly mittens are strung around the border like Christmas lights.

"Snowball Fight" is found here:
http://www.craftsy.com/pattern/quilting/home-decor/snowball-fight-lap-quilt/10810


Wishing you wonderful early holiday sewing successes!


Tuesday, August 19, 2014

"Snowballs in August" plus two quick tutorials

It's the middle of August, hot and humid, but I've been getting prepared for the cold and snow that are sure to come. I just finished stitching up a "Snowball Fight" in the form of soft, flannel lap quilt. Seasons don't match, but as a pattern maker, I really do have to plan ahead, and winter is really not that very far off.


"Snowball Fight"
It all started with the mittens. I really wanted to do something with mittens, but until I visited my local quilt shop I didn't know that I'd be making a snowball fight. You see, they had brought in these richly colored Woolies Flannels by Maywood.

Of course I couldn't resist touching the fabric. And that was all it took.

Hooked!

Soft, warm, oh so lovely. These were my mittens!

Luckily for me they had 10" layer cakes all ready to go. The idea for snowballs was born just like that!

And the best thing is that the fabrics and the whole idea of the quilt are great for boys as well as girls! How often does that happen?

Mittens + snowballs = ? 
A snowball fight! 
Giggle!
Love at first touch!
In addition to the layer cake I purchased some light flannel for the background, a bit of a deep red yardage for border accent, and a half yard of creamy white to make snowballs that could represent white snow.

How to make snowball blocks in any size you like: 

Start with a squares the finished size of the block. It's best to use a number divisible by three. Three inches, six inches, nine inches, twelve inches, etc. These make the math easiest.

Cut the squares the size of the finished block measurement plus 1/2". My blocks are 6" so I cut them at 6 1/2". 

Then cut four background squares for each block. They need to be exactly one third of the size of the finished block plus 1/2".

Six divided by three equals two. Add 1/2". So I cut my background squares at 2 1/2". Sewing is quick.

Photos tell the story.


Snowballs in the center, a couple of narrow borders, a wide border filled with mittens, and hand stitched scallops stringing the mitten together. 


That's it! Easy peasy! 

Well, except for having to rip out some seams and redo them plus other expected minor catastrophes along the way. You know how it goes. Just normal "stuff".


I really debated about the quilting. I considered spirals, and that idea was well liked by my facebook friends and by my friend, Midge. 

But I was worried. Flannel is thick and this little quilt has batting and a flannel back, too! Making smooth, large spirals on my little sewing machine would be hard enough on a quilt made of lightweight quilting cottons. I didn't even want to attempt stuffing this one into my machine and making large swirls. 

I considered this and that, and then I settled for stitch-in-the-ditch and straight line quilting on the snowball panel. My walking foot came in so very handy for that!

Since the inside was so plain, I decided to quilt the dickens out of the border. And, I was off on the cathedral windows free motion stitching adventure. It's a bit tedious, but I love this pattern!

If well done, the quilting looks like intersecting circles. 


Just one teensy little problem. My circles weren't really circles at all. In fact they were downright wobbly and irregular.  I needed A LOT more practice! 

This is a good sized border, so I practiced away. In fact, I got a ton of practice while quilting this border! It got a little bit better as I moved around the quilt. You can tell exactly which side of the border I started on, but who's going to look that closely?

The first side of my cathedral windows border


Stitching the cathedral window free motion quilting pattern:

Mark a grid on the area to be quilted. I chose a 1 1/4" grid. Smaller is actually easier than larger.


This is how the quilting goes. A diagram shows it best. 


Just follow the arrows. 
Down one square, over to the right, under to the left and repeat till you reach the end of the row. 

Then across to the right, scoop in on left in each square going up the grid till you get to the top. 

Scoop to the right and start over again. 

Draw your own grid or download one from the internet and practice with a pencil for a bit. Then try it on a piece of fabric. 

Here you can see my progress. I'm making my scoops too deep, but I didn't figure that out for a very long time. 


Filling in all around the mittens was a bit tricky, but I have to say, I enjoyed the work. 

I stitched up a cathedral window it each of the white snowball blocks, too. Just to decorate them up a bit. 

I'm really liking this little quilt and I've learned a lot from it as this was my very first actual quilt made of flannel. The soft warmth is perfect for cold winter evenings. 


I had lots of leftover fabric from the layer cake so I put it to use on the back of the quilt. A section of 9" strips inserted in the back cut down on the fabric I needed to buy and added a bit of color as well.


I've been thinking of other ways to work with flannel, too.

If I someday want to make one that's lighter weight, I might consider using a single layer of fleece on the back instead of batting and flannel backing. A cotton backing with the batting would also be lighter weight. For a summer quilt, two layers of flannel with no batting in between might be nice.

Happy stitching, everyone!


Tuesday, December 24, 2013

Home For Christmas - Tutorial

It's Christmas Eve at my house and all is calm and peaceful. Christmas chores complete, no noisy children underfoot, only soft holiday music in the background, and no wet birds, thank goodness.

I pulled out this Christmas quilt a few days ago and settled it on my couch by the fireplace. Of all my quilts, this one may be my favorite.


I love the log cabin pattern and the fabrics, but most of all I love how it reminds me of my mother. It was made to remember her. She was so heartbroken after my father died and wanted only to join him. Less than two years later, on December 15, 2005, in a house beautifully decorated for the holidays, she passed away. Her prayers were answered and she had truly gone home for Christmas. That's how the quilt got it's name.

People often ask me what I did to make the flowers look like they are dancing around vines. I'm sharing the trick with you. You might consider it a Christmas gift.


The finished log cabin blocks are 9" squares. This quilt is rather long and narrow, 4 blocks wide and 6 blocks long. If I were to make it again I think I'd either make it 4 blocks by 5 blocks or 5 blocks square. There are 3 borders, 1/2", 1 1/2", and 2".

The finished dimensions are 44" x 62".

It's all about the fabric choices. It begins with a very large floral background on a light or white background. The petals have to stand out individually with lots of light colored spaces in between. Then, a green leaf print. Again, the leaves should be rather prominent, though the light background isn't required. The rest of the fabrics in the log cabin blocks should be light or rather neutral.

The fabrics I used.
Only this one block is used, throughout the quilt. The numbers on this diagram show the order in which the strips are added.

Cutting measurements for one block. Multiply the number of strips of each fabric you will need for one block by the number of blocks you choose to use.
Strip 1: 1 1/2" x 1 1/2"
Strip 2: 1 1/2" x 1 1/2"
Strip 3: 1 1/2" x 2 1/2"
Strip 4: 1 1/2" x 2 1/2"
Strip 5: 1 1/2" x 3 1/2" 
Strip 6: 1 1/2" x 3 1/2"
Strip 7: 1 1/2" x 4 1/2"
Strip 8: 1 1/2" x 4 1/2"
Strip 9: 1 1/2" x 5 1/2"
Strip 10: 1 1/2" x 5 1/2"
Strip 11: 1 1/2" x 6 1/2"
Strip 12: 1 1/2" x 6 1/2"
Strip 13: 1 1/2" x 7 1/2"
Strip 14 1 1/2" x 7 1/2"
Strip 15: 1 1/2" x 8 1/2"
Strip 16: 1 1/2" x 8 1/2"
Strip 17: 1 1/2" x 9 1/2"

This diagram shows how to assemble  the blocks. They are turned in only two directions for this quilt pattern. 


The finished layout of the blocks after being sewn together. The dancing petals don't show up in this diagram at all. The main reason is that I couldn't find a picture of poinsettia fabric that had leaves as large and a background as light as it needed to be.  The inner green computerized design is also too solid. It should have a very light background with little green showing at all - more like the fabric I actually used. 


This photo shows the borders. The red is 1/2" wide, the floral is 1 1/2" wide, and the green is 2" wide. 


Merry Christmas from my house to yours. Whether home or away from home, may your holiday be filled with joy.