Sunday, November 24, 2013

Cookie Exchange Recipes #1


To share your recipes here, send them  to klee2strings@gmail.com
Don't forget to tell us why the recipe is special. Attach a photo to the email if you have one.
All recipe posts can be seen on the right side of this blog under the heading, "Holiday Cookie Recipe Exchange".


Gaynelle is the first to send in her favorite cookie recipe. Thank you so much, Gaynelle! These raisin filled cookies sound scrumptious.


"I think, of all my cookie recipes, this is my favorite. It is a Holiday Season favorite of ours, a Christmas Cookie made with dear memories of a precious patient.Her family would always bring us a big platter of these cookies during the Holiday Season. I always think of her, and it has been many years since her passing, as she would say,"My name was Carr and I married a Ford" and we would all laugh and eat cookies together.She was a special lady. Her daughter gave me the recipe many years ago as a gift, and I cherish it.This recipe was their grandmother's, so it is very, very old."  from Gaynelle

RAISIN FILLED COOKIES

Dough:

3 cups brown sugar
1 cup Crisco Shortening
2 eggs
1 cup milk
Cream together and add:
2 teaspoons baking soda
3 teaspoons Cream of Tartar
6 cups flour

Mix all together. This makes a lovely, soft, brown dough. Refrigerate at least 30 minutes or more before rolling out. I roll out just small batches at a time. (This also makes just wonderful, plain sugar cookies)

Filling:

1 box of raisins (I prefer the dark brown ones) Cover with water and add sugar to taste, I like mine sweet. Simmer till done, use flour to thicken. (Use a couple spoons of flour to make a paste, drop in the hot raisins, and stir till nice and thick. Cool filling. Cut out the rolled dough. I usually just use a glass, and dip the rim in flour, then cut out my circles. Works great for a cookie pattern. Pinch the edges of the cookie together after you put about a TBSP of filling in it, use the amount you want, or use a fork and dip the tines in flour, press all around the circle of the cookie if you want them to be fancy.
Bake at 375 degrees for 10-15 minutes. Reduce heat to 350 degrees if the cookies seem too brown. I use Pam spray on my cookie sheets.


This wonderful peanut brittle poem was also contributed by Gaynelle. 
She says, "I love recipes in poetry form..."


CHRISTMAS PEANUT BRITTLE
by Myrna Skousen

When it is Christmas candy time,
or any time of year,
This peanut brittle recipe
Becomes especially dear.
You add to one large cooking pan
Two cups of sugar if you please--
One cup white syrup, 1/2 cup of water too
And blend with gentle ease.

A dash of table salt,
When it is added too,
Will mean that you have reached the point
When you must cook the brew.
So cook it to the soft crack stage
And when it's time to add
Two tablespoons of butter
And the peanuts to your pan.

It takes one pound of peanuts
That you've purchased in the shell (2 cups raw)
And shucked yourself ahead of time
To make this turn out well.
With all the ingredients in the pan
You cook until it's brown,
And take your pan from off the stove---
Your candy's almost done.

Stir in one TBSP soda and one teaspoon vanilla,
Pour on a buttered sheet,
And let it harden as it will.
Then break in chunks your treat.
The rest comes very naturally
Just eat to suit your will,
And have a Happy Holiday
That's peanut brittle filled.


A Holiday Cookie Recipe Exchange Party!


It's almost time to start baking for Christmas. My freezer is stacked with butter, the sugar container is full, I've stocked up on chocolate, and all is ready to go. The fragrance of cinnamon and spice and everything nice will fill the house with a holiday spirit and I'll be turning up the volume on the Christmas music and doing a little dance as I mix, roll, cut, and frost several batches of our holiday favorites.

I do hope you'll join me!

Just send your family's favorite cookie recipes to my email address: klee2strings@gmail.com. Please tell us a bit about this recipe - where it came from, what it means to your family, whatever makes it special. Attach a photo or two to the email, if you'd like.

I'll post as many as I can whenever you send them. This is so exciting! I love cookie exchanges!

I'll start.

These gingerbread cookies are a big favorite in our family. It all started with a gift. Long ago, very long ago, in fact, when I was the young mother of a toddler, someone gave me a set of Christmas cookie cutters. Shortly afterwards I happened upon this recipe and that was the end of that! I've tried several different recipes over the years, but we always go back to this one.

Gingerbread Cookies 
The number of cookies will depend on how large you make them, but this recipe makes a LOT of cookies!

1 c. butter
1 c. sugar
1 egg
1 c. dark molasses
2 T. vinegar
5 c. sifted flour
1 1/2 t. salt
2 t. ginger
1 t. cinnamon
1 t. cloves

Cream butter; add sugar gradually. Bean in egg, molasses and vinegar. Blend in sifted dry ingredients. Chill. Roll  1/8 to 1/4 inch thick on floured surface; cut into desired shapes. Place on greased cookie sheets or on cookie sheets lined with baking parchment. Bake at 375 degrees F. for 5 to 15 minutes depending on size and thickness of cookie.

Decorate with icing and candies.

Icing Recipe

2 c powdered sugar
2 large egg whites
1/4 t. cream of tartar
3 to 4 t. warm water

With electric mixer, blend the ingredients on low speed, then beat on high speed for 8 to 10 minutes, or until the mixture holds a stiff peak. If icing is too thick, add a little more water ( 1/4 teaspoon at a time). You want it to hold peak but not be so stiff you can't push it through a decorating tip.

I can't wait to read your recipes!


Wednesday, November 20, 2013

A New Baby, New Blankets

A new great-niece (or is it grand-niece?) will be added to our family in March! It's baby project time at my house!

This little crocheted blanket is one of the items still in progress. Does any crafty person have only one project going at a time? I certainly don't know any who do.

Back to the crocheted blanket. It's been in the works for months! I started in September because I knew it would take forever to finish. The pattern is lovely, but works up very slowly, and I only crochet when I can squeeze it in between other things. Lots of other things! This is what I've accomplished so far. I love this crocodile stitch! The blanket is thick and soft and warm. I'll post a photo when it's totally finished.


With baby on the mind, my newest pattern is another baby blanket. What else?


Babies love the feel of smooth satin, and flannel is soft, warm, and lightweight. I have made many little satin bound flannel baby blankets over the years, and moms are constantly telling me, "This is the one." This is the one that the child wants to cuddle with; it's the one that gets dragged everywhere and becomes tattered; it's the one that can't be replaced and causes tears when it has to be taken away just for washing. 

I've always wanted to make a pieced blanket with satin ribbon, and this just seemed to be the right time to experiment. I really love this one! I took it out to the park behind my house and took a ton of photos!  In fact, I love this blanket so much that I'm having a hard time with the thought of sending it to California. I've already put aside a few items for a future great-grandchild (well in the future) and I do want to put this one into that pile. I might have to make another. Oh my! Heaven forbid! More sewing? (giggle, giggle)

There were some scraps left over and I had an extra package of binding, so I cut a 15" square and bound it with satin to make a little snuggly. The snuggly is small enough to stuff into a diaper bag when there isn't room for a big blanket and it may solve the washing the blanket issue. I may make a bib or two as well, and I can use leftover ribbon to create a taggy. This could turn into a whole set of odds and ends.

Check this one out at my pattern store. The pattern is truly loaded with detailed instructions for every single little step and tons of photos. I tacked on the tutorial for binding with satin as a little (10 page) extra. 

Now, off to the next project. I think that January silhouettes are calling my name!

Happy Stitching!

Saturday, November 16, 2013

Tutorial: Satin Binding on a Baby Blanket

One of my friends is about to become a first time grandmother. She's a quilter and has been sewing like crazy. She knew that I was making a pattern for a baby blanket with satin binding and begged me to show her how to attach it. This tutorial is for her and for all of you who have wondered how to make the binding look neat and professional.

The puppy applique will be found in my Craftsy pattern, “Doggy in the Window” baby blanket.

Finished Measurements: Approximately 34" x 40"

Materials:
·      2 yards of baby flannel
·      1 package of satin blanket binding
·      matching thread

Preparing the Blanket for Binding
1. Prewash two yards of baby flannel in warm water. Prewashing is essential because the flannel will shrink a lot.

2. Press the flannel and cut it in half.

3. If you are adding an applique, do it now, before you put the front and back pieces of fabric together.

4. Lay the two flannel pieces wrong sides together on a cutting mat. The right sides of the fabric will be facing out.

5. Cut through both layers with a rotary cutter to square up the sides. You can usually get a rectangle of about 34” x 40”.

6. Pin the pieces together and stay-stitch around the outside edges of the flannel. You could zigzag or serge the edges instead if you like.

About the Binding

Satin blanket binding usually comes in package containing 4 3/4 yards of 2-inch single fold satin. It is found in most fabric stores on the same display case that contains rickrack, seam binding, and bias tape.

When you examine the bias tape you’ll see that one folded side is slightly wider than the other.

This wider side will go on the back of the blanket.


The cut ends of the binding fray very easily, so care will need to be taken to prevent your binding fraying apart at any seams.
                                                    
Attaching the Binding

1. Lay your unbound blanket on a flat surface. (I use an ironing board.)

2. Open the binding and slid it under one side of the blanket. Make sure the wider side of the binding is against the back of the blanket. Leave about an inch of binding overlapping the corner.


3. Snug the blanket right up against the fold all along this side.

4. Fold the blanket binding up and over the front of the blanket. Pin in place.


5. Set your machine to make a wide zigzag stitch. On my machine the width was set at 5 and the stitch length was 1.4.

6. Do not start stitching right at the corner. Begin about 6 inches in from that. You will need to keep that much the binding unattached for creating a neat corner seam later on.


7. Overlap the zigzag stitch so that it falls partly on the satin and partly on the flannel.

8. Stitch all the way up to the next corner. Lift the needle and cut the thread.


9. Open the binding. Fold at a right angle so that the blanket edge lies snugly up against the fold down the center of the binding.


10. Align the binding on the back first. Fold it into a neat, mitered corner that comes exactly to the edge of the stitched binding. This is really quite easy, but you may need to manipulate it a bit to get it just right. Pin in place.


11. Turn the blanket to the front and lay on a flat surface. Once again, tuck the blanket edge right up against the fold of the binding and pin in place all along the edge.


12. Fold the front segment up to make a mitered corner like you did on the back. Make sure that the front and back folds are in exactly the same place on the corner. Again, this may take a bit of maneuvering. Pin.

13. Begin sewing at the top of the mitered edge. Backstitch a few stitches, then sew forward to the edge of the binding. Make sure your stitches overlap both edges of the binding. If the front and back folds are aligned, the stitches will catch both sides of the back fold just like they do on the front.


14. Turn the blanket and stitch down the next side in the same way you stitched the first side.


15. Continue in this manner stitching sides and turning corners until you reach the last unfinished side. You will be putting a hidden seam in this last corner after you attach the two ends of the binding.

16. Stitch along the fourth side until you are about 6 inches from the end. Backstitch, cut the stitches and place the quilt on a cutting mat.


Note: You will be connecting the two ends of the binding, the end on the first side you attached and the end on the last side you attached.

17. Fold this last section of binding back out of the way so you can work with the binding on the side that you first attached to the quilt.

18. Make sure the blanket edge is snugged up against the fold in the binding. Now, cut the end of the binding 1/4 inch beyond from the side of the blanket with a rotary cutter.

19. Fold this segment of binding out of the way and trim the remaining edge 1/4 inch beyond the side of the blanket.

20. Open up both ends of the binding. Bring the cut sides together and pin.

21. Stitch the ends together with a 1/4 inch seam. Use a zigzag stitch to finish the edge so that it won’t fray out in the laundry after it’s all finished. Press the seam to one side.

22. Working on the last side you added binding to, pin the binding in place. The seam will fall exactly on the edge of the blanket.

23. Zigzag stitch the rest of the binding on this side of the blanket. Start where you left off with a backstitch and sew to the end in the same way you stitched to the corner edge on the other three corners.

24. Open the binding and fold it to miter the corners exactly like all other corners. The only difference is that this time a seam will be tucked away on the inside.

25. Miter the corners as before and pin.


26. Stitch the mitered folds, turn the blanket and stitch along this final stretch back on the first side of the blanket that you worked on.


27. Sew right up to and just over the beginning zigzag stitches. Backstitch.

Cut the threads and your blanket is beautifully bound with perfect stitching on the front and on the back!


Happy Stitching!!

Monday, November 11, 2013

A Do it Yourself Christmas 2013

I just looked at the calendar and had a bit of a shock. Thanksgiving is almost on top of us and we have only six weeks left till Christmas! Where did the time go? There's so much to do, and so very little time!

I'm not the least bit interested in decorating with those expensive, but poorly made items that fly off assembly lines in some far away factory. Not only that, but for the special people in my life, I want to give gifts made by my own hands. I know I'll be be sewing right up to the very last minute, and I will definitely be visiting several of Craftsy's pattern shops to search through the fabulous ideas of some of my fellow designers.

If you are also looking for ideas, I hope you'll drop by my Craftsy shop to see what there is to see. Each of my patterns is easy to make. The piecing is simple and applique is a whiz with quick fusible web.
Just a Few of My Patterns
Ideas For Your Holiday Sewing

I've divided this blog into several very short idea sections. There are decorating ideas, projects for a few special people, and some super fast, last minute gifts. Check them out. You may find something you like. And if you can't find everything you need, do visit the shops of my fellow Craftsy designers.


Decorate Your Home

Set a pretty table, or hang a cheerful wall hanging. My pattern shop has four holiday table runners or wall hangings that make up quickly.  A free pattern, "Two Christmas Table Runners", was posted last December.

Table Runners or Wall Hangings
Scatter mug rugs everywhere. These are perfect for your small tables or your desk. They are just the right size to hold that holiday cup of cocoa and a cookie or two. Mug rugs also fit beautifully on a shelf or in a display amidst your Christmas cards.

Ready for Takeoff

Special Gifts for Special Folks

What to give the new mom? What about a pair of cute bibs and a matching burp cloth?
Elephant Walk
A new apron might be fitting for your favorite cook. This one fits all sizes. 
Coffee Break Apron

Mug Rugs for Everyone

Choose a mug rug that has personal significance for the recipient. Roll a special mug rug, put it in a pretty cup, and you'll have a very thoughtful gift.

Left: Heartthrob and Sunshine Brew  Right: Four Seasons
Several mug rugs were made specifically with children in mind. There's something to be said for having your own little snack mat. Your littles might enjoy "New Toys" or "Just Ducky".

Last Minute Gifts for Desperate Moments

This happens to all of us. You suddenly discover that you are short a gift or two at the very last moment. Don't panic!! Sew up a few of my "Zoom-zoom" coasters. 

If your gift is going to someone who sews, you can throw a mug rug kit together in minutes. Print off a pattern and cut fabric scraps for the piecing, background and border. Add a bit of trim, a spool of thread, a piece of batting, and toss everything into a pretty box. You'll have an instant gift that every sewist will appreciate.
Mug Rug Kit
May you enjoy happy holiday stitching and may all of your projects be done on time!


Sunday, November 10, 2013

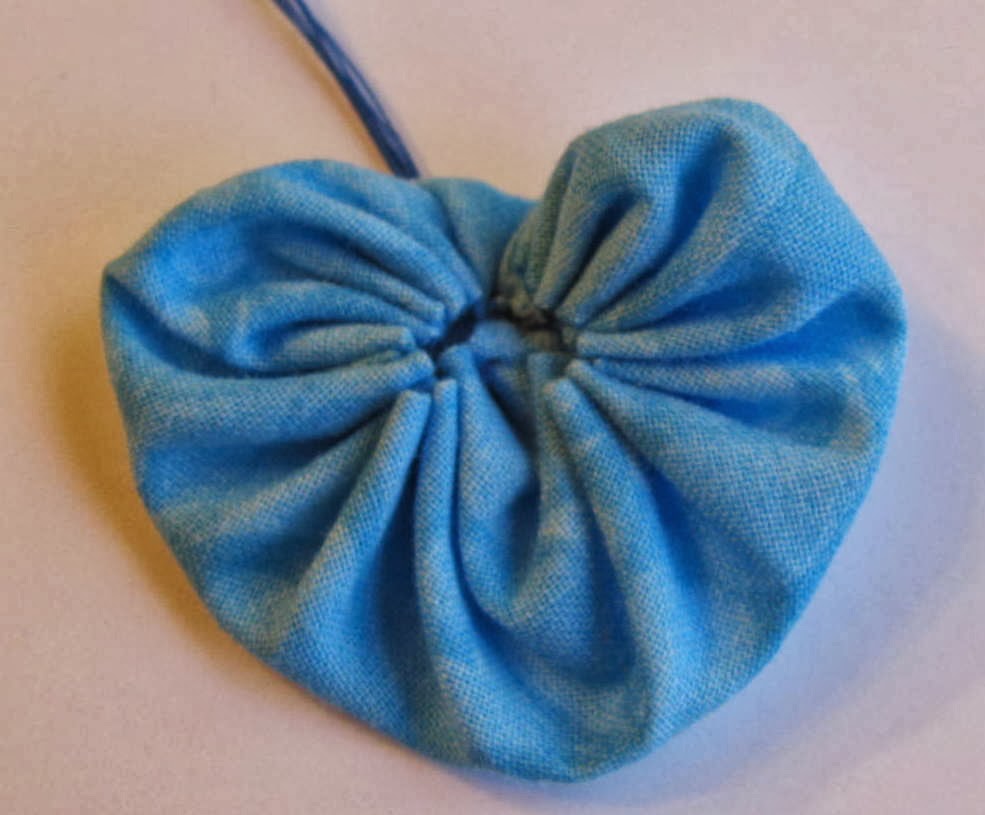
Tutorial: Making a Heart Shaped Yoyo

A heart shaped yoyo is made very much like a round yoyo. The main difference si that it begins with a hearth shaped template. The finished yoyo will be half as wide and half as tall as the template. For a two-inch (2"x2") yoyo, you'll need to start with a four-inch (4"x4") heart.


Instructions:

1. trace around the template directly onto the wrong side of your yoyo fabric and cut out the fabric heart.

2. You'll be working with two strands of thread, one on each side of the heart. A strong thread, like a hand quilting thread, is best for this, but this time I substituted and used a double strand of medium weight thread.

3. Begin at the top center of the heart and work down one side only. Fold the fabric over 1/4" and baste with a long basting stitch. Work from the top center of the heart to the bottom center. Leave 2"-3" tails at either end. 


4. Use a second length of thread to baste the opposite side of the heart. Again, leave tails at top and bottom.


5. Starting at the top, begin gathering the fabric to form nice round curves at the top of the heart.  


6. Take both strands of thread at the bottom of the heart and gather from the bottom up. Adjust gathers as you go to keep the heart shape attractive.

7. Pull all threads tightly into the center of the heart so that there is little or no gap where the gathers come together.


8. Thread a large eyed needle with all threads. Making sure that your heart is centered and has a nice shape, push the needle through to the back of the yoyo. Pull tightly. With the same thread, make another stitch that goes up through front and down again through the back. Make a knot, tie off, and trim the thread.


9. Attach a button to the center of the heart. I like to catch some of the gathers in the stitches as I do this.


Done!!