Thursday, August 27, 2015

A Teacher Request: Cell Phone & ID Holder Tutorial


Between gossip and school chat during a recent back to school lunch with my teacher friends, one of the gals showed us something her teenage daughters had been working on. It's a holder for a cell phone and school ID card that their mom can slip over her belt. It would be especially handy for recess duty or field trips. The girls had a super idea, but they knew it needed to be refined. The case can only be worn on a belt, and it is rather wide. I think that may have been the reason their mom showed it to me. 


The other teachers agreed that the idea was fabulous, and that was all the encouragement I needed. I so love a challenge! "Tell me more," I said, as I pulled my handy dandy pencil and scratch pad from my overstuffed purse. The five of us spent the next fifteen minutes collaborating on design elements.

The minute I got home I headed for my sewing room. Measure this, measure that, make a sketch and I was off to Hobby Lobby with a shopping list. Clear upholstery vinyl, D-rings, zippers, belt clips ... What? They had no belt clips? Okay, what could substiture?  I grabbed a package of ID card clips just in case, and headed home.

Back in my sewing room I pulled a fat quarter from my stash and got to work.  I made two pockets for the front of the case. The larger pocket holds the cell phone, and the smaller, frontmost pocket has a clear vinyl insert for an ID card or favorite photo. There is a zippered pocket on the back for cash, credit cards, driver's license, a few tissues or whatever.

I used the ID card clips that I found at Hobby Lobby for clipping the case to a belt or waistband.

Prototype

I took the prototype over to school for approval. The girls liked it a lot, but I wasn't completely satisfied. The D-ring was great for attaching the case to a lanyard, but to carry it at the waist, the ID card clip had to be clamped to either a belt or belt loop. Without those options the fabric at the waistband had to be pinched and then gripped between the  teeth of the clip. It held securely, but I wasn't completely happy. I really did want a belt clip for it that could slip easily over a waistband or pocket like my hubby's leather cell phone case does.   

I was sure I could pick a few up belt clips at Joann's, but that store is clear across town, so I called first. I was surprised to discover that they nothing at all like that.  I made a few more phone calls. There were no belt clips available at any of the fabric stores or any of the local craft stores - not even online!

The last option was eBay, the source for absolutely anything imaginable. Sure enough, I found just what I wanted.

I'm most definitely not in the business of advertising, but sometimes I feel that I really do have to share products with you. This is one of those times.

This is what I bought - 1 1/2" plastic belt clips available in sets of 10 for $ 10.35 from BuckleRUs. 
This is the eBay link:
http://www.ebay.com/itm/10-100-pcs-Plastic-Belt-Clips-1-1-2-PTC1-/151325176274?var=&hash=item68e1f6a038
I like the new and improved version of the case so much better! 


Now I'm working on stitching up a bunch of them. Four are done and there are a few to go. After all, I do have ten belt clips, endless fat quarters,  and lots of teacher friends. I'm making myself one, too, but since I don't need to carry an ID card, I'll make the smaller front pocket without a clear insert. I can use my own case around the house, when I go walking, or when I dash out on a quick trip to the store or the library.  


The Tutorial: 
Cell Phone & ID Holder

4” x 6 ½”
Fits an iPhone 6 with a bit of space to spare. 


Materials:

·       One fat quarter fabric
·       One small piece of fusible interfacing
·       One small piece of clear vinyl upholstery fabric  
·       One 5” (or larger) zipper
·       Belting, 1” wide x 2 ½” long
·       One rectangular ring, 1”
·       One belt clip, 1 ½”
·       Thread

Cutting:

From fat quarter, cut:
·       Two rectangles, 5” x 7 ½”
·       Two rectangles, 5” x 11 ½”
·       One strip, 1 ¼” x 5”
·       One strip, 2” x 5”
·       Two strips, 1 ¼” x 4”
·       One rectangle 2 ¾” x 5”
·       One rectangle 5” x 5

From fusible interfacing, cut:
·       One rectangle 4” x 7 12”

From clear vinyl, cut:

·       One piece, 3 ½” x 4”


Instructions

Make The Clear Vinyl Pocket 
Use ¼” seams on the insert.

Note: Leave the paper backing of the clear vinyl in place while sewing. Sew with the paper side down against the feed dogs to keep the vinyl from sticking to the sewing machine.  

1. With the right side of the fabric facing the vinyl, sew one 1 ¼” x 4” strip to each of  the two 4” sides of the clear vinyl. Finger press open.

2. Sew the 1 ¼” x 5” strip to the bottom of the clear vinyl. Finger press open.

3. Sew the 2” x 5” strip to the top of the clear vinyl. Finger press open.

4. Press the edge of the 2” x 5” strip of fabric back ¼”. 

5. Tear the vinyl's paper backing away and discard.

6.  Fold the fabric from step 4 down onto the back of the vinyl so that the pressed edge is even with the stitching line. Press.


7. Top stitch on the right side of the folded fabric strip.

Finish the front of the case. 

1. Lay the wrong side of the clear vinyl pocket on the right side of a 5” x 11 ½” rectangle.  Align the pocket with the bottom of the rectangle.  


2. Fold the top of the rectangle over to the back. Stay stitch. The folded piece will make the cell phone pocket.

3. Place the two pockets on the bottom edge of the right side of one of the 5” x 11 ½” rectangles.  Stay stitch. 

Make the Zippered Back Pocket.

Note: I didn't have a 5" zipper, so I used a 7" one. It will be easy to cut to size later.

1. Iron the interfacing onto the wrong side of the remaining 5” x 7 ½” rectangle. Set aside.


2. Lay the zipper on the  edge of the right side of the 2 ¾” x 5” strip of fabric. The zipper pull should face down against the fabric. Align a zipper foot along the edges of the zipper and the fabric and stitch. Fold the fabric back from the zipper and finger press. 

3. Lay the zipper and fabric piece right sides together on the 5" x 5" piece of fabric. Align the edges and stitch with the zipper foot. Finger press the fabric back from the zipper.


 4. Lay the wrong side of the zipper section on the right side of the  5” x 11 ½” rectangle that is backed with interfacing. Open the zipper a bit so the zipper pull will be inside the seams.  Stay stitch all around.

5. Trim off the excess lengths of zipper. 


Finish the case:

1. Fold the belting in half and slip the rectangular ring into the fold. Align against the top edge of the zippered pocket sections, center and stay stitch. 

2. Place the two halves of the case right sides together. The photo below shows them side by side.

3.  Sew all around the case with a ½” seam. Leave an opening at least 2  ½” wide at the bottom of the case for turning.

4. Trim the seam to about 1/4" all around the case, except for the section by the opening. Leave that area of 1/2" seam allowance in place for folding inside when the opening is sewn closed.  Trim the corners very close to the stitching.


5. Turn the case right side out. Gently push the corners out with a point turner.  I used the pointed end of a large wooden knitting needle. 

6. Press the case flat, but don't place the iron directly on the vinyl. Tuck the ends of the open section at the bottom to the inside.

7. Hand stitch the opening closed. 

8. Make a double line of machine stitching right under the belting so it won't pull out. 


9. Attach the belt clip by fitting the free side of the rectangular ring into the small space at the bottom of the belt clip. Snap the belt clip closed. 


Done!!

The last three cases.

Wishing everyone an ever "sew" happy weekend!


Friday, August 21, 2015

School Days!

School has begun and I've been  under the spell of nostalgia for those busy, exciting first days of school when everything felt new and bright. The children arrived with eager faces, looking for friends, and sizing up the teacher with apprehension. We teachers, still fresh from summer and filled with energy, studied the new students, too, as we got to know them and familiarized them with the procedures and curriculum of the new year.

Even after eight years of retirement, I've never overcome the "teaching bug" that has settled deep into my bones. I manage to keep myself involved with my former teammates and get my "kid fix", too, by giving monthly book talks to the fifth graders in my former school.


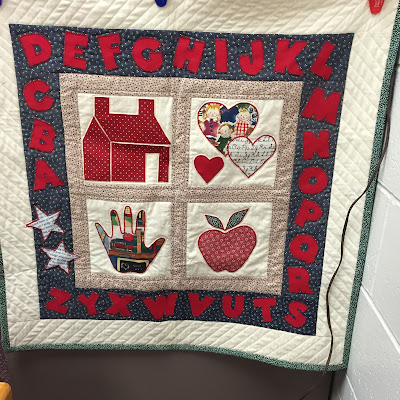
This year, even though I have no classroom or small children in my life,  I've been unable to resist making this little classroom wall hanging. The fabrics called to me. This is actually the first of two wall hangings This one is for pre-school and primary grades, but coming along later will be a wall hanging for upper elementary school grades.

There are mug rugs to go along with it, too. The mug rug patterns are included in the wall hanging pattern, but they are also available as two separate patterns for those who prefer something smaller. One is called "Playmates", the other is "Schoolhouse".

The flag by the schoolhouse might not have been part of the pattern had I not stumbled across a couple of pieces of fabric in my scrap basket. This is why I save those tiny pieces. Of course, if you didn't have the fabrics, it would be fairly easy to add white stripes to a red background fabric and a few white French knots to  a piece of blue.


And there's more for teachers in the works. 

This is the prototype for little case for carrying a cell phone and ID badge. There's a zippered pocket in the back, too. The clip can be attached to a belt or waistband. I'll have another version soon, but I'm waiting for some plastic belt clips to arrive in the mail. My teacher pals were asking if I could make something to keep their ID badge, cell phone, and room keys all together whether they're in the building or on the playground.

I'm going to make myself one, too, but without the see-through window. It would be so perfect for wearing on my pocketless pants whether I'm in the house, walking in the neighborhood, or chasing off to the library.


The first photo shows a change in the strap attached to the D-ring. The webbing is much sturdier than fabric.

I'd love to hear you ideas for improving this for other uses. I could easily come up with two versions.

Right now, I need to clean up the mess down in my sewing room. I won't show a photo! Believe me, it's an embarrassment today!

Have a lovely weekend!

My former school stomping grounds. 


Friday, August 14, 2015

Then and Now: Two School Quilts

I should be sewing autumn and winter designs, but I'm not. I'm sewing quilts with school themes. School has just begun in Lincoln, and even though I've been retired for eight years, I still become infected with the back to school bug every single August. This year, instead of hanging out in the school supply aisles in every store I enter,  I've found myself revisiting an old idea.


About fifteen years ago I made this little wall hanging for my classroom. It was one of my early attempts in working with fusible web applique. When I retired from teaching I gave the quilt to a teammate. It's getting awfully faded, but Shelley still has it hanging in her room. 


 As you can see, I hadn't yet discovered free motion quilting, a blanket stitch, or the idea of using walking foot for quilting. The design is flawed as well, but we all have to start somewhere.

I've decided to make two school quilts this year. One will be for the youngest set, and one will be more fitting for for the upper grades.


This first little wall hanging is almost finished. It would be cute in a classroom, but it would also be sweet for a child's room. I'll finish the binding tonight, and I hope to have the pattern out early next week.

The second quilt will be quite different. The symbols and colors that are perfect for the littles just don't work with older children. The fabrics are chosen, but the overall plan is still in the design stage. One step at a time.

Fall and Winter sewing will just have to wait.

Wishing you a great week!

Wednesday, August 5, 2015

Calico Cats and How to Make Paper Pieced Hexie Patterns in Any Size

I'm quite enamored of this latest mug rug pattern! The whimsical combination of hexies and cats makes me smile. Better yet, the sewing went so quickly that I made the mug rugs in three different fabric combinations.  I know exactly what I will do with them, too.


My good friend, Shelley, loves her cats - all three of her cats. I know that she'd dearly like another kitty, too. In fact, if she were to follow her heart in this there is no doubt that she'd swiftly morph into the "crazy cat lady" with a house filled to the brim with meowing felines.

Shelley has suggested more than once that I should design something for all the cat lovers in this world.   I've also had some requests from my facebook quilting pals. I've been listening, and this is my response.

Note: If you really want a particular pattern, folks, just let me know. Whenever there are several requests, I do my very best to comply.

Next Monday I'm meeting Shelley and some other teaching friends from my old team. Everyone will get a mug rug sometime during the year, but Shelley, who is also the driver on our quilt shop field trips, goes first. She can choose any one of these, and if she twists my arm, I may even let her have more than one.

I think that I'll need to keep one for my little neighbor girl. She's six years old and desperately wants a cat. We have a no pets policy on the two rental townhouses in our building, so she threatened me by saying that they would move. Her parents are thrilled that I get to be the bad guy this time. They've tried to compensate her with a fish, and they definitely wouldn't want a cat even if it were allowed. A mug rug won't begin to take the place of a real cat, but it will be something of her very own.

I rather enjoy making hexies with English paper piecing and stitching them on by hand, but it is quite time consuming. Paper foundation piecing them by machine goes so very much faster, so I've included patterns and a quick tutorial for sewing them in the "Calico Cats" pattern.


You can make your own paper foundation hexie pattern.

It's truly super easy.

1. Draw or download your hexagon in whatever size you like. Now, draw a rectangle around it. The rectangle with be exactly lined up with the flat sides of top and bottom, and it will touch the points of hexagons on the sides.

2. Draw another rectangle with each side exactly 1/4" apart from the original rectangle.

Looks like this:


That's it! Pattern done! What could possibly be easier than that?


Yikes! It's almost back to school time and I have only one teacher gift pattern in my shop.

"Apples for a Teacher"
A quick back to school gift for your favorite teacher.

Have a glorious August week, everyone. 

Happy Stitching!


Thursday, July 30, 2015

Stumbling Over Slow Growing Pumpkins

Pumpkins need a pretty long growing season, but the pumpkins in this patch needed a full year to grow and ripen! I quite honestly may have spent more time on this Pumpkin Patch table runner than on any other of my patterns. We all start those projects that cause us to stumble and, sometimes, to land smack on our faces, and this was one.


I made the pumpkins in July of last year. I had an idea for an autumn table runner, and I'd picked up this very interesting yard of fabric. I started with the pumpkins. The pumpkin sections were all laminated onto the fusible web, cut out and ready to go.

I began piecing the background with absolute conviction that this design would be original, unique, downright fantastic!  I stitched the "interesting" background. Hmm... Not exactly what I'd expected. Then I laid the pumpkin appliques onto the background. Oh my goodness! Not fantastic at all! A total disaster, in fact. The background fabrics were bland and boring and the orange fabrics in the pumpkins looked pretty washed out. No pop. No life. No way. I was so glad I hadn't got as far as removing the paper from the fusible web. I tossed the failed background in with my scraps and packed the pumpkins away for another day.

A year went by and July came around and turned even more hot and muggy than usual. Maybe I was thinking about cooler weather, or perhaps that batch of new autumn fat quarters I'd picked up when we went on our quilt shop hop was the trigger.  For whatever reason, I decided to dig out those pumpkins and give them another try. There seemed to be a hundred interruptions. I had almost given up on the whole idea, but, I refused to quit again. I'm so glad I kept plugging away. The new fabrics made all the difference! Now the pumpkins began to shine. The pretty orange colors really stood out and the green leaves and vines only added to the vibrancy of the layout.

I had one more little stumble with the first plan for the border.  There is a photo of that attempt in last week's blog. It seems impossible, but it was both busy and bland. Sometimes simplicity is the best option. The fabrics are beautiful without any fancy piecing, so I made the easiest border possible, and it worked just fine. The story is done.

A Helpful Side Note

Here I go giving away free advertising again, but now and then I do find something that my readers may or may not have discovered. A few weeks ago, I purchased a product that really did live up to its reputation, and it has made my applique process so much easier. It's this applique pressing sheet. The applique designs can be completely fused together on the pressing sheet, then lifted and moved as whole pieces to place on the quilt. Instead of fiddling with moving every single section of my individual pumpkins to arrange them I was able to lift and move the entire pumpkin in just one piece.


I've had quite enough of year-long projects for now, and it's time to work on something small. New mug rug coming up next week. I hope!

Wishing you a fantastic last few days of July! 


Saturday, July 25, 2015

When Everybody Knows You Can Sew

I've been struggling with this pumpkin table runner for several weeks, so I'm not going to talk about it today. I'll just say that more drama with the need for unexpected major repairs plus other crises have not given me enough time to really focus on sewing. Right now, I only know that my original border plan isn't going to work. I'll think about it tomorrow.


This doesn't look good at all. 

Today, I'd rather talk about a situation frequently encountered by that those of us who sew. It's that dreaded conversation that begins with, "You sew, and I just need this one little thing ..." Its usually followed by, "I'll pay you, of course." I feel like a deer caught in the headlights - momentarily paralyzed, not quite sure which way to run.


My high school graduation gift was a Singer featherweight sewing machine that I carried off to college with me. I sewed my own outfits, and I made a bit of spending money by sewing for the other girls in my dorm. I also worked in the drama department designing and sewing costumes. The experience was wonderful for expanding my skills, and the extra cash was more than welcome.

I learned something else, though. I loved to sew, but I absolutely hated custom sewing for others!

I  had no choice in fabric or design, and looming deadlines kept me working much too late at night. I dreaded fittings. People didn't seem to notice all the little imperfections when they'd purchased something factory made. They were disappointed when the finished item didn't look quite the same on them as it did in the artist's rendition on the pattern envelope.  It was so rarely quite what they'd had in mind. My goodness! What did they expect?

So, I don't do custom sewing. Period. I'll sew anything for my family and I'll enjoy every minute, I'll sew surprise gifts, Christmas gifts, and baby gifts, but I don't do custom sewing. I'd rather break my toe!

I don't think that people realize how much time is involved, and they assume they'll be saving money. If they were to pay me at the same rate they pay any other professional service, a plumber for example, the price would be ridiculously high. Just think how much it would cost to shorten a pair of pants at $50 an hour. It would likely cost more than the pants did in the first place. What about a prom dress at that rate?

If I really enjoy this person's company, I might say, "Why don't you bring your fabric over to my house and I'll help you to do it yourself?" More often than not, they'll withdraw the request, but several folks have taken me up on the offer, and a couple of them have actually discovered that they like sewing. More than once I wound up doing the sewing while my friend munched on cookies and chatted away. Only for a really dear friend would I allow myself to be manipulated like that.

"You want me to sew a flower girl dress?" The parent of a student had asked the question. "Oh, my," I said. "I don't know how I'd squeeze it into my schedule. I'd have to take three or four days of sick leave."

I hate being less than honest, but when I couldn't think of anything else, I've been known to say that my sewing machine was in the shop and at the end of a long waiting list for repairs. Fortunately, no one has offered to loan me a sewing machine to do their "one little thing".

When a person needs alterations made, I usually give them the name of someone who specializes in alterations.

The best response is usually the honest truth. "I'm sorry, I sew gifts now an then, but other than that I don't sew for anyone other than my family." I've stopped worrying so much about whether the asker will be offended.

Sometimes it takes awhile for people to get the message. Years ago, the principal of my school asked me if I'd shorten her daughter's gym shorts. She'd pay me, of course. I explained that I don't do that kind of sewing, I only sewed for family and to make gifts. I recommended two places she could go to have alterations made, but she was quite insistent, and she was my boss. I finally relented, but when she tried to pay, I refused, flatly. "I don't sew for profit," I explained. "Consider this a gift," and I walked out of the door. She never asked again.

It's become much easier to say , "no," now that I have this little pattern business. My sewing is more hobby than anything else, but when I say that I simply don't have time, that my business is making patterns, people seem to understand. Before the business that little word, "no," was much harder to say.

I'd really be interested in hearing how you respond to the request for sewing. I'm sure you must have a story or two. Send them to me, klee2strings@gmail.com, and I'll include them in a special blog post.

Wishing you a fantastic last week of July.
Happy Stitching!


Friday, July 17, 2015

Christmas in July 2015

It's the middle of July, the weather is hot and sultry, but Christmas fabrics are filling the shelves in all of the fabric stores. Those fabrics are flying off the shelves faster than they are coming in, too!

My favorite winter holiday is five months in the future, but sewing panic is already beginning to set in. Will I be ready? How many projects do I really need to make this year? What do I need for gifts? How shall I decorate? What on earth can I sew that's at least a little bit different from everything else I've done?

I'm working on new ideas for patterns that will come out later, but some of you may want to get started now. A number of my projects are new since this time last year, and I hope one of these might help you with your holiday quilting plans.

Mug Rugs: 

For easy gifts or handy table decorations, nothing beats mug rugs. They are small enough that they don't take very long to stitch, and your scrap basket will likely already contain all the scraps you will need. They can also be popped into an envelope and mailed for special greeting cards.

If you are really pressed for time, "Mitten Weather" is a perfect choice. There's no need to spend long hours sewing or shopping for fabrics. This one whips together so quickly that you can make a bunch, one for everyone using favorite color combinations.

Find 'Mitten Weather" here:
http://www.craftsy.com/pattern/quilting/home-decor/mitten-weather-mug-rug/117179


"Wrapped and Ready" is one of my favorites. If you love Santa and his elves, this is a perfect project. This whimsical little elf resting after wrapping bunches of Christmas packages is sure to delight any child - or the child in any adult.

Get "Wrapped and Ready" here:
http://www.craftsy.com/pattern/quilting/home-decor/wrapped-and-ready-mug-rug/120846


I've blogged about the "Ice Skates" pattern twice in the past couple of weeks. This is the newest of my patterns and one of the most versatile. The pattern can be used to make a mug rug, a table topper or wall hanging, or even a pillow. Anyone who loves figure skating will appreciate this design.

Get "Ice Skates" here:
http://www.craftsy.com/pattern/quilting/home-decor/ice-skates-table-topper-or-mug-rug/154260

A couple of cardinal families live in the trees in my yard. They are so beautiful that I become mesmerized watching them. It's harder to see them when the trees are thick with leaves, but in the winter they stand out beautifully against the bare trees and the white snow.  A while back I made a pattern, "Four Seasons", to showcase my birds, and cardinals were on the mug rug symbolizing winter. This isn't a new pattern, but it is one of my favorites.

"Four Seasons" is found here:
http://www.craftsy.com/pattern/quilting/home-decor/four-seasons-mug-rug-set/68227


Table Toppers:

Table decor can have a huge impact on the overall look of a room. Table toppers are small enough, too, that they make wonderful gifts that will be appreciated for years to come. 

This square table topper is entirely pieced and contains no applique.  "Shining Star" is easy for a beginner to piece, and since it would look fabulous in any number of color combinations, it doesn't have to be made specifically for a holiday. 

Find "Shining Star" here:
http://www.craftsy.com/pattern/quilting/home-decor/shining-star-table-topper/119907


"Holiday Tabletop Trio" is the most traditional of my table decor patterns. I can't imagine preparing for Christmas without decking my house with poinsettias. Last year, in fact, I didn't have much time at all for decorating, so I put up the tree and filled the house with poinsettia plants. Nothing else seemed necessary. I used this table runner and matching place mats, and everything came together as a theme.  The pattern is actually three patterns in one: a table runner, place mats, and a small table topper.

"Holiday Tabletop Trio" can be found here:
http://www.craftsy.com/pattern/quilting/home-decor/holiday-tabletop-trio/123210


"Snow Family Holiday" is another pattern that works on a tabletop, but I hung it on a wall. There is something warm and wonderful about a family preparing for Christmas together, but a family of snow people is both magical and fun. 

"Snow Family Holiday" is available her:
 http://www.craftsy.com/pattern/quilting/home-decor/snow-family-holiday-wall-hanging/113625


Lap Quilt: 

If you want something to snuggle up under on and cold and snowy day, "Snowball Fight" is just the thing. It can be made either in cotton quilting fabric or in flannel for extra warmth. Mine is flannel, and it's so warm and cuddly. Traditional snowball blocks make the pieced center, and colorful, wooly mittens are strung around the border like Christmas lights.

"Snowball Fight" is found here:
http://www.craftsy.com/pattern/quilting/home-decor/snowball-fight-lap-quilt/10810


Wishing you wonderful early holiday sewing successes!


Thursday, July 9, 2015

Speed Skating

Ta-daa!!

The ice skate pattern is finished!

One mug rug ...

... and one table topper - or wall hanging, if you prefer.  Wait! You might use only the center section from the table topper as a block in a different quilt, or on a pillow. As I quickly discovered, this is a multi-purpose pattern.


I was almost finished with the sewing on the table topper and mug rug versions of the design when I learned about Anna's need for a way to display her skating level badges. The timing couldn't have been better! If you read last week's blog post you may remember the story of how all of this came about.

What a delight it was to help Anna design her own background for those hard won badges! The child has a mind of her own. I pulled out tons of fabric options from my stash, but Anna was adamant. Bright colors. Pink skates! She chose the fabrics and she chose to have them made into a pillow. I personalized the pillow with letters from my "Alphabet Soup" pattern that spell Anna's name.  Look how bright and joyful this pillow turned out to be. Really bright! Anna loves it.


The pillow cover fits an 18" pillow form. It requires two 19" squares of fabric that are sewn together with 1/2" seams. I added a zipper closure, but that isn't really essential. 

My first choice would have been to place the zipper on the seam at the very bottom of the pillow, but as my fabric was a bit short, the back had to be made in two sections. As a result, the zipper is oddly placed - off center in the middle of the back. I don't think Anna minds that the back of her pillow is less than perfect. 

This excellent tutorial for making a zippered pillow cover is found on the blog, "My Tiny Sidekick". 

Now I need to get to work on the next project. I wish I could make up my mind! I still haven't figured out the pumpkin pattern, and I have an idea for a small basket with matching mug rugs.  I'm imagining something to use for afternoon coffee with friends. The mug rugs could be a bit oversized, but still not as large as a regular placemat, and the basket could hold muffins or cookies. Napkins, too, maybe? In country cottage colors? Red and white, perhaps?

Eenie meenie minie mo ....

Pumpkins, table setting, pumpkins, table setting...

Didn't I just go through this?

Have a lovely weekend, everyone!!
It's July!!


Saturday, July 4, 2015

Cha-Cha-Cha and Winter Ice on the 4th of July


I found this on Facebook a few days ago. It fits me perfectly! I've definitely been cha-cha-cha-ing for quite a while now.


The back and forth dance stepping began two weeks ago when I was trying to decide on a theme for the next pattern.  Cha-cha-cha.
  
Pumpkins ... ice skates ... pumpkins ... musical notes ... pumpkins ... sunflowers ...  There were stacks of fabric everywhere!! Stacks and stacks. I had several piles for every single one of those ideas lined up across my cutting table, and I was running into a brick wall with ideas. It was back and forth for days! Then, suddenly ice skates scooted to the front of the line, and everything fell into place.


I've stitched a wall hanging (or table topper) and a mug rug to be included in the pattern, and here I am today - writing a pattern for ice skates on the 4th of July. I'll publish the pattern later in the week.

There's a story to go with this.

If you happen to be walking across the grass or standing by my front door, my sewing room is clearly seen through a large window just above my cutting table. My neighbor and I share a flower bed under that window. She was working on weeds when she happened to glance into the room and see the ice skate projects I was ready
If you look closely, you can see fabrics on my cutting table. 
She rang my doorbell. "Anna would love these!" she said. "Could I bring her over to look?"

Anna is eight-years-old. I knew she was taking ice skating lessons, but I didn't know that she was rapidly progressing from one level to the next and had already collected three badges. The child is obsessed with skating and I definitely understood. Ice skating was my favorite winter activity ever.

I learned to skate when I was exactly Anna's age. I didn't have lessons, but I became an avid skater. In Sioux Falls, where I grew up, the baseball diamond a couple of blocks from my school was flooded for skating every winter. It was kept smooth and clear of snow for skating until the weather became too warm. There was no charge for use of the rink, so we could skate to our hears content. All winter long our skates went with to us school and from school straight to the skating rink. There was a warming house with a wood burning stove where we could buy hot chocolate and candy bars, but who had time for that when the days were short and we had to get on home before dark? We wanted to skate!

Back to Anna. It turns out she needs a place to display her badges as she acquires them, so I'll soon be working on another project for the ice-skate appliques. What should it be? A bulletin board? A skating tote? A pillow? Anna has chosen her fabrics, but she has more decisions to make.

The skates HAVE to be pink! With blue blades!

Oops, the timer on my stove is binging and I hear potatoes calling. They seem to think that the 4th of July is a potato salad kind of a day. 

Happy Independence Day!!

Saturday, June 27, 2015

Traffic Jams and Roundabouts

This week my brain has been functioning like summer traffic moving through road construction. The traffic is barely crawling and I keep running into unexpected detours. I'm getting nowhere.

The first plan was to do something with the pumpkins that designed last year - maybe a table topper or a table runner. I had a couple of ideas, but when I pulled out my autumn fabrics and sat down to sketch I found myself drawing ice skates. When I was young, ice skating was my very most favorite winter sport ever, so I've wanted to do something with that for a very long time. Skates, however, were not at all what I had planned for this week.

I tried to forget about them and get back to pumpkins, but still, the skates wouldn't go away. I previewed fabric options, but none of them make me go, "Ahh, yes!"

 These are the best of my choices so far.

Our quartet of quilting buddies is heading off on our summer fabric shop hop around southern Nebraska this Monday (hooray!!), so I'm hoping to find the perfect skate fabrics then. I know they're out there. We'll have a lovely giggle-fest, too, and that is so good for the soul.

In the meanwhile, skates have been forced to the side, and I'm back to pumpkins. This detour is taking me around and around in circles!

My fabrics with last year's pumpkins

Square table topper, rectangular table runner or something else? Help! 

One thought.
Maybe I should start all over with a completely different something for this weekend. Something like a quick mug rug, maybe, or that sewing machine cover I need to make.

Then, again, I may just stay away from my sewing room altogether for a few days to give my creative brain a bit of a rest. Maybe it's time to pull a weed or two from my flower bed and wait for the road blocks to come down. 


Wishing you a wonderful week with smooth traveling all the way!


Saturday, June 20, 2015

On Vacation ... If Wishes Were Fishes


"If wishes were fishes, we all have a fry." I could really use a vacation about now, but I'm afraid a real vacation will have to wait awhile. At this moment, though, we are completely finished with workers coming and going along with those headaches of dealing with the house. That's enough to make the days feel as relaxing as a vacation.

Oops. Shouldn't have written that! I'd better knock on wood quickly now! Hope I'm not too late!

Our neighbor girls are unbelievably excited about the new tenants. They've been the only girls in the neighborhood, but the new family has an eight-year-old girl. That makes for two eight-year-old girls and one 6 year-old girl right next door to each other.  The three girls can't seem to get enough of each other,  so we live in a very happy building. There's a whole lot of giggling going on!

"On Vacation" has another meaning this week. After seemingly endless interruptions, the pattern for my vacation themed table runner/wall hanging is finished! Talk about happy dance time!

Making the pattern didn't seem as difficult as getting the photographs for this one. I must have taken twenty or more photos over the past few days, and I'm not entirely thrilled with any of them. Because of that I had a horrible time deciding which photos to use on the Craftsy pattern page. Please pop over there and take a look. Should I choose one of the others for the main photo? I've been switching back and forth half the day, but I'm still not sure.

These are the current first and second choice photos - in no particular order. Both were taken in the same location, but one was in bright sunshine and the other taken later in the day when the area was shaded.


The sunny photo feels more artistic, but the shaded one shows the details of the quilt better. I really would like to hear your opinion on this. There are other photos on the pattern page, too, so several to choose from. It's very easy for me to switch it up. 

I made another trip to the fabric store this afternoon, and this time I came home with some autumn fabrics. These are totally different than my usual color and design choices. Instead of bright whites and softer colors, I'm staring at black and bright, bright orange! I'm also wondering if I've lost my mind. How on earth am I going to make this work?

Have a super week.

And, keep cool!!

We've suddenly jumped straight into summer heat and humidity. Even though I moaned and groaned, I'm going to miss the cool, rainy first part of June. 

I'm ending with a pair of blocks made by Hannah Ford for the Quilt Along 2015. Adorable, aren't they?


Friday, June 12, 2015

Roadblocks!

The Good Part

Let's begin with the sewing progress, because that became the highlight of my week. I wasn't able to even enter my sewing room until Thursday!

I was so excited to finish designing the appliques for the summer table runner!  All are now fused to the background and ready to be stitched in place. If the stars align, the runner may be completed next week. If not next week, then I'll definitely I'll have the pattern out the following week.  Knock on wood! Fingers crossed!

Indoor photos taken on a cloudy day are never the best.
Oh, no! A hubcap has been snitched! 

The trees filled up those empty spaces quite nicely, didn't they?  I may or may not throw in a few little embroidered bits just for fun, but I don't think they're actually necessary.


On to the madness! 

This week's craziness was all my fault. I had told everyone that was we were finished with tradesmen for awhile. I really ought to know better than to say such things out loud. Even thinking them can cause it all to backfire.  Murphy's Law, you know. Self-jinxed again.

Our tenant moved out on Sunday, and when I walked through the empty home the wear and tear of five years occupancy by a man living alone really showed. He'd kept it clean on the surface and was tidy as a pin, but - well, you know.  The work on getting that unit ready began in earnest. We were really fortunate that we were able to coordinate everyone and have it completed in only three days.

Monday
Painters: We'd thought that the kitchen alone would need painting, but it turned out that the entire main floor was in need. Why would a person scrub a painted wall with a scouring pad?

Tuesday
Cleaning crew: So many people simply don't have a clue how to keep bathrooms and kitchens from becoming disgusting, and I swear the baseboards hadn't been dusted since he moved in.
Locksmith: The front door couldn't be opened from outside. A latch wouldn't pull completely open. We had to go in through the garage.
Carpenter/handyman: A bifold door was in the closet and missing a part, there was some damage to the front door that needed to be repaired and sanded, and black, moldy bathtub caulking came out.
Plummer: Replaced a broken kitchen faucet.

Wednesday
Carpet cleaners: Good golly, I thought those carpets would never come clean, but a bit of scrubbing and magic steam pulled out those nasty stains and accumulated dust.
Handyman again: Replaced the old bathroom caulk and the bathrooms looks fantastic.

It positively gleams! Come live next door, and we can be sewing buddies! :)

Tomorrow I'll paint the front door and it will be totally ready for new renters. Fingers crossed that we find the right family soon. We're looking for good neighbors, so we don't rent to just anyone.

Here's hoping that all of us have time to lean back this summer, put our feet up, and put our cares away for awhile.


Sun Down, Feet Up
 Pattern by Two Strings found on Craftsy