Wednesday, March 2, 2016

"Martha's Roses" and How to Make Fusible Bias Tape

The spring table topper is finished! . When I made that big center block, I wasn't at all sure how I'd use it, but I'm really pleased with how this table topper turned out. I've named it "Martha's Roses" after my mother.

"Martha's Roses" (21 ¾” x 21 ¾”)
Mother was an avid gardener, one of those who had plant magic in her fingers. Her garden was filled with flowers, and pink roses were her favorite. From the moment I designed the appliques, this became my mother's piece.

Last fall I worked with fusible bias tape on a stained glass quilt, "First Christmas". It made attaching the bias tape so easy! I had a particular fabric in mind for the bias tape stems on "Martha's Roses", so the commercial tape wasn't going to work at all. How hard could it be to make fusible tape from my chosen fabric?

Turns out it wasn't hard at all!

Homemade fusible bias tape on "Martha's Roses"

I rarely use commercially made bias tape anymore. It's expensive and the colors and widths available are really limited. If you have bias tape makers in various widths, the task is easy, but I prefer the flexibility of making bias tape of any size with simple tools.

Make bias tape.
No bias tape maker necessary.


You will need a hera marker, a straight quilt ruler, and a flat surface for this. Hera markers are inexpensive and readily available almost anywhere that quilting supplies are sold. I bought this one made by Clover for less than $5.00. 

1. Cut bias strips 1/2" wider than the width you need for your finished tape. The tape used on "Martha's Roses" is 1/4" wide, so I cut the strips 3/4" wide. 


2. Longer sections of tape can be made by sewing strips together exactly like you would sew strips of bias binding. 

Place strips at right angles.              Sew with a 1/4" seam. Press open.                  Clip triangle "ears".


 3. When your bias strip is ready, lay it on a flat surface (I use my cutting mat.) with the wrong side facing up. Place your ruler so that it is 1/4" in from one long side of the bias strip. Mark by sliding the round end of your hera marker firmly along the edge of the ruler. The hera marker will crease the fabric and it will fold easily along the crease. Repeat on the other long side of the strip.


4. Finger press the edges down, then take the bias strip to your ironing station. Using your thumb and a forefinger, gently fold the two edges toward each other. Press the edges in and down with a hot iron.

5. The tape is now ready to use. You can use quilt basting glue to hold it in position on your quilt top, or you can make it fusible. 

 Add fusible web to the tape.

1. Slice strips of fusible web ever so slightly narrower than your bias tape. I found that it was easier to work with short sections of fusible web. Lay the fusible web, paper side up, on the bias tape. Iron to fuse to the tape in place.


2. When the paper is removed from the fusible web, the bias tape can easily be shaped and positioned in place with an iron.

 
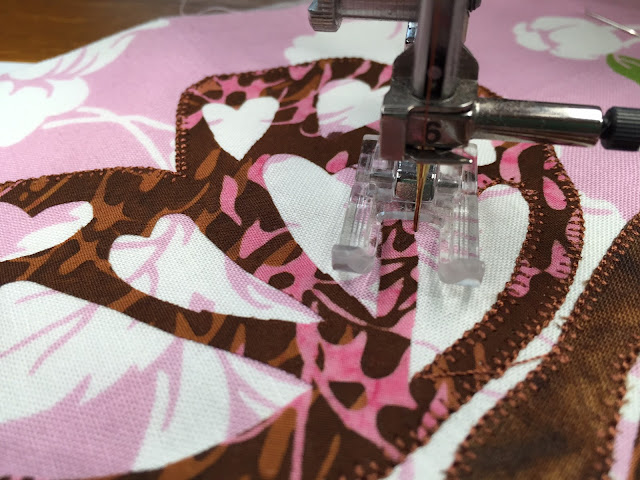
3. Stitch the edges of the bias tape with a narrow zigzag stitch or with a straight stitch.

Other examples of bias tape made with a hera marker: 

1/2" bias tape was used on "Spring Table Runner".

5/8" bias tape was used on the ruffle of this apron. 
(I have not made a pattern for this apron.)

Happy Stitching!!


Saturday, February 27, 2016

Progress and The Splendid Sampler Gallery, Part 1

Coming Soon

It's been a great week for quilting! I've finished sewing my new, spring table topper, and I'll start writing the pattern today. If all goes well, the pattern will be completed and published next week.


The Splendid Sampler

You'll be hearing more about this quilt along in coming weeks. I'll add photos of the new 6" blocks each weekend. There will be 100 blocks altogether. That sounds like a lot of work until you consider it being only two small blocks each week. I would love to share your photos here as well. The Splendid Sampler facebook page has so many photos, that most of them get lost in the crowd. My blog will only have those that you chose to share.   Send your photos to me (kfaripour@gmail.com) and I'll  post all new photos each weekend.

There have only been four blocks so far, but I can tell that I'll enjoy the Splendid Sampler quilt along immensely. I'm already facing challenges and learning new tricks with these blocks, and that's just what I need. A good quilter's workout should really help me to grow. Two blocks a week doesn't seem overwhelming, and the idea of having 100 unique blocks at the end of the process is exciting.

The main fabrics I'm using are from "Mon Ami" by Basic Gray, but I'll toss in others, I'm sure. With so many different kinds of blocks, there are bound to be some scraps from my stash here and there.

If you haven't signed up for the quilt along you can follow this link to learn all about it. http://www.thesplendidsampler.com/


These are my first four blocks.

I did it again. I confess that I altered a couple of the patterns Some of simply can't leave patterns exactly as they are designed. But it's okay! The Quilt Police are a myth! I tipped the heart in the first block and I added a handle and spout to the vase in the fourth block.

Block #2 and Block #3 were challenges for me. Piecing with tiny triangles is a skill that I definitely need to work on. Eventually, I'll remake #2. It's not acceptable at all. I don't like chopped off points.

Your Blocks

From Dixie Moore


Dixie says,

"I didn’t begin tracing the pieces for Block 4 until nearly suppertime because I spent much of the day wrestling with how I want to proceed.  I’m not certain I want to stay with the Fossil Fern collection.  So, I dug up a collection of old-fashioned blues and white that I had from another project I never made. I may want to try that color combination instead. I felt I had to make a few in order to compare. It’s so early in the game, I wouldn’t mind re-doing the other three blocks in the blues and white. I’m sure you feel as I do: I have to love the fabrics and the way they begin to communicate with each other as I do my work. I’m not feeling that, at least not yet, with the Fossil Fern."

The fifth block will be revealed on Sunday! I can't wait!

Friday, February 19, 2016

Quilt Blocks and Banana Carrot Bread

 This week has been wonderful! Not only have I had enough energy to be able to play a bit in my sewing room and in my kitchen, but the weather has been nice enough to open windows and go for afternoon walks.

Sewing Room Play
 
I couldn't wait to start work on a new block design. I'd been toying with it on paper for a couple of weeks and it was ready for fabric. I was determined to use only fabrics that I had on hand. The pink and soft green fabrics felt fresh and spring-like, so that was my starting point. . The first attempt in fabric was okay, but boring. I felt like it really needed more color. I switched out only one fabric, but the difference is dramatic. Today, I'll begin trying to turn this into something - still not sure what, but definitely something. 

One photo taken in the morning, one taken in the afternoon. The colors change in the light.

I've joined a quilt-along group, "The Splendid Sampler", with Pat Sloan and a number of other designers. There will be 100 blocks altogether - two each week. This is the link:    http://www.thesplendidsampler.com/

I'm not at all pleased with my second block, so I may make it over later on. I didn't notice until I looked at the photograph, but some of my points got chopped off. I definitely need to work on perfecting a number of my skills and this is a pleasant and painless way to do so. I'll have 100 blocks at the end, too. A whole quilt!


Kitchen Play


Bananas were overripe, carrots were starting to get dry on the outside, and my golden raisins were almost finished. What do you do when you have food that needs to be used or tossed? This time I did toss it - all into one recipe, and believe me, this is a keeper! It's sweet and moist and simply chock-full of flavor and texture goodness. 


Banana-Carrot-Raisin Bread 

Makes 2 Loaves

Yum!!
2 ½ c sifted flour
1 tsp. baking powder
1 tsp. baking soda
½ tsp. salt
1 c. mashed ripe bananas
1 c. sugar
¾ c. softened butter
3 eggs
1 c. finely grated carrots
½ c. chopped walnuts
½ c. raisins
1 tsp. sugar + 1 tsp. cinnamon for baking pans


Preheat the oven to 350°.

Grease two 9”x 5”x 3” loaf pans.  Mix 2 tsp. sugar and 2 tsp. cinnamon. Sprinkle half of this mixture onto the bottom of each pan. Tip the pan to spread the sugar/cinnamon mixture so it coats the bottom and the sides of the pan.

Sift together flour, baking powder, baking soda, and salt. Set aside.

Combine bananas, sugar, butter, and eggs in a large mixing bowl. Beat on medium speed for 2 minutes.

Stir in dry ingredients. Don’t overmix. Fold in carrots, raisins, and walnuts.

Spread mixture into loaf pans. The pans will be about ½ full. 

Bake at 350° for 50 – 60 minutes, or until a toothpick inserted in the center comes out clean. 


Wishing you a lovely week with lots of playtime! 


Thursday, February 11, 2016

"Kitty Craft" Block for February: Challenges and Do-Overs

I've boxed myself into an even tighter corner than usual with this year's B.O.M. As always, I started with a pleasing layout plan. Because I'd had so many requests for cats,  I'd already decided to use them for the theme. Fitting the cats and other items into specific sizes and shapes of blocks is the foremost design challenge.


This month I chose to let two kittens loose in the craft room.  With one kitten up and one down, I was able to fit them into the tall, narrow block that I needed to fill. One of the kittens has crawled into the pencil pot and the other is playing with scattered pencils. A shoofly block and a set of flying geese are the companion blocks.


The Do-Over

Sometimes it takes another person to point out a flaw, and sometimes that flaw becomes so distracting that there's no choice but to start all over. The block was completely finished when a friend pointed out that my pencils were too fat or my kittens too tiny. Or both.   Here you can see the first attempt and the do-over side by side. The pencils are thinner and the kittens just a tad larger in the final block, and I can sleep better.


The Construction Challenge

Pencils. Pencils have points. Colored pencils have colored points. I didn't realize that those colored points would be a bit of a challenge until I tried to hand embroider one of them. It was awful! The embroidery floss was way too thick, and the point looked like a big colored bump on the end of the pencil. As I've said before, my hand stitching leaves a bit to be desired. 

I moved to the sewing machine, and those points came out very nicely with only four or five stitches forward and back. With either method, I definitely recommend that you practice first.

I started at the very tip of the pencil point, inserted my needle, drew up the bobbin thread, and stitched two stitches in place to secure the thread. With a long stitch (stitch length 4) I stitched forward one stitch right down the left side of the pencil.


Now comes the tricky part. You have to back stitch one stitch and finish in the very same spot where you began your stitch. I messed up several times because I had moved the fabric ever so slightly before beginning the back stitch.


After the back stitch, with the needle still in the same location, angle the needle just a bit and forward stitch one stitch. This stitch will be very close to the first, but not on top of it. Continue as with the first stitch, angling each stitch a bit more to the right and always back stitching into that very same beginning point. Four or five stitches will do it.


Not bad at all. :)


I'm thinking ahead to March. 
What should the cats be getting into next? 

Oh, my gosh! Sunday is Valentine's Day!
Have a lovely one!


Friday, February 5, 2016

Blessing Undisguised

Someone has been watching over us, and I've had a magical week.

My surgery on Monday went perfectly, and my daughter was with me almost the entire day. The snow didn't begin until very late, long after she was home with her dad.

Tuesday, while the wind swept blinding snow into deep drifts throughout the city, nurses pampered me and catered to my every need. In between naps I browsed the internet and came up with several ideas for new patterns. I didn't have my sketchbook, so I filled Pinterest with seed thoughts.

A half dozen phone calls or more calmed my panicked hubby, and he and our daughter spent a wonderful, relaxed day enjoying each other in the most meaningful way.

Public schools and city colleges took a snow day, so my grandchildren were thrilled with having a school day when they could sleep in.  My neighbor bundled up and spent hours playing with his new snowblower. He cleared my driveway and sidewalk several times - partly to help out, but mainly just for fun. To top it off, the groundhog didn't see his shadow so winter is almost over!

The snowplow came by and cleaned out street early Wednesday morning and I came home before lunchtime feeling much better than anyone had anticipated. I'll be having two nap days for awhile, I'm sure, but I think I'll have the energy and focus to work in my sewing room next week.

Yesterday, my new stove arrived right after lunch. The floor underneath the old stove was really dirty, but my deliverymen volunteered to scrub it for me before they set up the new one! As I said, someone has been watching out for me this week.

The new stove is so pretty! I didn't chose a fancy glass top because I won't give up my heavy cast iron cookware or my pressure cooker. Since my house is not set up for gas, the stove is very basic with coil burners. I've been promised that the oven will cook evenly, so I'm as happy as can be.


Last week slapstick comedy dominated, but this week was all guardian angels and fairy godmothers. February is looking good.


Saturday, January 30, 2016

Blessings in Disguise?

My house is clean, groceries are purchased, and I've been cooking and baking like crazy this week. I planned it all out to make sure that everything at home glides smoothly along during my hospital stay and for the first week or two after I get home. I was so well organized with my to do list. What could possibly go wrong?

Famous last words. How did I get trapped in an episode of "I Love Lucy?


One "oops" after another.

Oops #1. Surgery is on Monday. I'm supposed to come home on Wednesday and, as my husband is unable to come to the hospital, my children have been planning to take turns sitting with me Monday evening and most of Tuesday. Now, the weather forecast calls for a blizzard and heavy snow on Tuesday. Eight inches or more, they say. The worst storm of the season, they say. Good grief!

Oops #2. Snow always blows down from the roof and lands right in front of our door and makes deep drifts on our driveway. Ed, who does our snow removal, had surgery yesterday. He'll be available in about six weeks.

Oops  #3. I broke my oven. Honestly. I broke it. It happened like this. I took the blueberry pound cakes out of the oven and turned it off, but, I turned the knob to "self clean" rather than "off". (Why are those two settings right together like that?) Then, instead of hitting "end" to stop the self cleaning, I accidentally hit "start". The door began to lock, so I panicked and yanked it open. I hit "end" again. And again. The oven was getting hotter. So, I raced downstairs and switched off the fuse for the range. After a few minutes I reset the fuse. The oven cooled down, but the lock mechanism for the self-clean is frozen. It sticks out and the door can't close all the way. 

Oops #4. I called the appliance repair folks. With parts and labor charges, replacement of the lock mechanism on the oven is about the same cost as buying a new range! 

Oops #5. I was all done with the second kitty block for the 2016 quilt along. I thought it was a darling block, so I showed it to Shelley, my cat loving friend. "Oh, how adorable," she exclaimed. Then she leaned back and frowned. "Those are awfully big pencils," she said, "or the kittens are awfully tiny. But it's still cute." Oh dear. Back to the drawing board. 
Pencils too fat? Kittens too small? Maybe both.
Blessings in Disguise 

Blessing #1. On Tuesday, I will be in a place with food, electricity, and all the help I need.  My children have promised to stay home and safe if the roads are bad. We have phones to keep the hubby up to date. :)

Blessing #2. My neighbor with the snow blower has offered to help out and clear our driveway and sidewalk of snow! Good neighbors are a true blessing.

Blessing #3. The burners on the stove work fine, so, although baking came to a halt, I made potato-bacon soup and two stove-top casseroles. In the process, I invented a new casserole recipe that my hubby really likes.

Blessing #4. I'm getting a new range! My range is ancient. The oven temperature is uneven and one burner is unpredictable, but I've been putting off replacing it. Delivery is scheduled for Thursday, the day after I come home from the hospital.

Blessing #5. I've started fiddling with the quilt block design a bit today and I'll have some time to work on it tomorrow. The pattern will be delayed until later in the month, but it will be so much better with everything more proportional.

A final blessing - 
Slowly, but surely, we are moving toward spring. 
February, the month of love, is only two days away!!


Sunday, January 24, 2016

Getting Ready for Surgery and Chicken Noodle Soup

I've been putting off this surgery, but I want to get it done quickly now so that I'll be fully recovered and full of energy before summer. I have no qualms about showing my age on the outside, but when the insides start to droop, life can become just a bit uncomfortable. Best to hitch it all up before it becomes a real problem.

The procedure is scheduled for a week from tomorrow, and that means I have a long, long list of things to do this week.

I'll spend two nights in the hospital, so I bought new pajamas first. I grabbed a couple of pairs of sweatpants, too. Petites are too short, mediums, too long. Sweats get shortened today. It's on my list.

Don't tell anyone, but since I was so close to the quilt shop across town I dropped in. Just to look around, and  ...  I know, fabric wasn't on my list. Hush! Don't tell!

Among other things on list, I'm doing some advance cooking for my freezer. I started yesterday with an easy soup, of course. Chicken noodle this time. In case you hadn't noticed, I do love soup, and it freezes so well for those times when there simply isn't time or energy to cook a meal.


This soup starts out with aromatic veggies and chicken broth for the base just like most of my other soup recipes do. The rest is pretty basic, and exact proportions are completely up to the cook. I used my crock pot so I could leave the soup cooking while I ran errands, but this soup turns out just as well if it simmers slowly in a pot on the stove top.

If making this with chicken thighs instead of breasts, the chicken broth can be eliminated.

Chicken Noodle Soup
 
Ingredients
  • 1/2 chicken breast, cut into bite size pieces
  • 12 oz. chicken broth
  • 1 medium onion, chopped
  • 2 cloves garlic, minced
  • 1/2 cup carrots, chopped
  • 1 stalk celery, diced  
  • 1 T parsley flakes
  • 1 sprig fresh rosemary
  • 1 sprig fresh thyme
  • 1 bay leaf
  • 8 oz. fettuccine or egg noodles
  • salt and pepper to taste
  • water

1. In a heavy skillet, saute onions until translucent.

2. Add garlic and chicken breasts. Flavor with salt. Saute until the chicken pieces are lightly browned on all sides. 


3. When the chicken is browned, place all ingredients except the noodles into a slow cooker or a stew pot and cover with water. Allow to cook until the vegetables are tender and cooked through.

4. Add the noodles and enough water to completely cover them. Simmer for another 15 - 20 minutes or until the noodles are cooked.

Serve. 

I'll post more about my preparations for surgery next weekend. I've only made a dent in my to do list. 

Have a beautiful last week of January!


Thursday, January 21, 2016

Sailboats, Beef Stew, and a Question

It's been a cold, typical January week, but while I sat at my desk bundled in fleece, I concentrated on summer, sailboats, and the deep blue sea.  The summer thoughts resulted in a mug rug, and the keeping warm resulted in comforting beef stew. 

The Sailboats

Blue skies, blue sea, and two sailboats ride the waves. I'm so looking forward to warmer weather. 

"Sailboats"

Old-Fashioned Beef Stew

I wouldn't exactly call this a recipe because I basically tossed some beef and veggies into a pot and let it simmer, but this is how I made it. I didn't start this until mid afternoon, so I cooked the stew beef in a pressure cooker while I was getting everything else together. If you have more time the stew beef can be cooked in a pot before adding the vegetables. I much prefer using fresh herbs, but I was limited to the ingredients in my pantry.

Yum! Beef stew with a crusty baguette on a cold winter's night.


Ingredients: 
The measurements are estimates because I tossed in what looked good to me. You will need to adjust the vegetable proportions and quantities to suit your own taste.
  • 1 T olive oil
  • 1 medium onion, chopped
  • 1 lb. stew beef
  • 2 cloves of garlic, finely chopped
  • 4 stalks of celery cut into 1" strips
  • About 1 1/2 cups of baby carrots
  • 3 or 4 small to medium potatoes, cut into 1 1/2" cubes
  • 1 T dried parsley flakes
  • 1 bay leaf
  • A pinch of dried thyme
  • A sprinkle of ground cloves
  • 3/4 c frozen green peas
  • Salt & pepper
  • Water 

    Almost done. This is gently simmering, but peas haven't yet been added. 
    1. In a pot or pressure cooker, saute onions in olive oil until translucent and lightly golden in color. 
    2. Add stew beef to the pot, brown on all sides. Add water to cover and cook until tender.
    3. Toss all the other ingredients except for the peas into the pot. Add water to cover the veggies. Some of this will evaporate during cooking, but if you like the stew to be more soup like, you can always add more water.
    4. Cover and simmer on medium low heat until the veggies are cooked through and the juice has thickened. (30 minutes to 1 hour
    5. Add the peas into the pot. Simmer for another 5 to 10 minutes to heat the peas through. Serve.
    The Question


    I'm working on an idea for a quilt about sewing/quilting. I want to place some words on it, and I'd like your input. Rather than the names of tools or items used in sewing, the words should be more descriptive of feelings or thoughts you might associate with it. What words come to mind when you think of sewing or quilting? 


    Keep Warm!!


    Wednesday, January 13, 2016

    Valentine Butterfly Kisses and Other Sweet Things

    Valentine's Day is coming up, but sweetness can come at any time of year. I've had a very sweet start to my week.

    My daughter spent Sunday afternoon with us just because she hadn't seen us in a week, my son brought me chocolates yesterday for no reason at all, I've received several sweet notes from customers who have made my artistic efforts so very worthwhile, and I had a brain flash that resulted in a mug rug filled with love.

    You know how one random thought can lead to another. I was trying to come up with an idea for a very quick Valentine's Day pattern for this year. The day is all about love, and I had a flashback to my babies. Sometimes I miss them those sweet little hugs and their fluttery, butterfly kisses.

    When I thought of them, I knew that butterfly kisses were exactly what I wanted for this project.  I do believe that a butterfly kiss in fabric might look something like this.

    I chose some romantic fabrics from my stash, but wouldn't this be sweet in kiddie fabrics? 
    The mug rug is really very easy, but cutting out and stitching around the little heart cutouts can be tricky.

    These are some tips that may be helpful.

    1. Use a very small, sharp scissors when cutting out the hearts. It can be hard to manipulate corners and small curves when you are working through the double layers of fusible web and fabric.

    2. If you are stitching the appliques with a buttonhole stitch, you should definitely shorten the stitch to take it around those inside curves. I adjusted the width to be narrower as well.


    3. Practice using the blanket stitch before starting. I don't usually have to go around so many inside curves with my blanket stitch, and these are very tight curves, so took it very slowly.

    4. If the blanket stitch is new for you, or if you want to review using it for applique, check out this page on my blog.


    Wishing everyone a week filled with sweetness!
    I'll be nibbling on chocolate while I work on the next project.


    Saturday, January 9, 2016

    "Kitty Craft", the B.O.M. for 2016 is Underway


    I'm so excited! In spite of a week of computer/printer woes, the pattern for the first pair of blocks in this year's Block of the Month quilt is finally finished! 

    I've named this wall hanging "Kitty Craft". The quilt combines four large applique blocks containing cats with several smaller pieced blocks. The center section will be 24" x 30", but with borders, the quilt will grow to 36" x 42". I'll plan on getting one pattern pair up each month. If all goes well, the B.O.M. will be completed in June.

    I hope you are a cat lover, because this wall hanging is all about cats - cats in the craft room doing exactly what one might expect of them. In this first pattern the kitty has found the yarn basket, and she is having a grand old time. These first two blocks will fill the spaces in the upper right corner of the quilt.

    I can easily imagine the single 12" yarn basket block in a mini quilt. It would look great alone with a pretty border, but it could also be combined with the spools block.

    The center section will be 24" x 30". 


    Full layout plan. 36" x 42".
    I love a scrappy look, and this design works beautifully with scraps. This time, though, I've chosen to use fabrics from "Farmhouse Quilts" by Fig Tree on a cream colored background. Other bits will be tossed in, too, of course. I'll use blacks for the cats and a few coordinated smaller prints from other lines.

    The pattern includes two options for making the spools block. There are instructions for traditional piecing of the spools block, but, since I much prefer paper foundation pieced patterns for small bits like these, I've added templates for that construction method, too.


    I hope you'll join me in a bit of cat play this year. Remember, I want to hear all of your ideas. 
    What might the kitty be up to next?


    Wishing you a very happy week!


    Thursday, December 31, 2015

    New Beginnings, a Few Goals, and Quilt Along Ideas

    Where does the time go? Another new year is about to begin and I am so not ready!

    New Beginnings

    I'm especially not ready for the idea that my granddaughter is getting married in June! My sweet little baby girl who loved dolls, princess dresses, my purses, and my red shoes is getting married?

    Somebody pinch me, please.
    Yesterday

    I only blinked!

    My sewing goals for 2016

    1. I hope to make a wedding quilt. 
    "Hope" is the key word here. If I don't have it finished in June, I really hope to have something made by next Christmas. It wouldn't really have to be a bed quilt, would it?

    2. I'll be working on a new quilt along - this one with cats. More about that in a minute.

    3. My brain is numb right now, but I can surely come up with a few new mug rug and table runner patterns this year.

    4. Once again, I'm going to try to use my stash as much as possible. Technically, new purchases are part of the stash, aren't they?

    The 2016 Quilt Along 

    One of these years I'll surprise myself and everyone else by making a full size quilt for the quilt along. This year it will be another wall hanging. The plan is to make it 28" x 36" before adding the border.


    I'm planning to place cats in five large blocks. The cats will be engaged in a different activities in each block.

    I haven't decided if they should be silhouette cats or not. What are your thoughts on that?

    The smaller blocks will be pieced. I'm thinking of simple basic blocks - stars, flying geese, log cabins, and such. Since they are so small, I'll likely use paper piecing or a mix of paper and traditional piecing. 

    I'd really like to hear your opinions about this plan. Yes? No? Maybe? Anything but cats? Tell me your thoughts.

    I'd also like your thoughts on a quilt for the newlyweds. I haven't clue what I might sew. 

    Wishing you a wonderfully happy and creative New Year!!


    Saturday, December 26, 2015

    Fuzzy Comforts and Christmas Spaghetti with a Secret Ingredient

    It's the day after Christmas and all is quiet in our house, exactly the opposite from yesterday's wonderful hustle and bustle, laughter and cookie snitching. The family began arriving around 9:30 in the morning and stayed for the entire day. We started with breakfast and ended with our famous Christmas spaghetti dinner. (The recipe is below.) We were too full of cookies and good food to have any interest in dessert. I am truly blessed.

    We are in no danger of being cold this winter. My son dressed us all in matching fleece jackets, and I handed out five warm fleecy robes. Yes, they were finished, and with time to spare!


    There is nothing that needs doing today. Such a luxury! I've spent the whole day lounging in my chair reading the latest Inspector Gamache novel by Louise Penny, and I have no intention of doing anything more energetic than that.

    Christmas Spaghetti Sauce With Meatballs 
    (and a secret ingredient)


    I was so busy enjoying my family that I forgot to take photos of our dinner table. The spaghetti was served with fettuccini and accompanied by lots of fresh veggies and warm garlic bread.

    This is a large recipe. There were seven of us, and I made a full crockpot of sauce so that there would be plenty left to send home with everyone.

    Once again, the measurements for ingredients are close estimates, but not exact. I don't usually measure at all, but I let my taste guide the proportions. I made the sauce the day before Christmas, then reheated it and added the secret ingredient on Christmas day.

    Meatballs
    I don't add herbs or spices to the meatballs because they absorb their flavor from the sauce as it simmers.
    • 3 pounds ground beef
    • 2 medium onions
    • salt and pepper to taste

    1. Chop the onions in a food processor or grate them.
    2. Thoroughly mix all ingredients together. 
    3. Shape into balls. I made the meatballs about 2 inches in diameter, but smaller is fine.
    4. Brown the meatballs. 
    5. Refrigerate until needed.
    Sauce
    • 1 tablespoon olive oil
    • 2 medium onions, chopped
    • 6 - 8 cloves garlic, finely diced
    • 1 bunch (about 1 cup)  of fresh parsley, chopped fine, or 2 tablespoons dried
    • 1/2 cup fresh chopped basil leaves or 2 teaspoons dried
    • 3 bay leaves
    • 3/4 teaspoon dried oregano
    • 1/2 sweet green pepper, diced
    • 1/2 sweet red pepper, diced
    • 3 or 4 baby carrots, grated
    • 4 cups cooked, chopped tomatoes (I used tomatoes that I had prepared and frozen during the summer, but canned is fine.)
    • 2 small cans of tomato sauce (8 oz)
    • salt and pepper
    • 1 can condensed cream of mushroom soup (This will add flavor and thicken the sauce at the same time.)
    • 3 or 4 cups of water 
    • salt and pepper to taste
    The Secret Ingredient
    • 1 - 3 oz. Bristol Cream Sherry (Another high quality cream sherry would do, but don't use cooking sherry or dry sherry.)  
    1. In a heavy skillet, fry the onions in the olive oil until they are golden brown.
    2. Add the garlic, parsley, and basil to the pan. Continue frying on medium low heat until the herbs are wilted.


     3. Add the peppers grated carrots. Fry for another minute or two. 


    4. Pour the contents of the pan into a crockpot. Add the tomatoes, tomato sauce, mushroom soup, salt and pepper. Stir until blended.

    5. Add enough water to give the sauce a nice consistency - not too thick, but not watery.
    6. Place the meatballs in the pot. Cover and cook on low for 6 hours or more. This can simmer all day if you like.
    7. About ten minutes before serving pour an ounce or two of the cream sherry into the sauce. Stir and taste. More sherry can be added if you like, but be careful not to overwhelm the the other flavors with the sherry. The sherry should sweeten the sauce a bit with a unique, but subtle fragrance and flavor.

    Enjoy!


    Now, to get back to my book. I love this series!!