Thursday, April 27, 2017

Sara's Quilt, Block 9, Tutorial

All of the blocks for Sara's Quilt are finished!! The patterns and tutorials are all mixed up in order, I know. It's just another example of how my brain bounces around from this to that at random.
Block 9, 10 1/2" x 10 1/2"


This was the final block that I made for Sara's Quilt, but there will be one more tutorial on my blog for block 7. The Dresden blocks will need a template, so that will be on Craftsy as a free pattern. Just more confusion, I know.

I can't believe that I forgot to take enough photos for this block! As a result, writing this blog took ten times as long as it would have if I hadn't had to make all of the diagrams. Sometimes I am such a scatterbrain! Sigh...

The diagram will be a useful guide to fabrics and their placement.

Eight different fabrics are used.
Cutting Instructions:

1. From each of the reds in the top row, cut one 2 1/2" x 2 1/2" square and one 3 1/4" square. Cut the 3 1/4" squares in half diagonally. 
2. From the Medium Red, cut four 3 1/4" squares. Cut each in half diagonally.

3. From Cream 1, cut four 2 1/2" squares and four 3 1/4" squares. Cut the 3 1/4" squares in half diagonally. 

4. From Cream 2, cut four 2 1/2" squares.

5. From the Center Cream, cut on 2 1/2" square.

Make half square triangle patches: 

1. From each of the main red fabrics you will have two triangles. Sew the triangles into half square triangle patches as shown. 

Sew one triangle of each with a Cream 1 triangle. Sew the other triangle with a Medium red triangle. 


2. The patches will be slightly larger than needed. Trim each to a 2 1/2" x 2 1/2" square.


 3. Four Medium red triangles and four Cream 1 triangles will remain. Sew each Medium Red triangle to a Cream 1 triangle to make four half square triangle patches. Trim each patch to 2 1/2" x 2 1/2" as before. 

Assemble the block.

Arrange the patches into rows and sew together.  


Next up, Block 7.
We are nearing the end.


Saturday, April 22, 2017

Two Patterns and Light at the End of the Tunnel

All of the blocks are finished - but I'm not celebrating quite yet.

When I saw  all of the blocks on my design wall, I realized that the quilt will need sashings and cornerstones. I love almost every one of my blocks, but except for the Dresden plate blocks, the quilt looks too crowded for my taste. I think I need to redo the center Dresden block as well. It's 1/2" smaller than the others and in the photo, I can tell that that small difference will be exaggerated when I add the sashings. I may change the fabrics on one other block. Can you tell which one doesn't quite seem to fit?

With 1" sashings, Sara's quilt will grow to 56" x 56" without a border. I'll consider whether or not to add that later. If the quilt gets too large, I won't be able to quilt it on my sewing machine. That may or may not be a good thing. More decisions to make later.

I've also added two free paper foundation patterns on Craftsy, Block 6 and Block 8. Either of these blocks could have been made with traditional piecing, but I got lazy. It was so much easier to draw the paper piecing patterns than it was to figure out all of the cutting measurements. Math really is my weakness.

Block 8

Block 6
There will be two more tutorials on my blog this week, and then, I think the entire pattern for Sara's quilt will be finished. I'll be happy dancing for sure when the entire quilt is done!!

Heigh ho, heigh ho. Off to work!


Monday, April 3, 2017

Spring Dance and Other Spring Mug Rugs

This mug rug makes me smile. I do love spring.


When my daffodils came into full bloom a week or so ago, I knew that I had to make a mug rug for them. I added a crocus for color, even though crocuses bloomed earlier. The butterflies haven't made an appearance yet, but the ants are out, so the butterflies will be fluttering about in no time. I used my artistic license card and tossed them all on the same mug rug. I love that card!

I know I've said this before, but when there several small pieces in an applique, it really helps to use an applique pressing sheet. I put each flower together one layer at a time. The pressing sheet is almost clear, so with my layout sketch underneath, it was easy to see where to place each piece of the applique. When a flower was completed, I peeled it off the sheet in one piece to arrange on the background.

The layering process.


A bit of embroidery adds detail. You know that I love those little details. I used free motion quilting to add depth and movement. The butterflies and daffodils really do seem to be dancing in the spring breeze.

Easter, May Day, and Mother's Day will be her soon, so here are a few other mug rug ideas for the season. All can be found in my Craftsy pattern store. https://www.craftsy.com/profile/2strings-s-pattern-store

2015 Quilt Along, Bunny and Basket
 
Mom Mug Rug

Lily Mug Rug
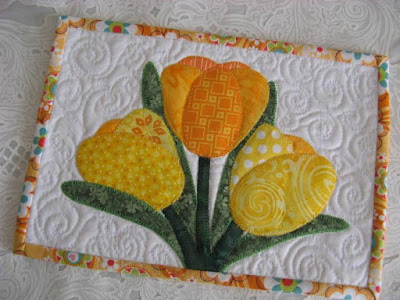
Spring Tulips Mug Rug
Baskets for Mom
Have I missed a spring flower in my mug rugs? If so, I'll need to correct that.
 
Happy April!!
Giggle!

Tuesday, March 21, 2017

Marathon Sewing and the One Day Tote

Shelley came over last Friday to sew a tote with me.  She quilts a lot, but she only makes totes at my house. Shelley is too young to retire, so getting together outside of school doesn't happen easily during the school year. Friday, though, was the last day of spring break in Lincoln and, miraculously, neither of us had other commitments. 

We thought the sewing would take two days, but we pushed right on through and finished the tote in one session.  We started just after 10:00 in the morning and, with only a short break for lunch, we worked almost constantly until 5:00 in the afternoon. What a crazy marathon!

Shelley's a cat person, but she chose a puppy print. Once upon a time, her mother had a dearly loved Boston Terrier. The fabric reminds Shelley of her mother. She paired the black and white terriers on a teal background with hot pink polka dots. Love, love, love the pink! It really adds pop to the tote.


Shelley didn't have a pattern or even a photo. She wasn't sure what she wanted, except that the tote had to be big with pockets inside and outside. Oh, and no zippers. She hates sewing zippers.

I've made so many totes and purses, that I usually just design as I go. This time, though, it didn't go quite so smoothly. Conversation and concentration don't really go hand in hand. Bleeding doesn't aid concentration, either.

A primary rule of quilting is, "Always slide the guard over the blade of your rotary cutter when you aren't cutting fabric."  You know where this is going, don't you? Shelley forgot the rule, and nicked her thumb with that razor sharp blade. It wasn't deep, and I should have taken a photo, but I was too busy chasing up the stairs for a band-aid while yelling, "Don't bleed on the fabric!".

We didn't have a pattern, so there was no list of steps to follow. I got a couple of steps out of order. It was all Shelley's fault, of course.  Some of those steps were pretty important, too! It's a good thing that I have more than one seam ripper.

Shelley did most of the sewing, but now and again, I helped out. While I was sewing the edge stitching on the pocket, my needle slipped off the edge along one entire side. More seam ripping. When the tote was completely finished, we discovered that I had cut the button loop at the top of the tote too short to go around a button. Just when I thought we were finished, the seam ripper was back at work. As I said - all Shelley's fault.

There was more. Shelley had eyeballed the amount if fabric she thought we'd need, and told the clerk to "cut it here". We were stuck with what we had, but we made it work. We ran a bit short, and we had to use pieces of both of her fabrics for the tote lining. There was pink gingham in my stash that lined the pockets. The interfacing also ran short, but I had plenty of that in my stash. Have I ever mentioned that I love my stash?

Look at all of those pockets!


A big pocket for one side of the lining.

Four small pockets for the other side of the lining. One is for pencils, one for a cellphone, and two are for whatever falls into them. 

The big front pocket is just under 12" x 12". Fussy cutting got those pups centered. If you look closely, you can see that too small loop at the top of the tote.

I was watching the clock, and even as we neared the end, I was sure that we would need  one more sewing session. Then, as if by magic, the tote was done!  

 Almost 5:00 P.M.: Shelley still needed to buy a button, but everything else was complete.  We discovered the too short button loop right after taking this photo. Thank goodness, it was a quick fix.

Shelley sent me this photo the next day. The toggle button is perfect. The loop fits!