 |
| The photograph looks like it was taken in winter, but it was actually almost 90 degrees and humid out there on my porch. |
These little toys are so very versatile! I attached them to a styrofoam wreath with long pins, but I can see them used in so many different ways. I wish I had time to sew some different uses, but there is only so much time in a day.
These are just a few of my ideas:
- Attach the toys to a ready made evergreen wreath. They would only need some little plastic or metal loops sewn to the back. Bits of wire threaded through the loops would attach nicely to the evergreen branches.
- Using the same little loops attached up at the top of the ornaments, the little toys would be wonderful tied onto a Christmas tree with pretty bits of ribbon.
- What about replacing the traditional bow on a package with a cute ornament?
- Stocking stuffers for older children!
- I'm even visualizing mug rugs or Christmas stockings with fusible web appliques made from the templates
The pattern contains all the details for sewing the ornaments, so I'll focus on preparing the wreath in this blog post.
The Wreath
Any size or shape of styrofoam wreath would be fine for this project.
I started with a plain white 16" styrofoam wreath. I chose one with a flat top rather than one that was rounded. First, I wrapped it in a 2" bias strip from 1/2 yard of green fabric. Then I used an entire roll of sheer 2 1/2" green ribbon to wrap over the cotton.
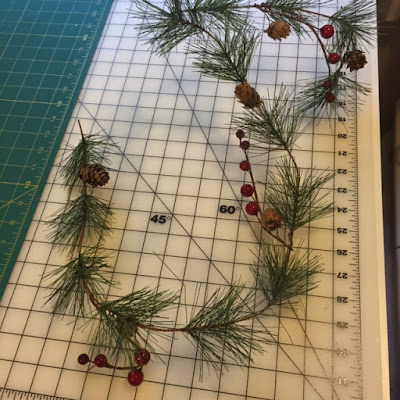
Wire based garland sections with holly, pinecones and evergreen came next.
I placed these on the wreath and used 5/8" sheer green ribbon tied on the back side of the wreath to hold these pieces in place The ribbon allows enough flexibility to allow positions to be altered here and there as the ornaments are attached.
I added some purchased pinecone decorations and a few small glass balls to lend color and variety to the arrangement.
The toys and additional glass ball ornaments were added last. Long pins with pearl heads worked beautifully! I hooked them into the back side of the toys and then poked them into the wreath.
In only one week, fall will officially arrive.
May your last week of summer be wonderful!


Karen, what an absolutely adorable wreath. Can't wait to get your pattern. I have 3 nieces that would love this for their Christmas gifts :) Thank you.
ReplyDeleteI'm so glad you like it, Edith. It's just the kind of thing that would appeal to young girls.
DeleteWunderschön! Eine ganz tolle Idee! Ich freue mich auf die Muster und auf's Nähen!
ReplyDeleteVielen Dank und viele Grüße, Marlies
Beautifully! A very good idea! I look forward to the pattern and sewing's!
Thanks and best regards, Marlies
Thank you so much, Marlies! I'm so glad you like it.
Delete