Saturday, September 2, 2017

Christmas Elves Quilt Along, Block 3: Sleigh


Christmas Elves, Block 3, 8" x 9"

The center block for this wall hanging was always meant to be the very last block, but a series of unfortunate events interfered with the plan.

Excuses
1. I messed up on my lovely schedule and I had only allowed two weeks between publishing Block 2 and Block 3. Calendars, counting, and dialing telephone numbers always give me trouble, so this was no big surprise.

2. Last week my other self took over, and first thing I knew I was designing and sewing a sleigh. Also, no surprise. My patterns always prefer to design themselves at will.

3.  Because of excuses 1 and 2, the companion blocks for the elf carrying packages fell way behind schedule. I made at least three attempts at blocks that didn't work at all, so the last companion block is yet to be designed.

4. Unplanned events like two unexpected doctor visits, a broken ceiling fan, numerous hubby interruptions, and other odds and ends have interfered with my already shortened work time. Why does this always happen when a person is in a hurry?

A Promise

From now on, I will do my best to stay on track and get the Elf with pakages group of patterns, now named Block 4, ready no later than next weekend. I am determined to have the entire pattern completed on schedule on October 14, as planned. Fingers crossed!

The Sleigh

I seriously considered redoing the block from scratch and repositioning the boxes. They seem just a tad off kilter to me, but I didn't know how to work it into on time to get something out on September 2. I've almost convinced myself that it will do, so it's staying as is. It will make me crazy forever, I know, but so be it.

An Option 

A couple of years ago, I designed "Ready for Takeoff", a sleigh on a mug rug. As you can see, the two sleighs have some similarities and some differences. The proportions of the two sleighs are quite different. The new sleigh is also red with snowflake trim, but it's longer, lower, and sleeker. It contains a tree rather than Santa's bag because the elf in (the new) Block 5 is stuffing a bag with packages. Two bags in one wall hanging felt like one too many.  The original sleigh also fits on a smaller block. You can see the difference in this side by side photo.


If you already have the first pattern and want to use that instead, you definitely can. You will need to enlarge it about 110% and either add to the contents or pile the contents a bit taller to fill the 8" vertical space better.

A Happy Note

It's September!

School is underway and cooler weather will move in.

When I was growing up, September was my favorite month of the year. My mother and I went shopping together. New school clothes were wonderful, but the new school supplies were my favorites. Fresh yellow pencils, unmarked pink erasers, pens, ink, plus lovely notebooks and binders filled with brand new packages of paper. I could never have enough paper! Mom always let me stock up on art supplies, too. I was allowed fresh crayons, colored pencils, water colors, and a sketch pad. Also, by the end of summer, I was really missing the chance to meet new teachers, learn new things, and make new friends.

September is also my birthday month. That made it just about as perfect. 

Wishing you a fabulous month!

School Wall Hanging

Saturday, August 19, 2017

Christmas Elves Quilt Along: Block 2

This is going to be such a cute quilt! Once again, I'm having way too much fun for an old lady. Instead of sitting on the porch in a rocking chair, I'm playing with my toys and my art supplies and making huge messes just like I did when I was ten years old. 

Block 2, Elf with Reindeer and Companion Blocks
The Pattern 
There is a lot of pattern with this group of blocks - fourteen pages in all. In addition to the templates for the appliques, there are paper foundation piecing  instructions for the tree, the template and instructions for the second version of the tree, and standard piecing instructions for the churn dash block.

I tacked a pinwheel block onto the churn dash blocks. This one is from the first set of patterns, but any 3" block can be substituted. In order to make the churn dash strip the same height as the elf block, I had to add one inch.  Since the points of the pinwheel and churn dash blocks don't touch, two 1/2" divisions worked perfectly to separate the churn dash blocks. If you'd like to use four churn dash blocks instead of the three plus a pinwheel, you would need to use three separating strips. Each would need to finish at1/3 of an inch, so cutting the strips just a hair over 3/4" should do the trick. When sewn between the blocks, the strips would be just that hair greater than 1/4".

When the quilt is altogether finished, I think I'll go back and add little embellishments. There are so many cute Christmas buttons, ribbons, and other little things that will soon be in the shops.

Other details:

I find that I'm using the triple stitch on my sewing machine more and more to replace hand embroidery. This time it made a lovely loop for hanging the ornament on the reindeer's antler.

A bit of colored pencil added color to the elf's face and ears, again. I think a photo here will show up much better than the smaller one included in the pattern.


The wide, close blanket stitches wee just fine for making hooves on the reindeer. The hooves are an easy addition, but not really necessary.


So here we are, almost at the halfway point in this quilt already. If you've joined in, I do hope you're enjoying this as much as I am.


What should go into that middle block? I still haven't decided, so please add your suggestions.


Are you ready for the eclipse? We are right on the path for totality in Lincoln.


I do hope it doesn't cloud over!


Saturday, August 12, 2017

A Template Alternative to a Paper Pieced Tree

Last week I tried to demystify paper foundation piecing a bit, but I promised alternatives as well. Almost everyone is happier when given a choice. Carrots or peas, country music or classical, paper piecing or a template.

The template approach has a different look altogether, but it still makes a lovely tree. Two trees, in fact.
Oops! One of the trunks wound up fatter than the others. What was that saying about measuring twice?
"A" shows the paper pieced tree, "B" shows a pieced version using the template, and "C" shows a single fabric tree made from the template.

This is what the template included in the pattern looks like.

I made version "B" very methodically. It works very nicely, but for the more adventurous quilter, it might be fun to improvise when sewing pieces of fabric together for the tree. Fabrics of odd shapes would give the tree a crazy quilt look. 

1. Cut eight strips of fabric, 1 1/2" x 5" each.

2. Stitch them together with 1/4" seams. Press the seams open.

3. Lay the template at an angle on the rectangle made from the strips. Cut on the template lines. 


4. Use the background templates to cut the background fabric sections.

5. With right sides together, sew the background sides to the tree, matching dots at the top and base of the pattern. For view "C" above, cut a single piece of fabric for the tree using the same template.


6. Cut a piece of brown fabric for the trunk. They should measure 1" x 1 1/2". Cut two strips of background fabric, each 2 1/2" x 1 1/2". If you measured correctly, the trunk will be 1/2" wide. I must have been daydreaming, because my  tree trunk is 3/4" wide.

7.Sew the brown fabric between the background strips. Press.


8. Sew the truck section to the tree section. Square up and trim to 4 1/2" x 8 1/2".

When I design a pattern, I often need to make more than one sample to make sure the pattern works. So, here I am with a four extra trees.

Now, what shall I do with them?

School is starting on Monday in Lincoln. Retirement is lovely!
Where did the summer go?

Sunday, August 6, 2017

Paper Foundation Piecing - the Basics

I've designed a paper foundation pieced tree for the Christmas Elves wall hanging, so his seems to be good timing for a blog to help those who are wary of this quilting method.


Paper foundation piecing should be neither scary nor curse worthy, yet there are many quilters who would almost rather put away their fabrics and hang up their rotary cutters than quilt on paper. I've been trying to get to the bottom of the problem, and I I'm going to try to help with three of the biggest issues. I won't even attempt to discuss everything, but I'll go over some basic tricks that I hope will be of help to some.

1. There is so much wasted fabric. Quilters hate to waste valuable fabric.  No matter how clever we are, there will probably be some waste with paper piecing. It doesn't have to be a huge amount, though. The waste can be controlled with careful cutting of the pieces of fabric. 

2. I don't know how to cut the shapes to fit. This issue is actually the same as the wasted fabric concern, and it's easily resolved.

Solution:
 
Cut fabric pieces the right size and shape.
When I started out with paper piecing, I just guessed and cut out chunks of fabric, hoping they'd fit. That didn't always work, so I slowed down and added a step. 

Start with two copies of the paper piecing pattern. Set one aside for sewing on, and cut out all of the numbered shapes on the second copy.

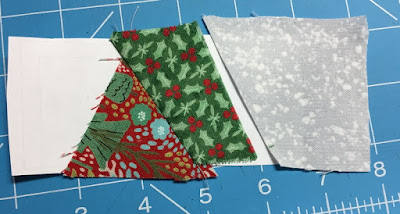
Lay each of the shape cutouts on the wrong side of the fabric you plan to use for that particular piece. You could use a fabric marker to trace around the shape right onto the back of the fabric or not. Cut around each shape leaving a seam allowance of about 3/8". You can use a ruler and rotary cutter to get the sizing exact, or you can estimate.

I'm more of a "wing it" cutter for this, so these are not perfectly cut.  I can see already that shape 2 and shape 3 are going to be a bit larger than I needed them to be, so I'm wasting more fabric than i should. 


3. It's just so confusing. Nothing ever fits right. Constantly ripping seams and trying again with a fresh piece of fabric, over and over, gets terribly frustrating. This issue is harder to fix because the ways in which our brains visualize things are as individually unique as our personalities. I do have an idea or two that might be helpful for some who get confused by the whole mirror image placement of fabrics and sewing everything backwards through a piece of paper.

Solution:

Lay the first piece on the back of the paper, right side facing up. I like to use a tiny dab from a glue stick to secure piece #1 in place so it doesn't slide around. A pin would work as well.

Next, lay the second piece right beside the first with the seams more or less lined up. On the pattern in the pictures above, piece #2 is to the left of piece #1, but on the back of the paper we're looking at the right sides of the fabrics, so that arrangement is reversed.


Flip piece #2 over onto the right side of piece #1. Line up the seams.


Turn the paper over and hold it up to a light source. Make sure that piece #2 overlaps the stitching line by about 1/4".

Sew right on on the line.

Flip piece #2 back and check with a light source to make sure it covers the whole shape nicely.

Trim the seam back to about 1/4".
I estimated and cut the seam with a scissors, but if you are a perfectionist, you could fold the paper back out of the way and trim it with a ruler and a rotary cutter. Just be careful that you don't cut the paper in the process. Been there. Done that.

Open the new piece, and press the seam.

Piece # 3 will be added in the very same manner. It helps to look at the fabric section and how it fits in the pattern before placing it.


You might even want to slip the piece under the paper to see how it will fit.


Turn the pattern and the new piece over. Line up the seams.


Flip this new piece so the fabrics are right sides together and align the seams as before. 


Use a light source to check the alignment from the front. Slide the new piece of fabric so it's about 1/4" from the stitching line. Sew in place, open, check that the fabric covers the space, trim the seam, and press.


When all of the pieces are stitched and pressed, use your ruler and rotary cutter to trim the section exactly on the 1/4" cutting line.

Trimmed and finished from the back.

Front view of this section.
When all of the sections have been prepared, you can sew them together according to the pattern instructions. Depending on the pattern, I may leave the paper in place and sew the sections through the paper. Other times, I may remove the paper and then sew the sections together like any other piece of patchwork.


I would really appreciate feedback on this tutorial. I'd like to know if this is at all helpful and if you have any ideas about what I can do to improve or change my explanations. 

If this still leaves you cold, don't fret. Next week I'll share another option for making a tree that doesn't involve paper piecing. 

Have a super week!

Saturday, July 29, 2017

Christmas Elves Quilt Along: Block 1

I had so much fun making this first group of blocks for the Christmas Elf quilt!


Click on this link to go directly to the pattern on Craftsy: Christmas Elves, Block 1

It's ever so scrappy, so I get to play with all of my pretty Christmas fabrics. I like the gray background fabric, too. I was surprised at how nicely it pulls all of the colors and designs in my various fabrics together. There may be more gray in future quilts.

I want the whole quilt, but I can definitely see each of the elf blocks as an independent wall hanging. I wonder how many people will make them that way.

Every quilt has a few little quirks, and this one is no exception. I've tried to include everything in the patterns for the blocks, but some of the details may need more clarification.

1. I think that the trickiest part of the quilt designs is with the ears. The front of the ears need to be snipped down a bit to make space for the hair and hat brim to slip under the ear and fit tightly against the forehead. I didn't photograph every one of the elves faces, but these two pictures should explain.
The snip down the front of the ear lets the hair slide under the ear and over the forehead. 
The ear overlaps the hair and hat brim.
2. The elves look fine without eyes or definite features, but just the slightest enhancement really bring them to life. A simple French knot is all that's needed for an eye, and a tiny bit of colored pencil suggests lips and rosy cheeks. I'm not planning to wash this quilt, but if you do have to wash it, don't worry too much about the pencil washing out. After it's been pressed with a hot iron, it will be fairly permanent.

The colored pencil work really is minimal. In this photo you can also see the way the blanket stitching fit on the ear and hair.

3. The lettering on the North Pole sign would be very hard to embroider after it was fused to the background. Hand embroidery is not easy on thick layers of fusible web. I bit of fabric is lost, but I cut a square of white fabric that was just a bit larger than my embroidery hoop. When I was finished with the embroidery, I ironed fusible web to the back of it. It was easy to work with after that. As a bonus, the embroidery will never pull loose. Those threads on the back are fused right along with everything else.


4. The paint can was fun. Sometimes  a marker is the best solution, although machine lettering would have been lovely, too. I could have drawn the handle with a marker too, but machine triple stitching was fast.

The right edge of the paint at the top of the can is tucked into the can rather like the hair is tucked behind the ear.
In case you were wondering, this is how Block 1 and it's smaller blocks will fit into the whole quilt. The quilt will be 29" x 33" before sashing is added around the outside.


Stay tuned.
Block 2, the Elf with the reindeer, is coming in three weeks!

Happy Stitching!! 


Sunday, July 23, 2017

Christmas Elves Quilt Along: Tips and Ideas For Getting Started

The Christmas Elves quilt along begins in earnest next Saturday.

If you're thinking about making the quilt, the following information might be helpful. I've shared some of these ideas on my Facebook page and in various blog posts that I'll refer you to.

Fabrics Used
  • Most of the fabrics are scraps of Christmas fabrics and other bits and pieces that I've collected over several years.
  • The gray background fabric is "Gray Snow" from the Holiday Traditions collection for Henry Glass. I found it at my local quilt shop, and I bought 2 1/2" yards just to be sure I'd have enough. 
  • I got 1 yard of pink and red candy striped fabric. I'm planning to use it for binding and, possibly, for a narrow border, so I may have quite a bit leftover. The fabric is from "Cozy Christmas" by Lori Holt for Riley Blake Designs. This is from last year's collection, so I ordered it online.
Working With Fusible Web Applique

If you are new to using fusible web or if you'd like a quick refresher on the basics, you can visit an earlier page on my blog. It covers most of the tips for using fusible web. Topics include: choosing the right fusible web, cutting out applique pieces, protecting your iron, easy removal of the web's paper backing, and thread choices. Click on this link to go straight to the page.  Tips for Using Fusible Web

This quilt is quite detailed, so I'm strongly recommending that an applique pressing sheet or a piece of non-stick baking parchment be used to make the fusing and assembly easier.
  • You can see through the sheet. If you place the layout plan under the sheet, you can fuse  the appliques right on the layout.
  • It's often easier to fuse smaller sections of the applique together and then add them to other sections to make the whole applique piece.
  • Pieces of applique can be assembled separately and then combined into the whole.

Pieces of Block 1 ready to assemble
    The head was fused together first.

    Assembly line packages
    Stitching the Appliques in Place

    I almost always prefer a machine blanket stitch for stitching the appliques down, and that is what I've used throughout this quilt. I like the finished look on the edge of the applique. The width and length of the stitch may need to be altered - narrower and shorter for small pieces with tight curves, a bit larger for less detailed pieces. Zigzag stitching works well, too, but with either type of stitching, it really helps to practice on sample pieces. The main thing to remember is that you need to pivot often to go around curves or turn corners. Also, the pivot should only be made on the outside edge of the applique and with the needle down. A couple of years ago I created a tutorial for using the blanket stitch. Click here to view it. Machine Blanket Stitch Applique


    Hands and Faces

    Any number of fabric colors from light pink to dark brown can be used for hands and faces. It all depends on the skin tones you prefer to use. I've never been able to find the exact shades that I prefer, so I've learned a trick or two. I start with a peach Kona Cotton and a few tea bags. Hot tea will dye the peach into a much more natural color. Stronger tea or the addition of coffee will make slightly darker tones.  I know that tea and coffee stains can be hard to remove, but I'm not sure how well the colors will hold up when laundered. I don't plan on washing this quilt, though, so I'm not concerned.

    An earlier blog post explains the process in detail.  Click on this link to view it. A Christmas Elf and a Trick or Two

    A bit of colored pencil brightened up the faces. It was like being back in elementary school. Once done, the pencil can be set with a hot iron.


    The pattern for Block 1 and it's sashing pieces will be ready for you next Saturday. I'll include specific information for making that group of blocks in my blog next week.

    Wishing you a lovely July week.


    Sunday, July 16, 2017

    Christmas Elves Quilt Along: Introduction

     Are you ready for a Christmas adventure? It's quilt along time.
     Join me in making a super fun, super cute, Christmas wall hanging.

    I know, it's the middle of July and Christmas is a whole 1/3 of a year away, but I'm wasting no time on getting this quilt along off the ground.

    These are the four main blocks that will comprise this wall hanging - four busy little elves. Christmas is all year round at the North Pole. Right now the blocks are pinned to my design board. Sashing blocks will be designed as we go.

    Here are the details.

    The main blocks will be published, one every third Saturday, starting on July 29th.  Sashing sections will come with each block. Each set, block plus sashing, will sell for $3.00.
    The final block and the construction of the quilt will be free, and will be published at the end of October.

    As we go, I'll update my blog with special instructions or information about how to work with specific parts of the quilt.

    The final layout will look more or less like this. There may be some minor changes, but the size should not vary by more than an inch in either direction.


    Mark your calendar with the dates:
    • July 22, preliminary tips for working with the blocks
    • July 29: Block 1, Elf painting the North Pole sign
    • August 19: Block 2, Elf with the reindeer
    • September 2, Elf carrying packages
    • September 23, Elf checking the list  
    • October 14, the center block and assembly
    I do hope you join in! Each of the blocks is very sweet on it's own. You can either make you favorite block and surround it with a pretty border for a small wall hanging, or you can journey with me and make the entire quilt.


    Close ups of the blocks:


    Happy Stitching!!