
(Shhh... this is a secret - just between us! I also tire out from the intensity of focus much sooner that I used to do, but we don't talk about that.)
A change of plans.
The day's sewing began with the realization that my plan to attach pockets between seams just wasn't going to work. The seams become way too thick and lumpy! So I put the pockets aside for later when I will need them, and I went to work on the body of the bag.
First, I cut two pieces of the yellow print 8 1/2" x 17" and two pieces of the gray fabric 6 1/2" x 17". The yellow makes the main body of the purse, and I'm using the gray for the base. I hope the gray won't show the dirt quite as much as the yellow might have if it were on the bottom of the purse.
Everything that follows about the body of the bag was done twice. Once, for the front section of the bag, and once for the back.
Now comes the fun part - attaching my lovely piping between these colors. First, I sewed the piping to the yellow fabric, lining up the seam edges like I did with the pockets yesterday.

Then, I sewed the placed the gray and the yellow right sides together sandwiching the piping between them. I lined up the seams and stitched from the yellow side right on the same line of stitching that secures the piping. I pressed the seam towards the gray.
Time to quilt! I used a fairly lightweight cotton batting for the pockets, but I chose Stiff Stuff batting for the bag, itself. It holds it's shape beautifully.
Quilting! The same treatment on the yellow that was used on the pockets, but vertical lines 3/4" apart on the gray to give an interesting textural contrast. I drew the lines onto the fabric first.

Then I stitched. Up one line, across in the ditch between piping and gray, down the next line, across the bottom - one continuous line of stitching. It shows best on the back.

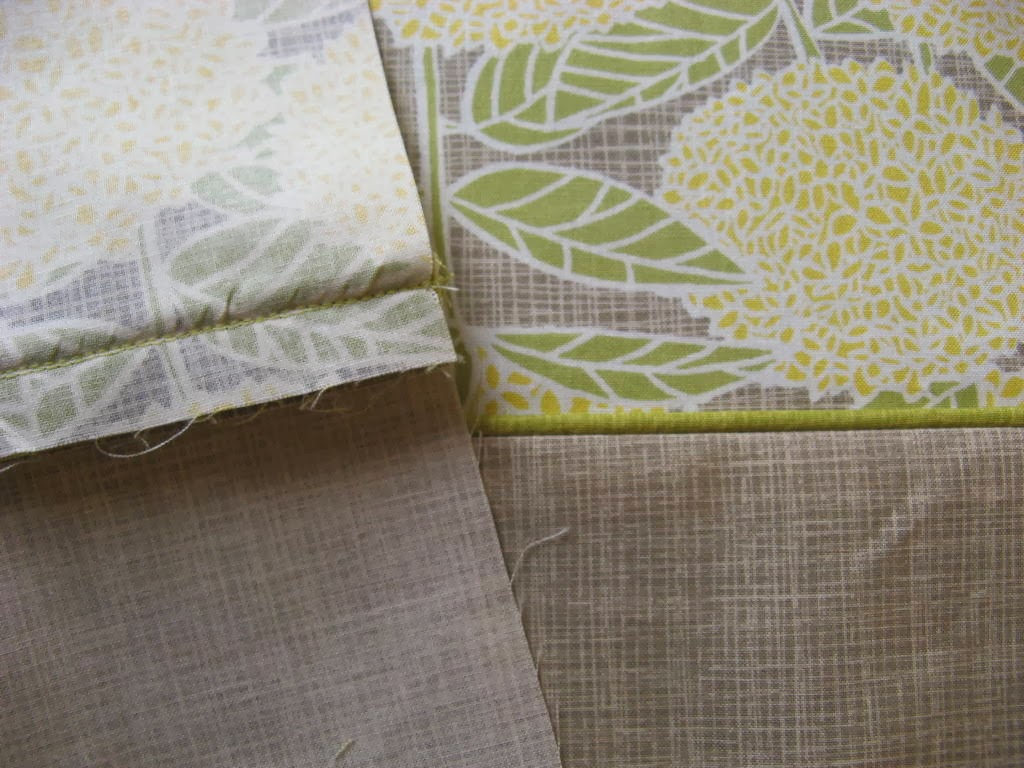
Now, I trimmed everything even and squared it up. The gray measures exactly 4 1/2" from the piping seam to the bottom, and the yellow is precisely 7, from the piping seam to the top. That makes a total height of 11 1/2". The width of each piece side is 16". This is what the two pieces of the bag look like after trimming.
 |
| Yikes!
Look how those four layers of seams show up on the gray!
That ridge is even more noticeable in the photo! I wonder how I can make it less obvious. Maybe I should have quilted the pieces first, then sewn them together. I was trying to avoid a getting seams too thick for sewing together. Hmm...
|
And on to pockets.
Step one, pocket flap.
First thing I did was to add the "male" part of a small magnetic snap to each of the pockets. A picture is worth a thousand words, they say, so I'll just let these pictures do the talking.


 |
| The short rows of stitches above and below the snap go through the quilted front. Those few stitches really add to the snaps stability. |
Next, I made a quick row of zigzag stitching along the raw edge of the flap.

You can see how I measured and marked the location for the pocket flaps. Everything had to be centered and made level.

Finally I trimmed the bottoms of the flaps evenly and finished them by sewing to the bag with a tight zigzag stitch.

And that was it for today!
More to come tomorrow.
No comments:
Post a Comment